KUMA Timer — Illustrated Guide
A picture-by-picture walkthrough of KUMA Timer, the stage countdown timer for live events. If you have never used a show timer, start at the top; if you are looking for one setting, use the search box or the contents list. Every screen shown here is real, every function has a section.
What KUMA Timer is
KUMA Timer is a countdown timer built for the people who run shows: stage managers, show callers, AV technicians and event producers. You set a time, press START, and the countdown appears on a screen the speaker can see, with colours that warn them as time runs out. Around that core it gives you everything a live-event team asks for sooner or later:
- Many ways to show the time: a big digital clock, a ring, a broadcast-style dot-matrix clock, or a layout you design yourself, on a second screen, on NDI or OMT video, on SDI/HDMI through a Blackmagic card, on a small LED panel or a phone.
- Many ways to control it: the app itself, a browser, the free iOS and Android Companion app, a Stream Deck through Bitfocus Companion, OSC and TCP/UDP from show-control systems.
- It can follow your show: mirror the remaining time of the video playing in QLab, Mitti, Millumin or PowerPoint, or chase LTC timecode.
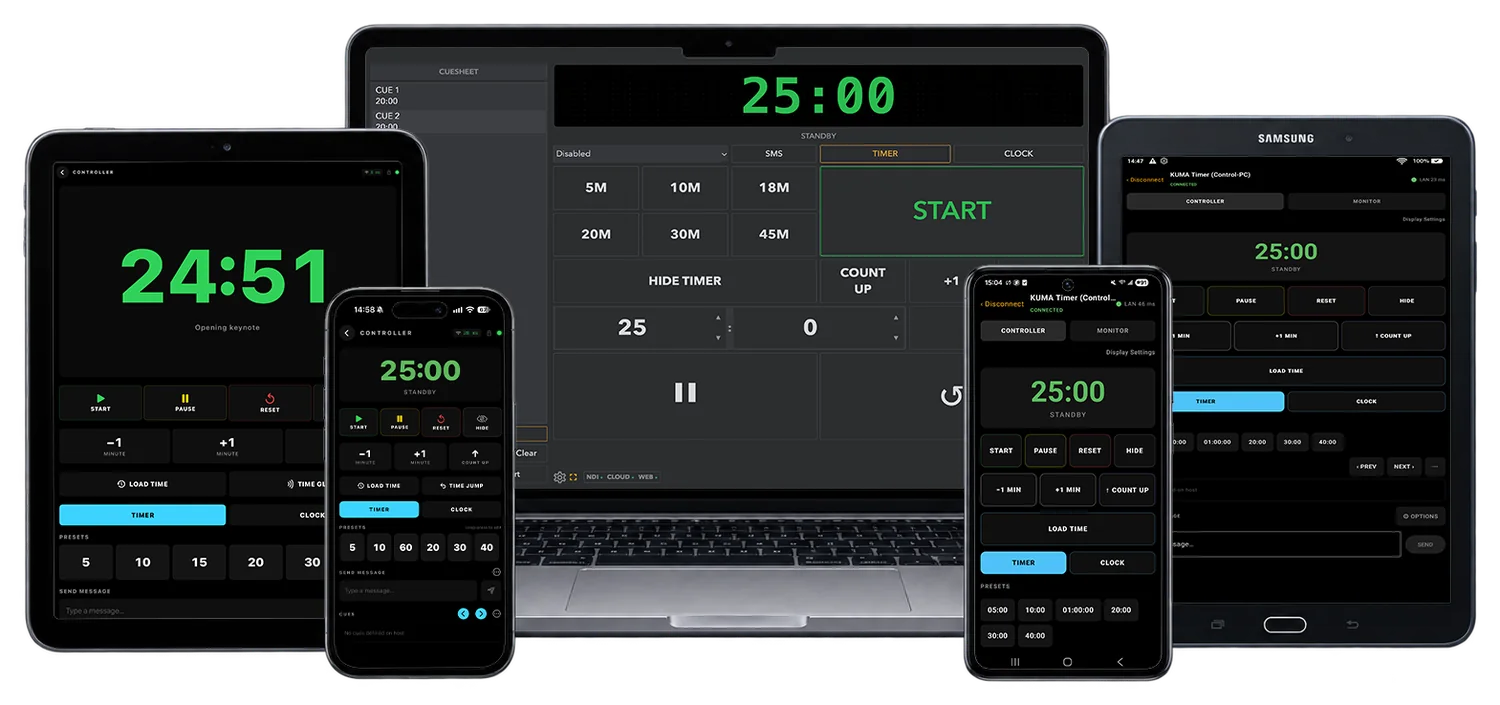
KUMA runs on macOS, Windows and Raspberry Pi. It has two windows: the control window is your operator view, and the display window is the picture that goes to the screen the speaker or audience sees.
Free trial, Lite and the licence
Every install starts with a 30-day free trial with every feature switched on, no sign-up and no card. At the first start KUMA shows how many trial days are left.
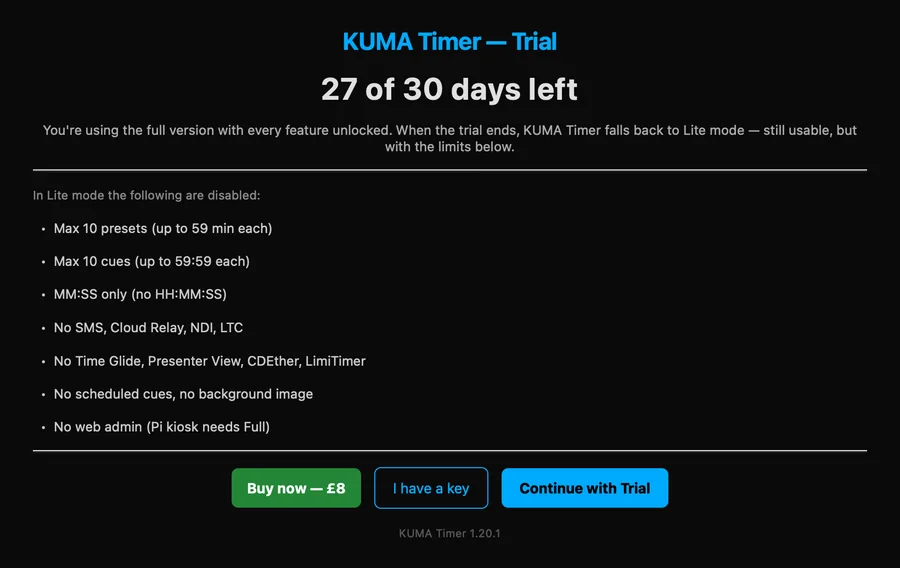
After the trial KUMA keeps working for free in Lite mode: the core countdown with up to 10 presets and 10 cues (each up to 59:59), minutes-and-seconds only, OSC and the Bitfocus Companion module. A one-off £8 licence unlocks everything for good (see the pricing page for the full list).
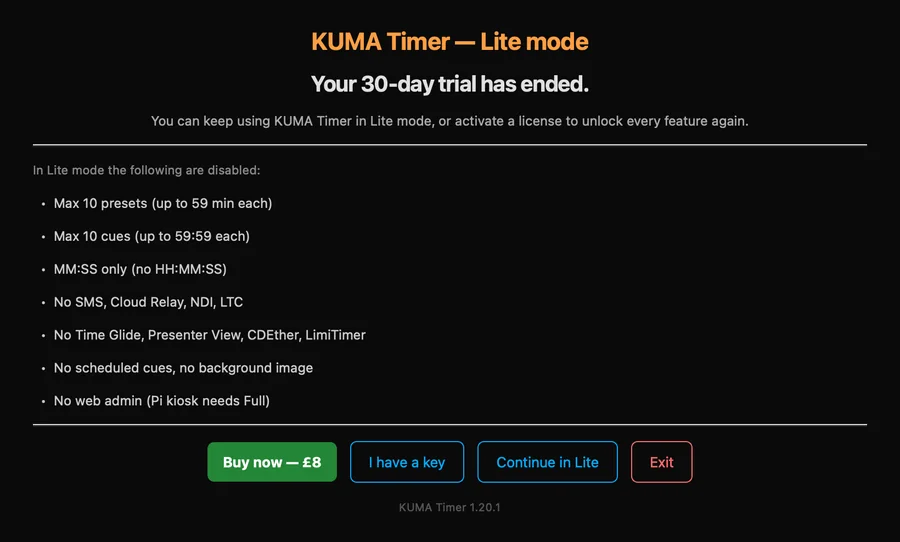
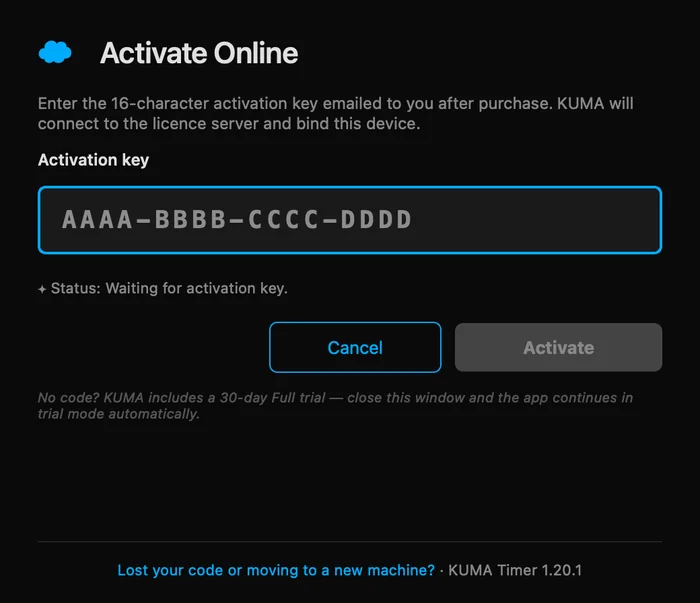
- Activate: Settings → Misc / License Info → Activate with key, or “I have a key” in the dialog above. Type the 16-character code from your email.
- One code covers macOS, Windows and Pi, one machine at a time. Moving to another computer: License Info → Deregister this machine or the deregister page.
Installing
Download the installer for your system from the download page. The macOS and Windows installers are signed.
- macOS: open the
.dmg, drag KUMA Timer to Applications, start it. On first launch macOS may ask for microphone access (only needed for LTC) and to allow incoming network connections (needed for the browser pages, Companion and OSC): click Allow. - Windows: run the installer and start KUMA from the Start menu. Allow network access if Windows asks.
- Raspberry Pi: a one-line installer turns a Pi into a full-screen timer appliance controlled from a browser. See Installation in the reference manual.
KUMA on Windows and on Raspberry Pi
The app is the same on every system. Only the window frame and a few platform extras differ.
Windows
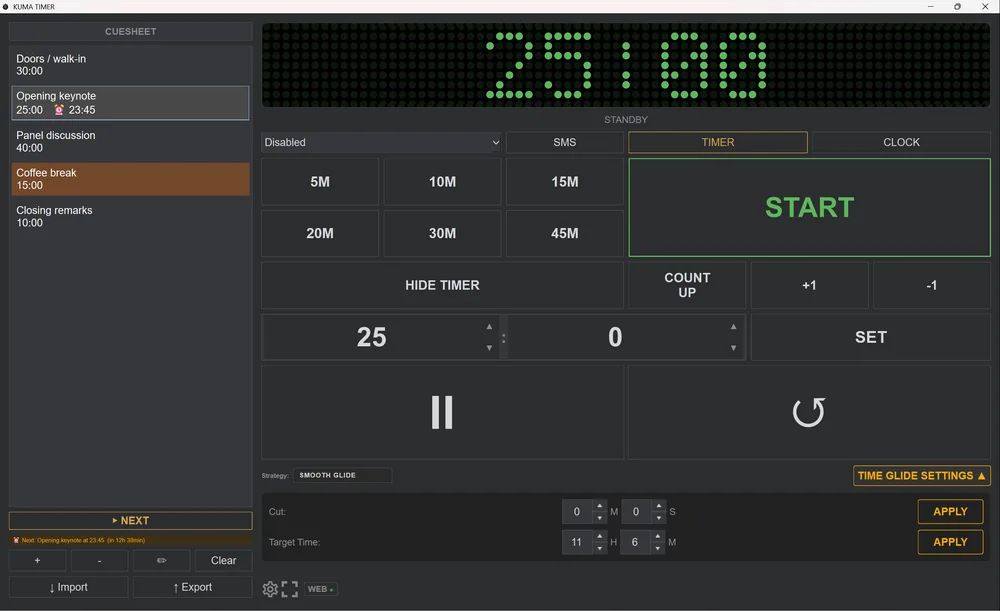
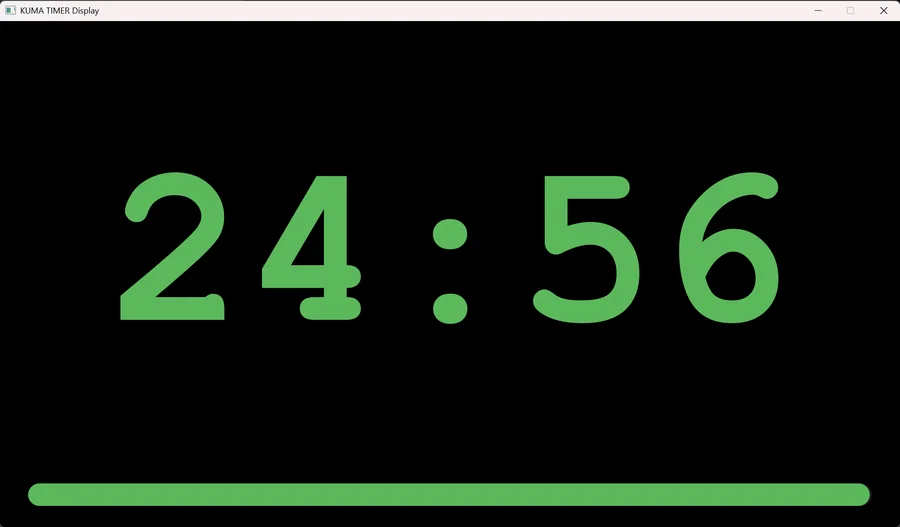
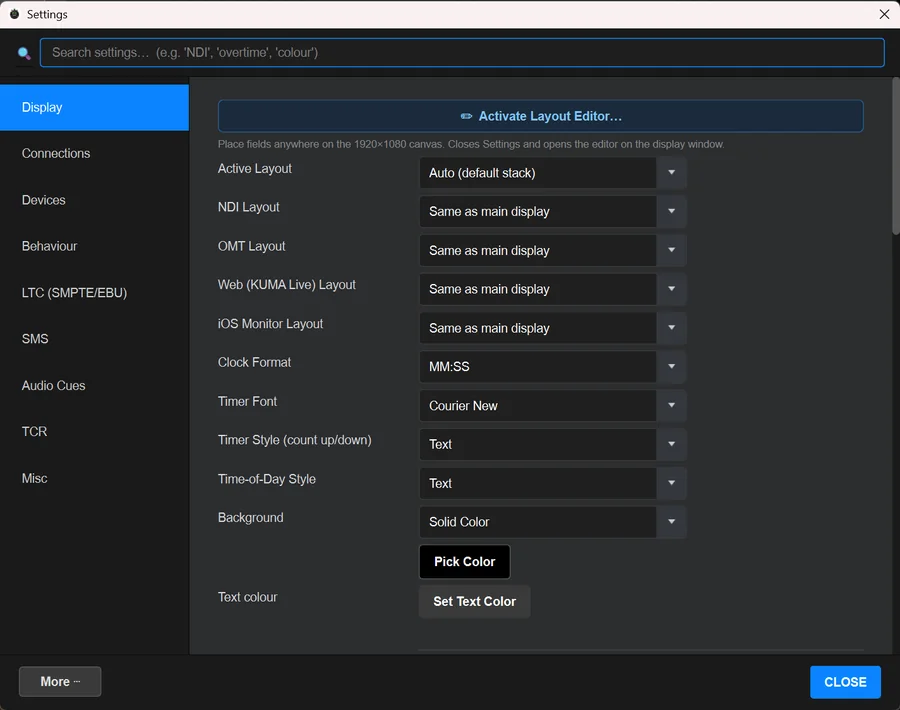
Notes for Windows: allow KUMA through the firewall when asked (needed for browser pages, the Companion app and OSC), use the touch keyboard option in Settings → Misc on touch screens, and if the title bar ever hides behind the taskbar right-click the taskbar icon, choose Move and use the arrow keys.
Raspberry Pi: a timer appliance
On a Pi, KUMA runs in kiosk mode: it starts full screen at boot, with no desktop, and you control it from the web admin on any phone or laptop (http://kuma-timer.local/). The installer is a single command, see Installation.
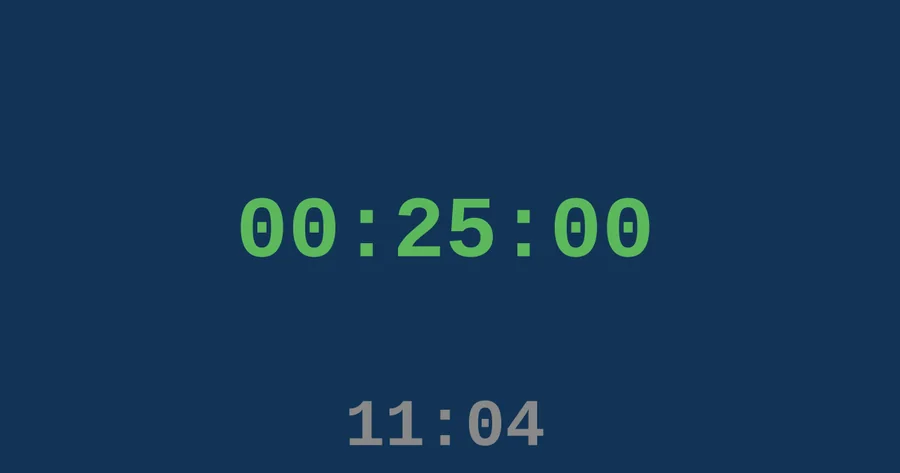
Quick-Entry keyboard (Pi)
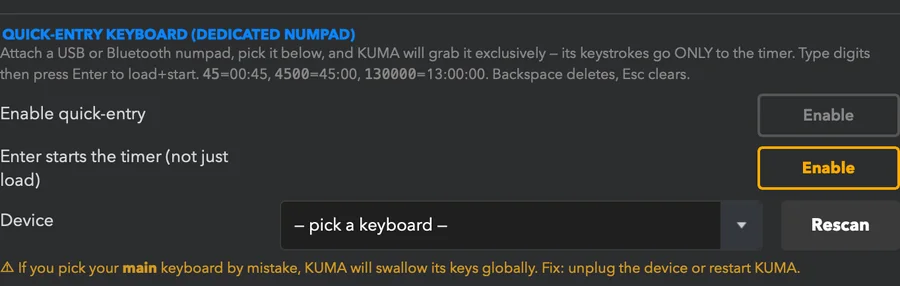
Plug a USB or Bluetooth numeric keypad into the Pi and pick it in Settings → Devices → Quick-Entry Keyboard. KUMA then uses that keypad exclusively as a remote: no screen, no mouse. Type digits and press Enter to load and start (45 = 00:45, 4500 = 45:00, 130000 = 13:00:00). The page is shown here as it looks on the Pi (rendered on a Mac for the screenshot).
| Key | Action |
|---|---|
| 0…9 | Enter digits (live preview on the big display; the last two digits are seconds, the next two minutes) |
| Enter | Apply the time and start |
| . / Space | Pause or resume |
| Backspace / Delete | Reset to 00:00 |
| + / − (keypad) | Add or remove a minute |
| Esc | Clear the digits you are typing without touching the running timer |
Quick-Entry is only available on Linux, because exclusive capture of one keyboard is a Linux feature. For an emergency exit from kiosk mode, hold Ctrl + Alt + Q for three seconds on a USB keyboard.
Quick start (2 minutes)
- Start KUMA. The control window opens, and a second window (the display) opens with it.
- Move the display to the screen your speaker will see: use the drop-down at the top-left of the buttons (it lists every connected screen). On a second screen it goes full screen by itself.
- Press a preset such as 10M, then START.
- Watch the display. The digits are green, turn orange a few minutes before the end and red in the last minute (all adjustable).
- Press PAUSE to pause and RESET (the circular arrow) to start over.
That is all you need for a first show. The sections below show every control in detail.
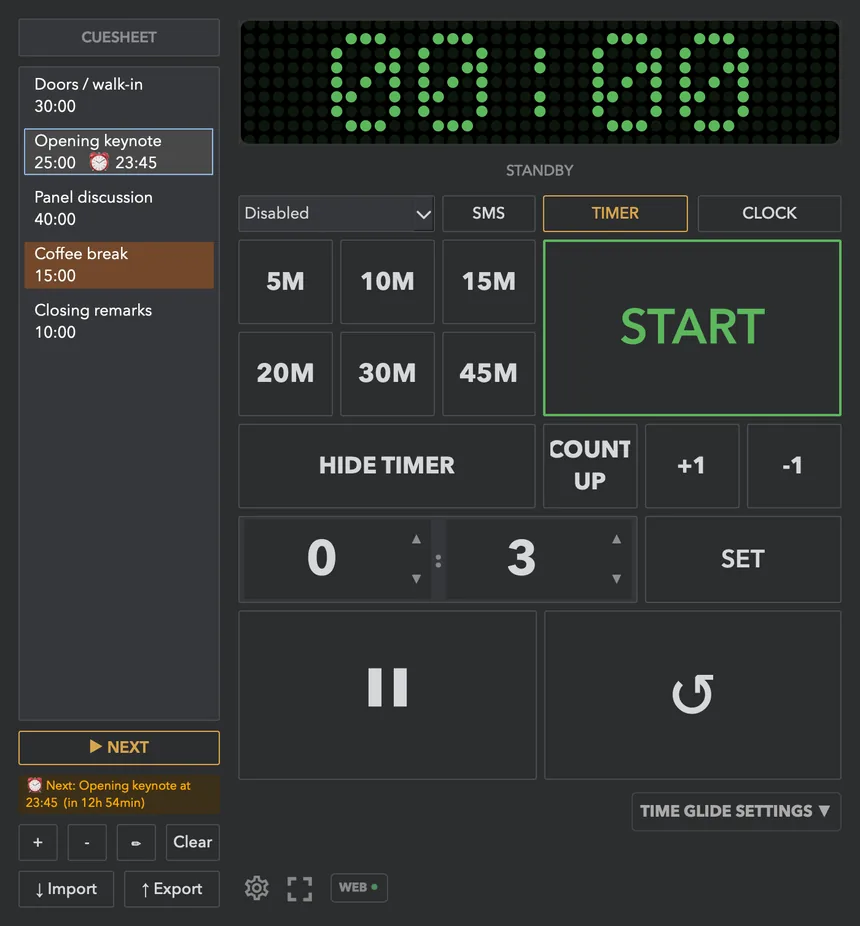
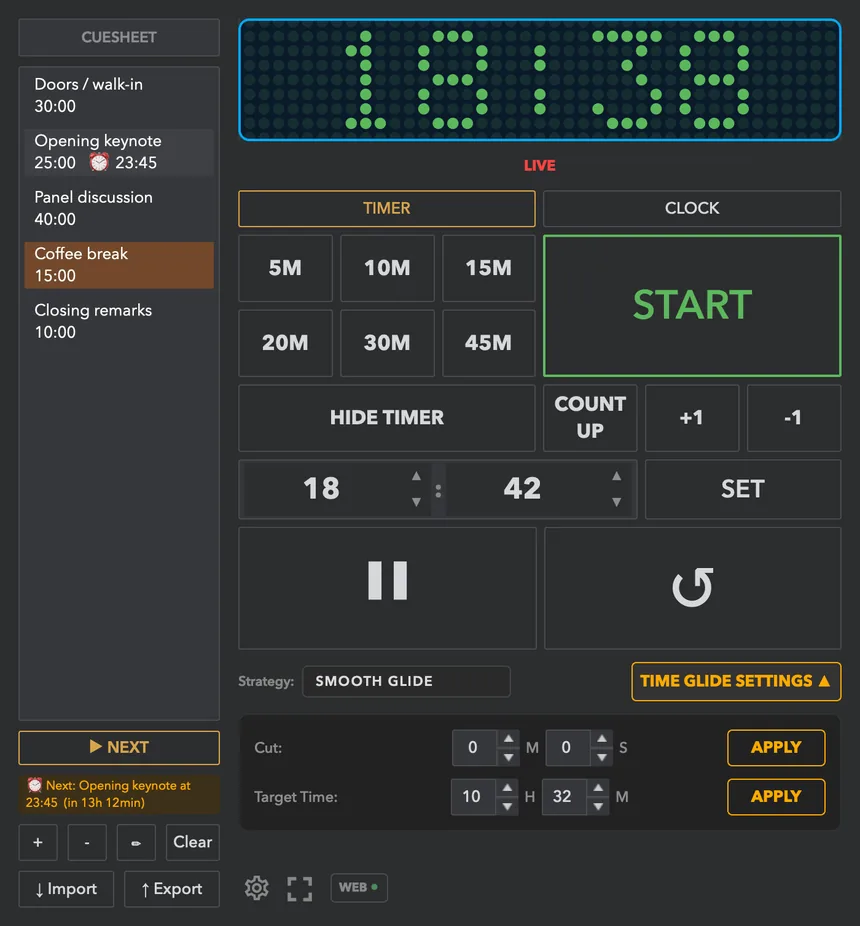
The control window, button by button
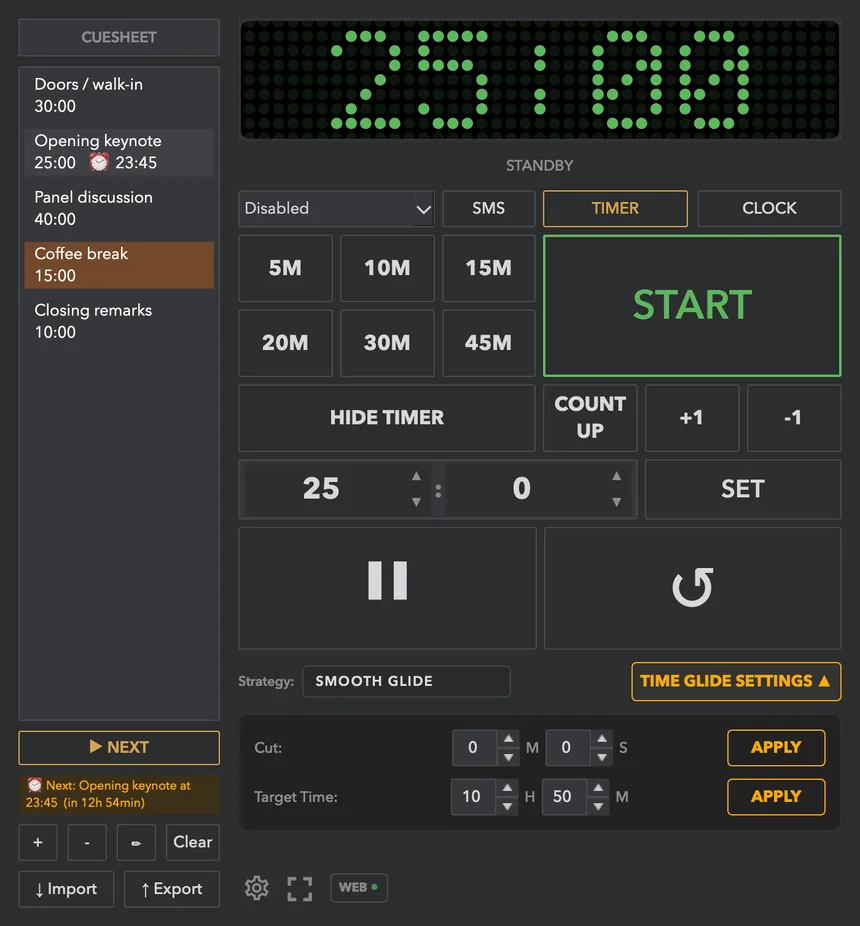
| Part | What it does |
|---|---|
| Monitor (top) | A live copy of what the display shows: LED dot-matrix digits by default. Under it the status: STANDBY, LIVE, PAUSED or OVERTIME. |
| Screen drop-down | Sends the display window to one of your screens (or “Disabled”). |
| SMS | Sends a text message to the display. See Messages. |
| TIMER / CLOCK | Switches the display between the countdown and the time of day. |
| 5M … 45M (presets) | Click to load that many minutes; press and hold to change the value. |
| START | Starts the countdown from the loaded time. |
| HIDE TIMER | Blanks the display while the timer keeps running inside. |
| COUNT UP | Switches between counting down and counting up from zero. |
| +1 / −1 | Adds or removes one minute. |
| Minutes : Seconds and SET | Type a time and press SET to load it without starting. |
| Pause (⏸) and Reset (↺) | Pause or resume; stop and clear. |
| TIME GLIDE SETTINGS | The time-cut panel: finish earlier without the audience noticing. See Time cut. |
| Cuesheet (left) | Your running order. See Cuesheet. |
| Bottom bar | Settings (gear), kiosk / full screen, the wide-screen button on ultra-wide screens, and status chips such as WEB (browser server running), NDI, CLOUD, frame rate and LTC state. |
The status chips in the bottom bar
Next to the gear and the kiosk button, small chips tell you at a glance which outputs and services are running. Each has a dot: green = running, amber = starting or waiting (for example NDI while it initialises), red = a problem. Hover a chip for the detail. The chip appears only when the feature is on.

Running a timer
Setting the time
Three ways, use whichever is quickest:
- A preset button: one click loads it.
- Type it: enter minutes and seconds (hours too in HH:MM:SS format) in the fields, then press SET. Press S to jump straight to the minutes field, type, press Tab for seconds, and Space starts it.
- A cue: double-click a cue in the cuesheet.
If you type more than 59 minutes in minutes-and-seconds mode KUMA offers to switch to hours-minutes-seconds so the number stays readable.
Start, pause, reset
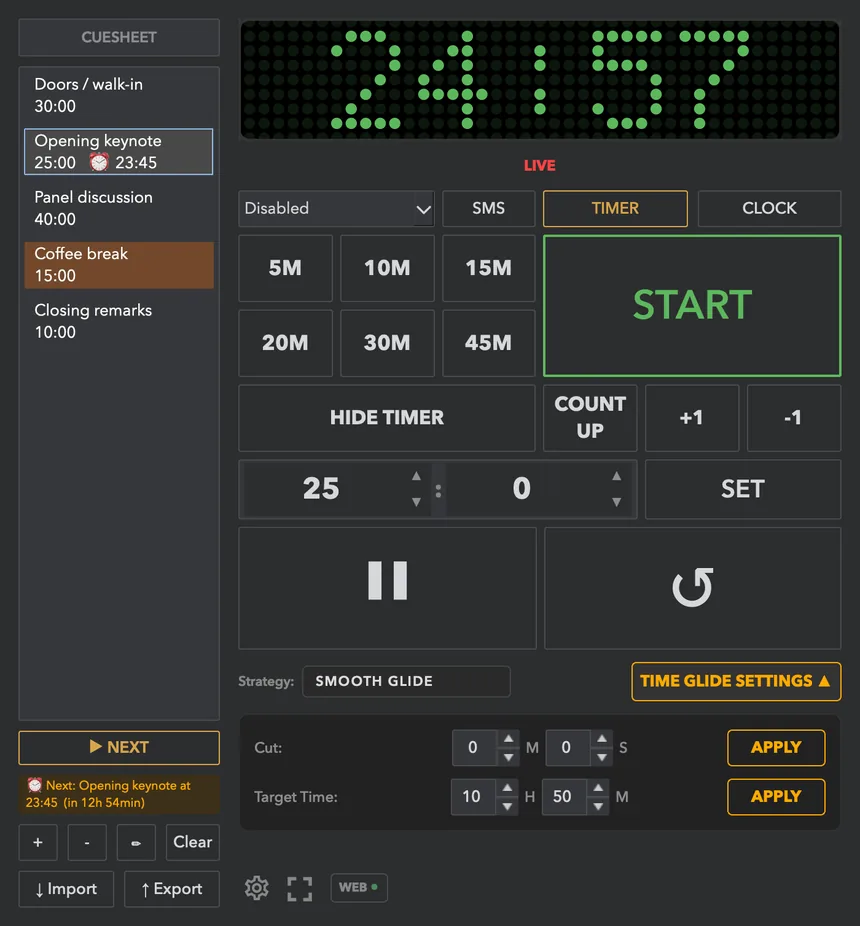
- START begins the countdown. The status turns to LIVE.
- Pause (the two bars) freezes it. While paused the button turns to a play symbol, press it to resume.
- Reset (circular arrow) stops the timer and clears it to 00:00. Pick a preset or cue, or type a time and press SET, to load the next one.
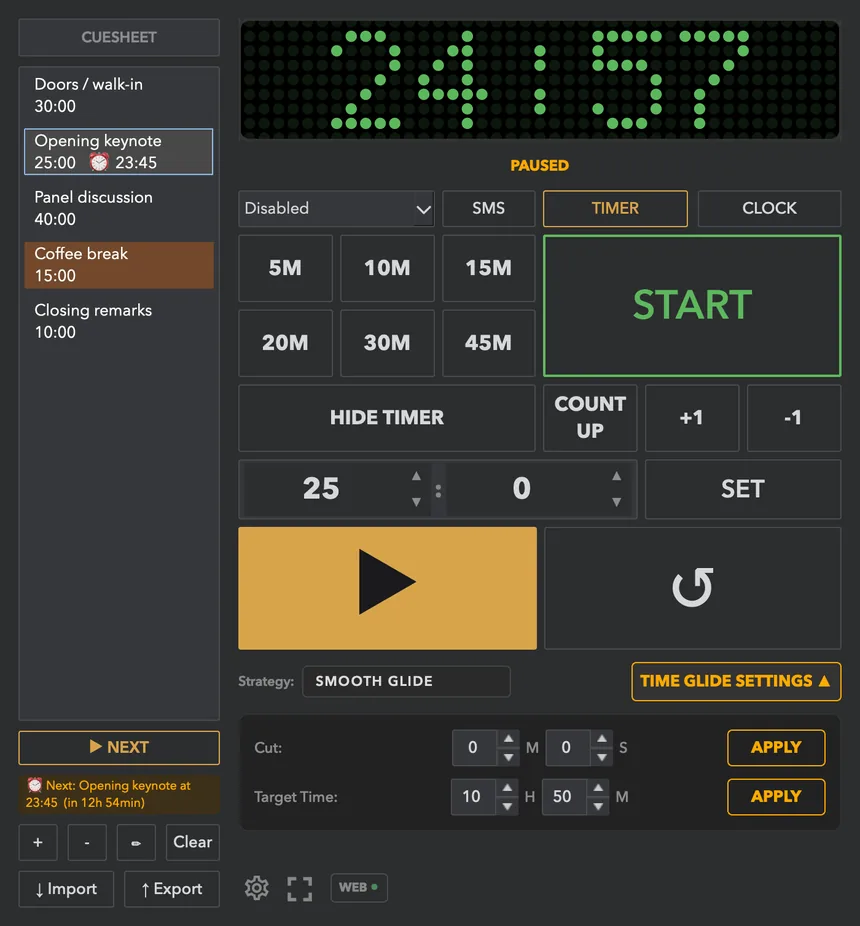
Adjusting on the fly
+1 and −1 add or remove a minute while the timer runs or is paused. Need to finish at a particular moment instead? Use Time cut. COUNT UP makes the timer count up instead of down. HIDE TIMER blanks the display, for example during a break, and the timer keeps running.
Presets
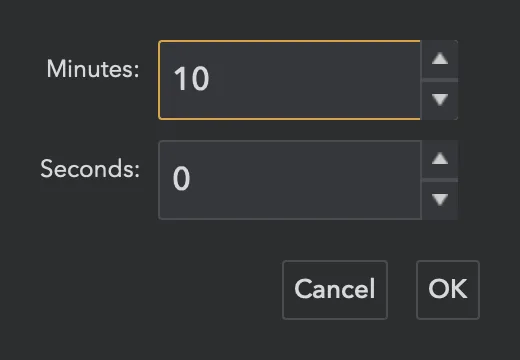
The six preset buttons load a duration with one click. Press and hold a preset (about half a second, a thin bar shows the progress) to change its value:
When time runs out: overtime
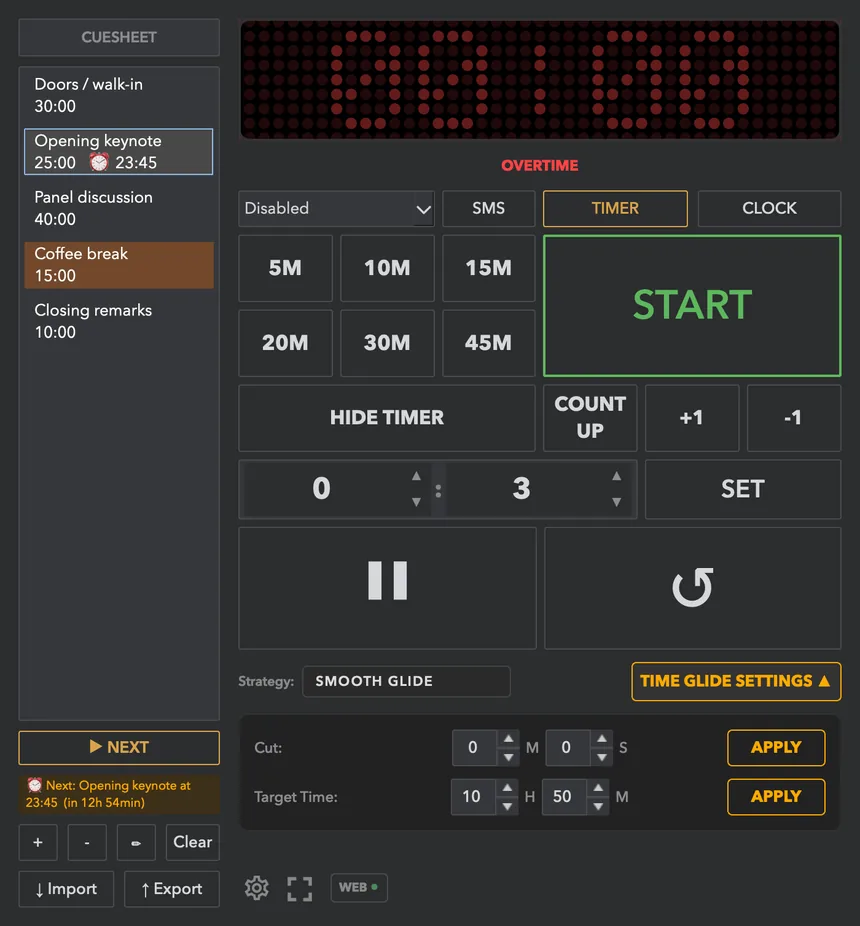
What happens at zero is up to you (Settings → Behaviour): count up in red, stay at 00:00, or stop. You can also change the screen background, blink the clock, show an OVERTIME label, or send an OSC message. See Overtime.
Timer or clock
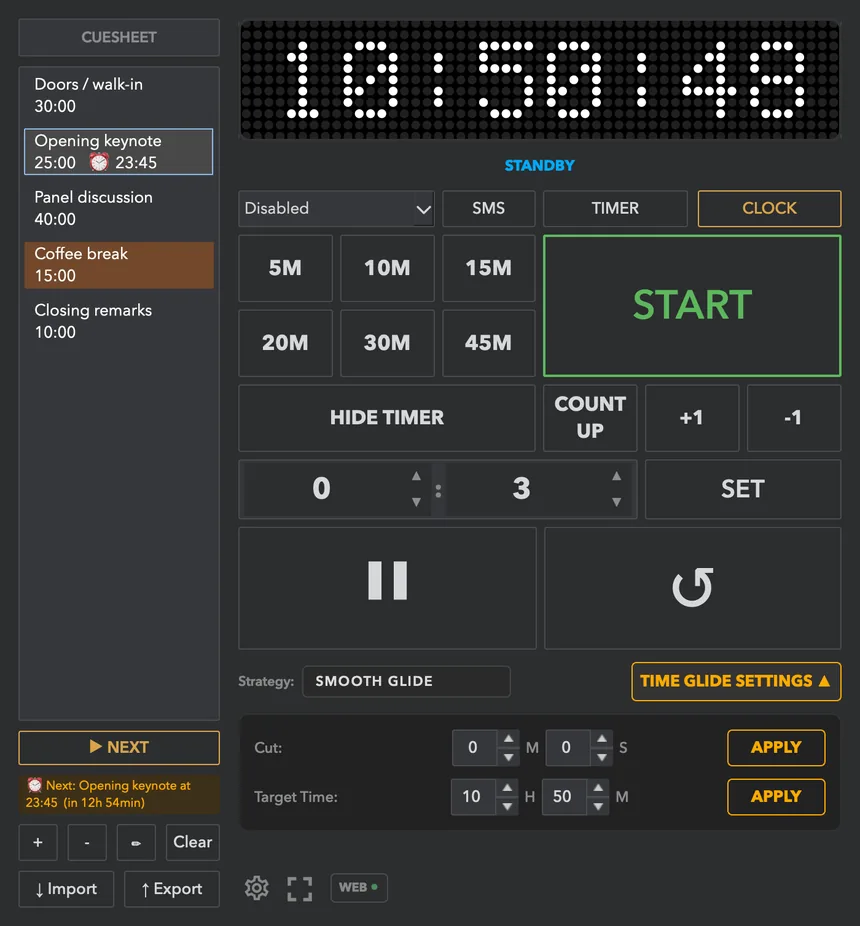
The CLOCK button switches the display to the time of day, handy between sessions; TIMER brings the countdown back.
Keyboard shortcuts
| Key | Action |
|---|---|
| Space | Start, pause or resume |
| R | Reset |
| H | Hide or show the display |
| S | Jump to the time-entry field and select its value |
| Ctrl/Cmd + 1…9 | In Settings: jump to a section |
| Ctrl/Cmd + Shift + D | Wide-screen kiosk on or off (ultra-wide screens) |
The shortcuts work wherever the focus is, even while typing in the time fields. The browser admin has its own list: press ? there.
Cuesheet (running order)
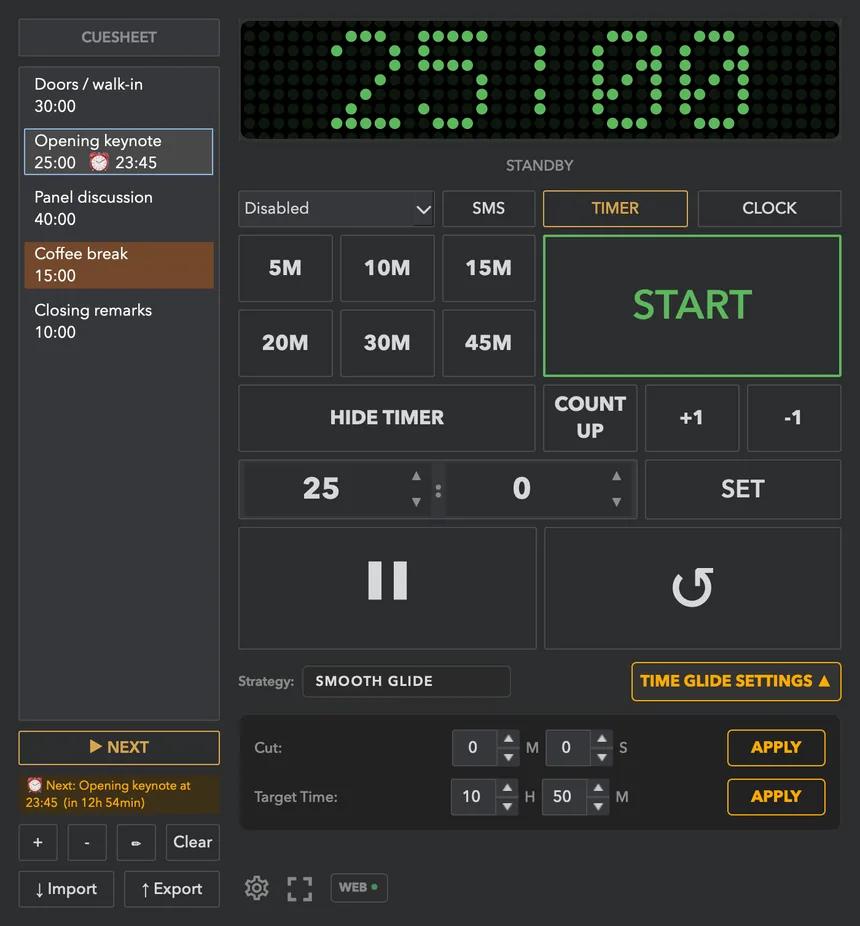
The left column is your running order: speakers, segments or breaks, each with its own time. Click one to select it, double-click to load its name and time, and press ▶ NEXT to move down the list.
| Button | Does |
|---|---|
| + | Add a cue (name, minutes, seconds, optional extras) |
| − | Delete the selected cue |
| ✎ | Edit the selected cue |
| Clear | Delete all cues (asks first) |
| ↓ Import / ↑ Export | Load or save the whole cuesheet as a CSV or JSON file |
| Drag a row | Reorder; saved automatically |
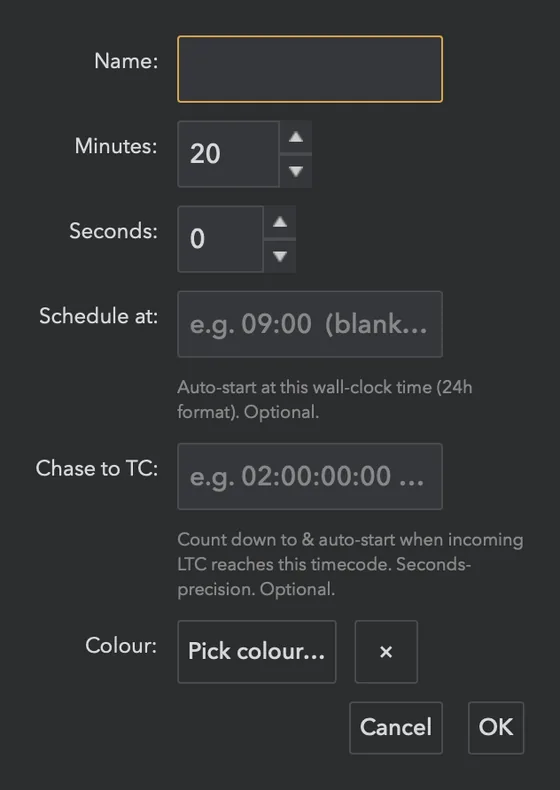
The cue editor
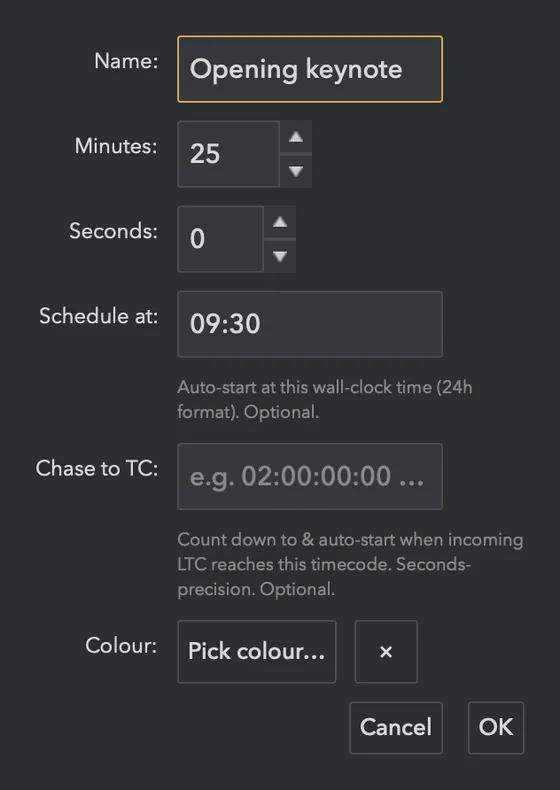
- Name and time are all a cue needs.
- Schedule at (HH:MM, 24-hour): when that wall-clock time arrives the cue loads and starts by itself (switch the auto-start off in Settings → Behaviour to have it only load). A small clock badge marks scheduled cues, the cuesheet shows a Next: cue at 10:30 (in 13 min) reminder under NEXT, and a cue whose time passed without running is marked missed. Behaviour → Reset missed/fired marks clears those marks so scheduled cues can fire again.
- Chase to TC: start this cue when incoming LTC timecode reaches a value (see LTC).
- Colour: tint the row to group cues at a glance. It only colours the list, not the display.
- OSC on start / end appear when chase mode is on (see LTC).
Import and export (CSV / JSON)
Build the running order in a spreadsheet and import it, or export to reuse a show. The file formats, field names and an Excel tip are in the reference manual; download the example CSV or example JSON to start. Importing replaces the current list, so export first if you want a backup.
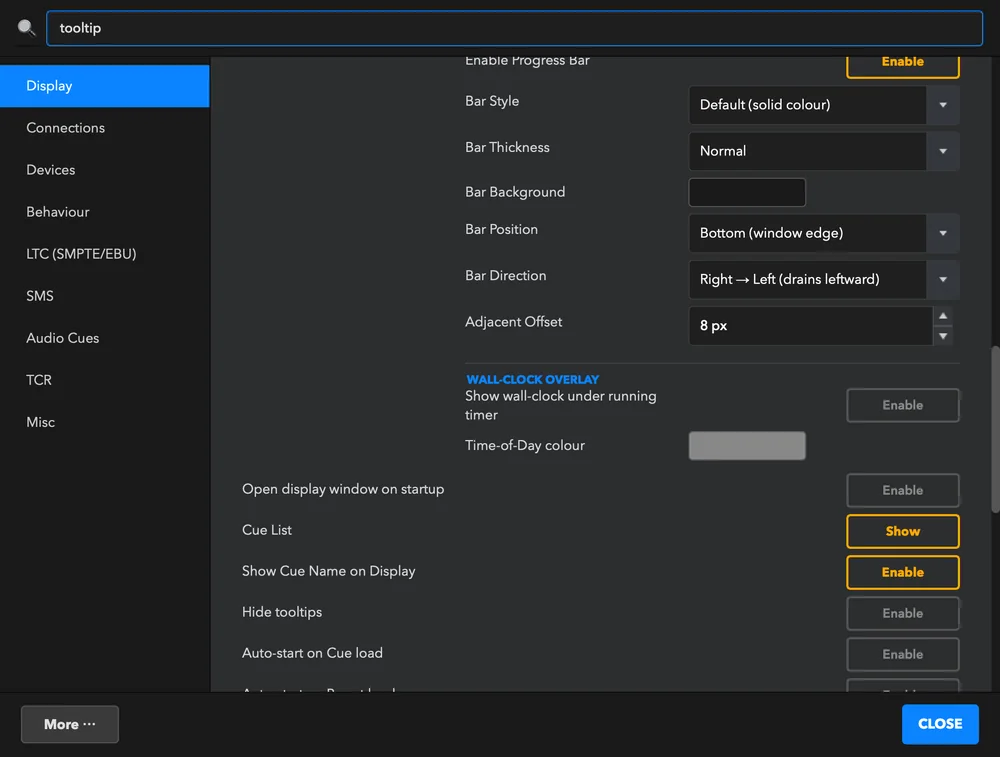
Hide the cuesheet with Settings → Display → Show Runsheet; show the cue name above the digits on the display with Show Cue Name on Display. Auto-start on Cue load and Auto-start on Preset load start the timer as soon as you pick one.
The display window and its looks
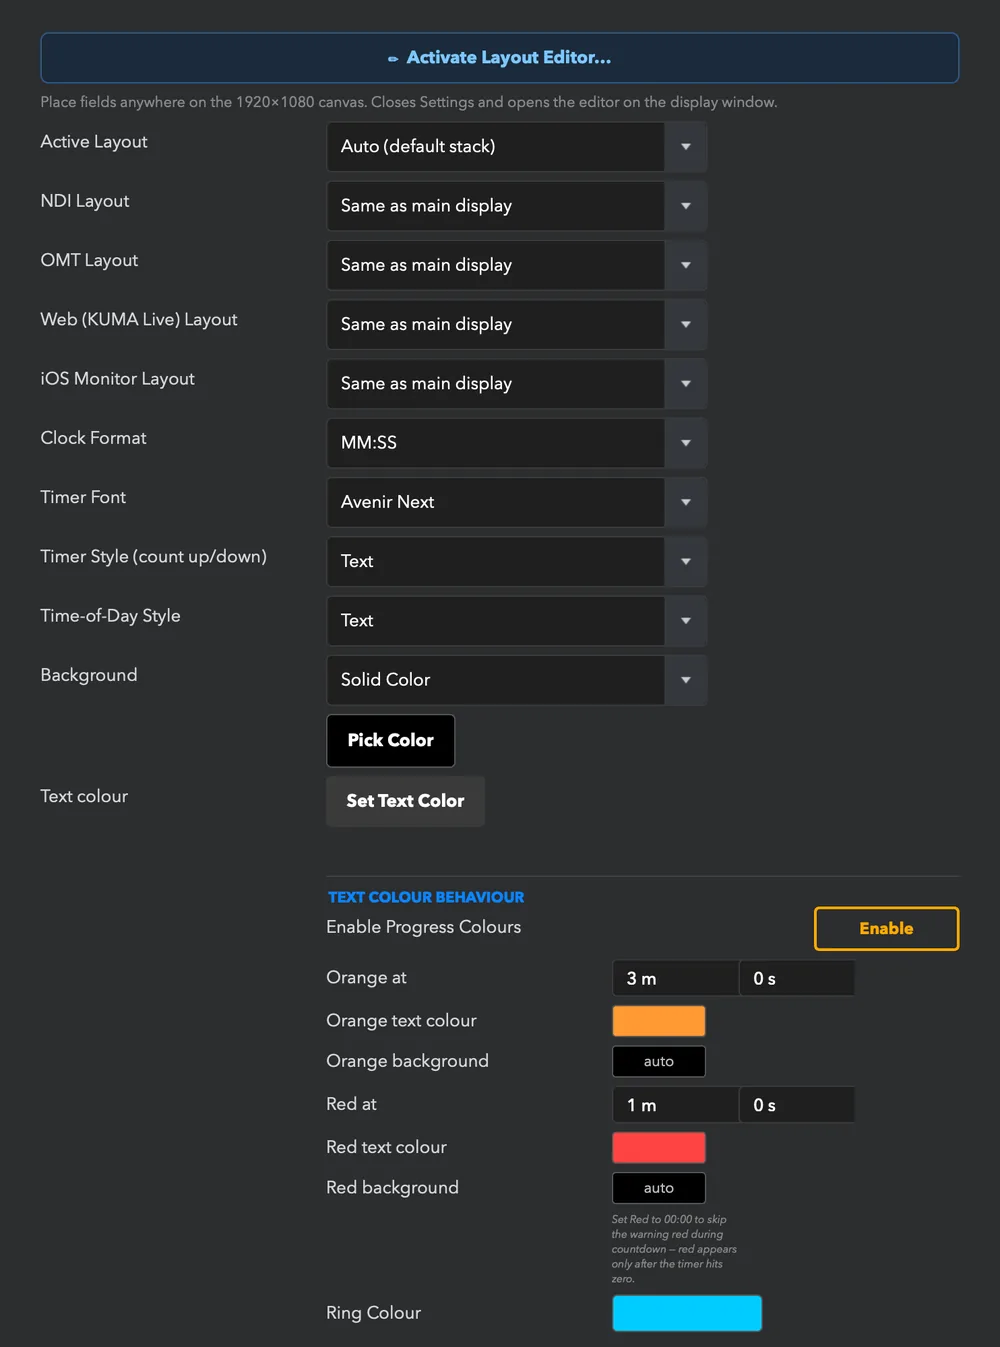
The display window is the picture your speaker or audience sees. Send it to a screen with the drop-down in the control window; on a second screen it fills the screen by itself, on the main screen it is a normal window. Settings for everything below live in Settings → Display.
Digits and format
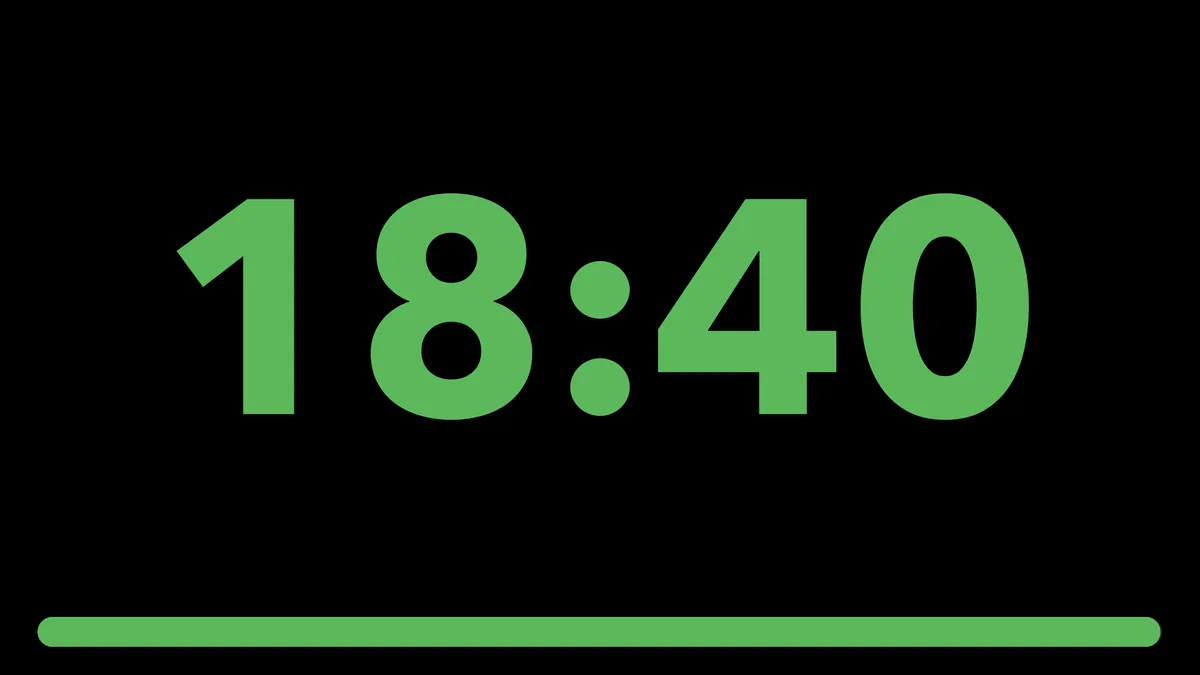
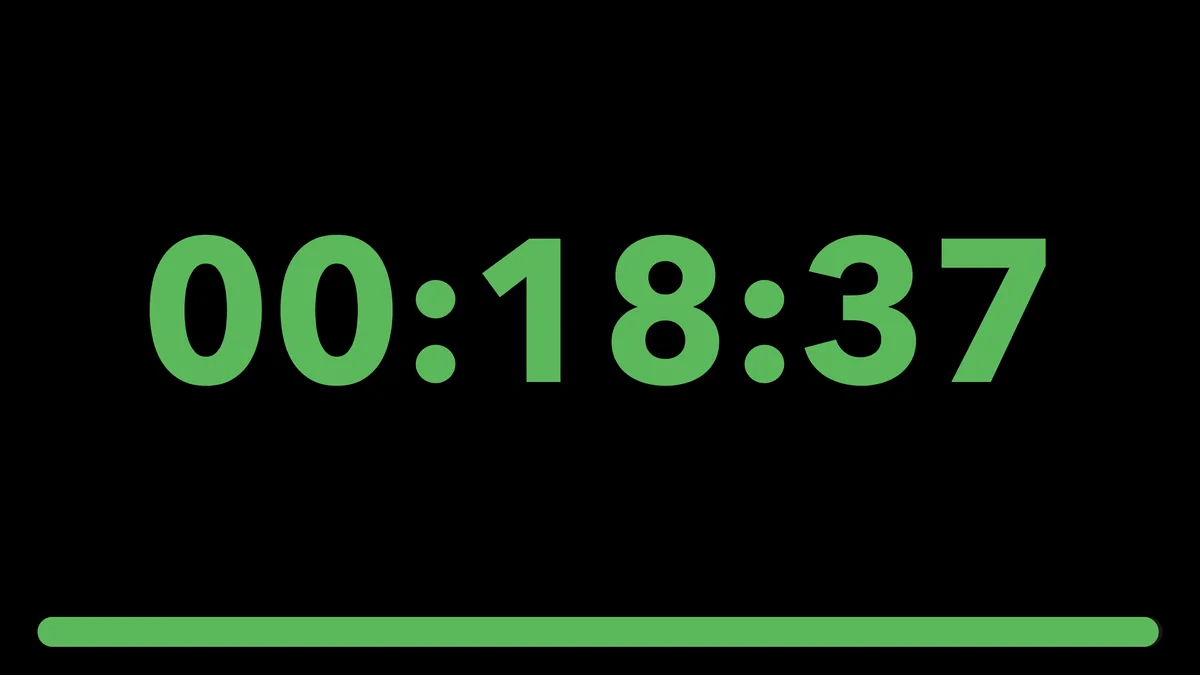
- Clock format: MM:SS (default) or HH:MM:SS; frame-accurate formats with a frame counter (MM:SS:FR, HH:MM:SS:FR) for broadcast. See Frame-accurate countdown.
- Timer font (all monospace so the digits never jump) and text colour.
- Timer size: make the automatic size bigger or smaller by a percentage.
Colour warnings
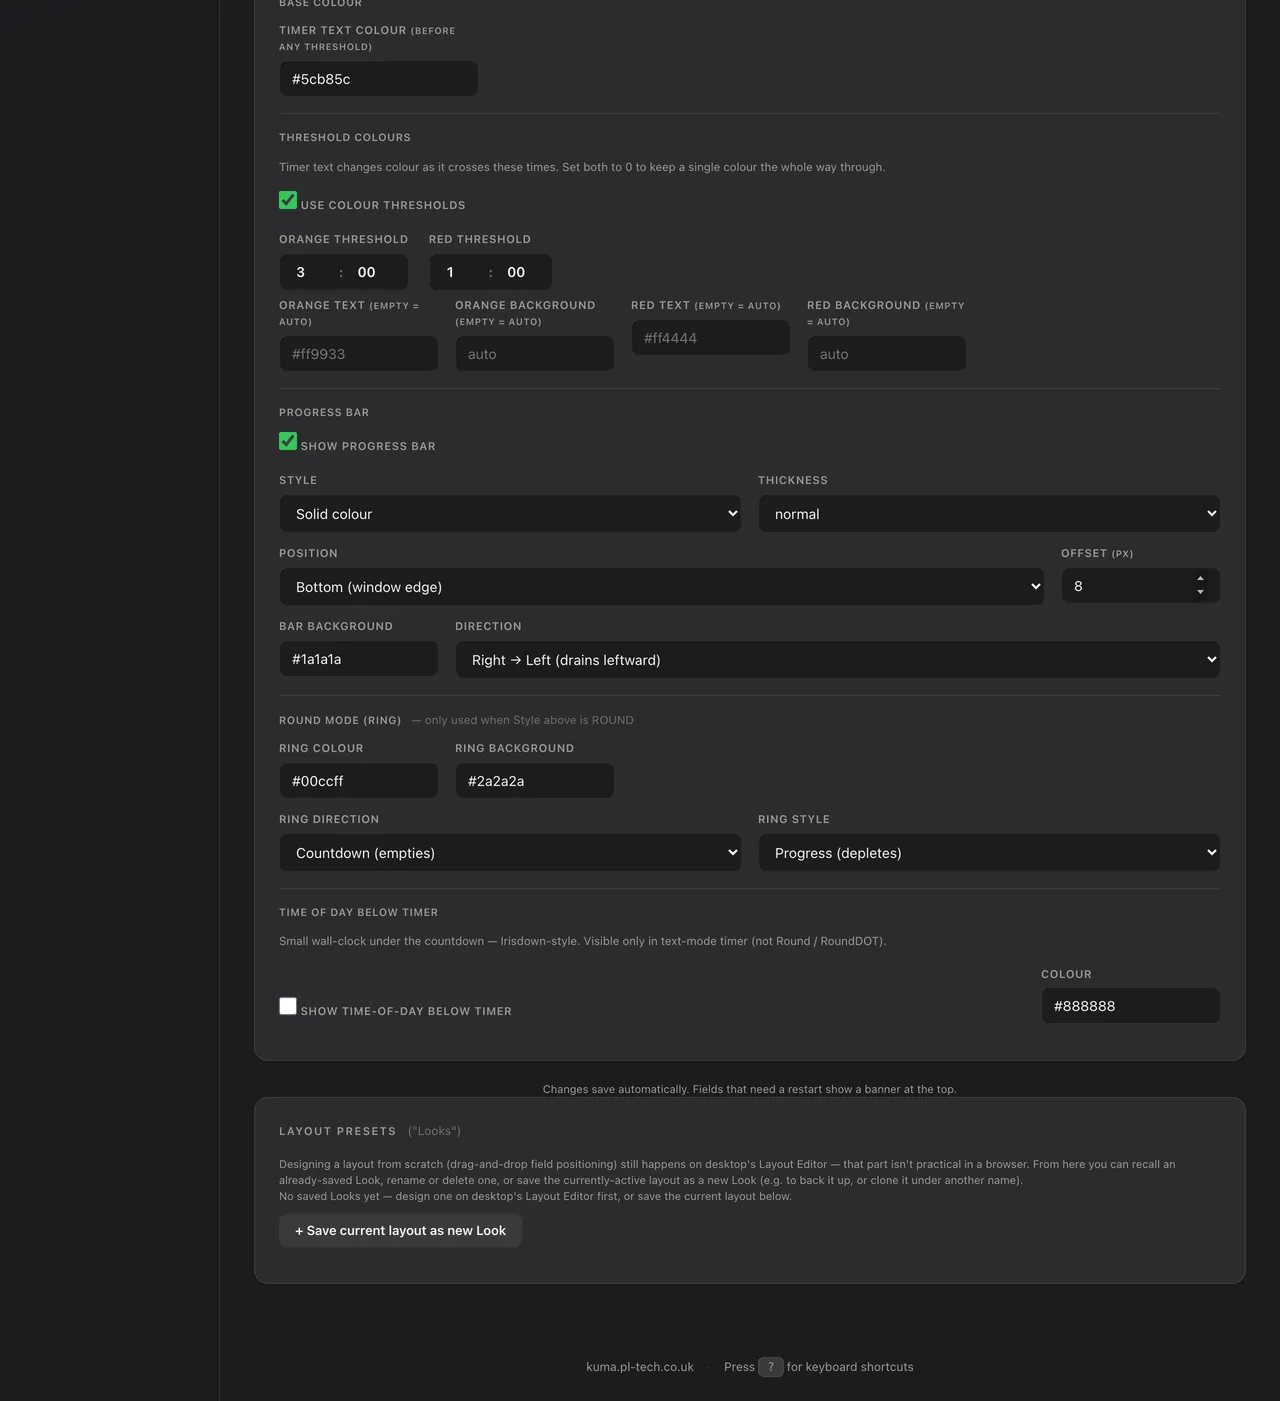
Enable Progress Colours turns the digits orange at a time you choose (default 3 minutes left) and red at another (default 1 minute left). You can set the text and background colour for each stage. Setting red to 00:00 keeps the countdown green or orange until zero, and red only appears in overtime. The audio cues use the same two moments (Audio cues).
Progress bar
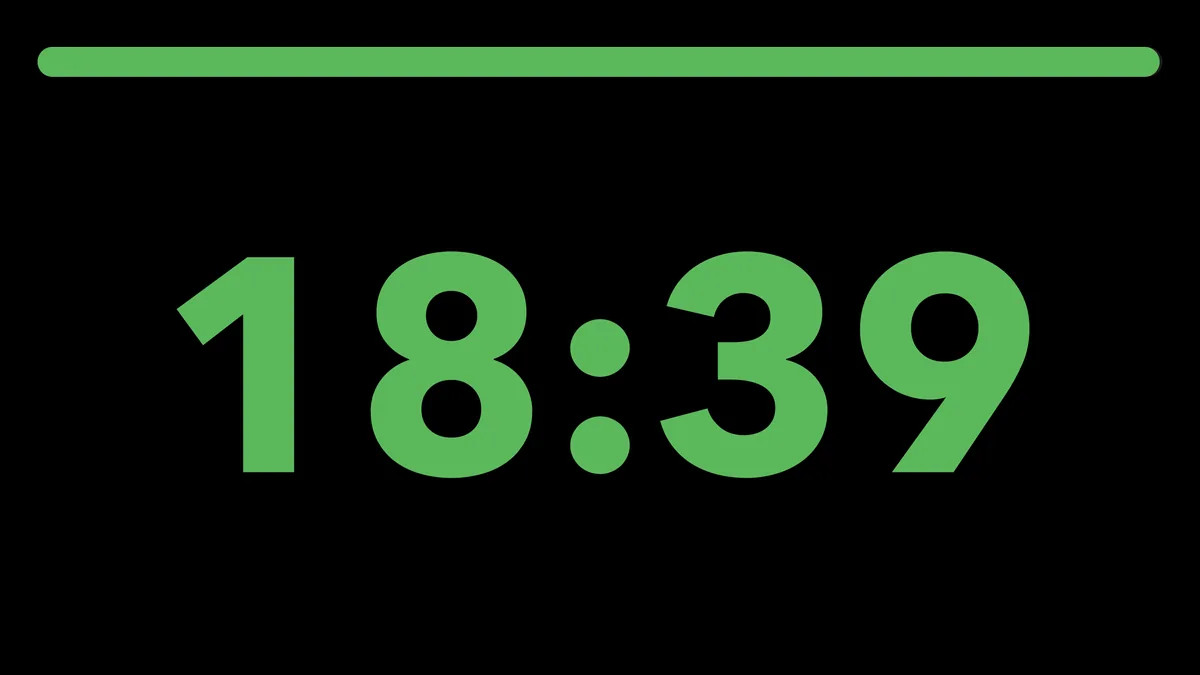
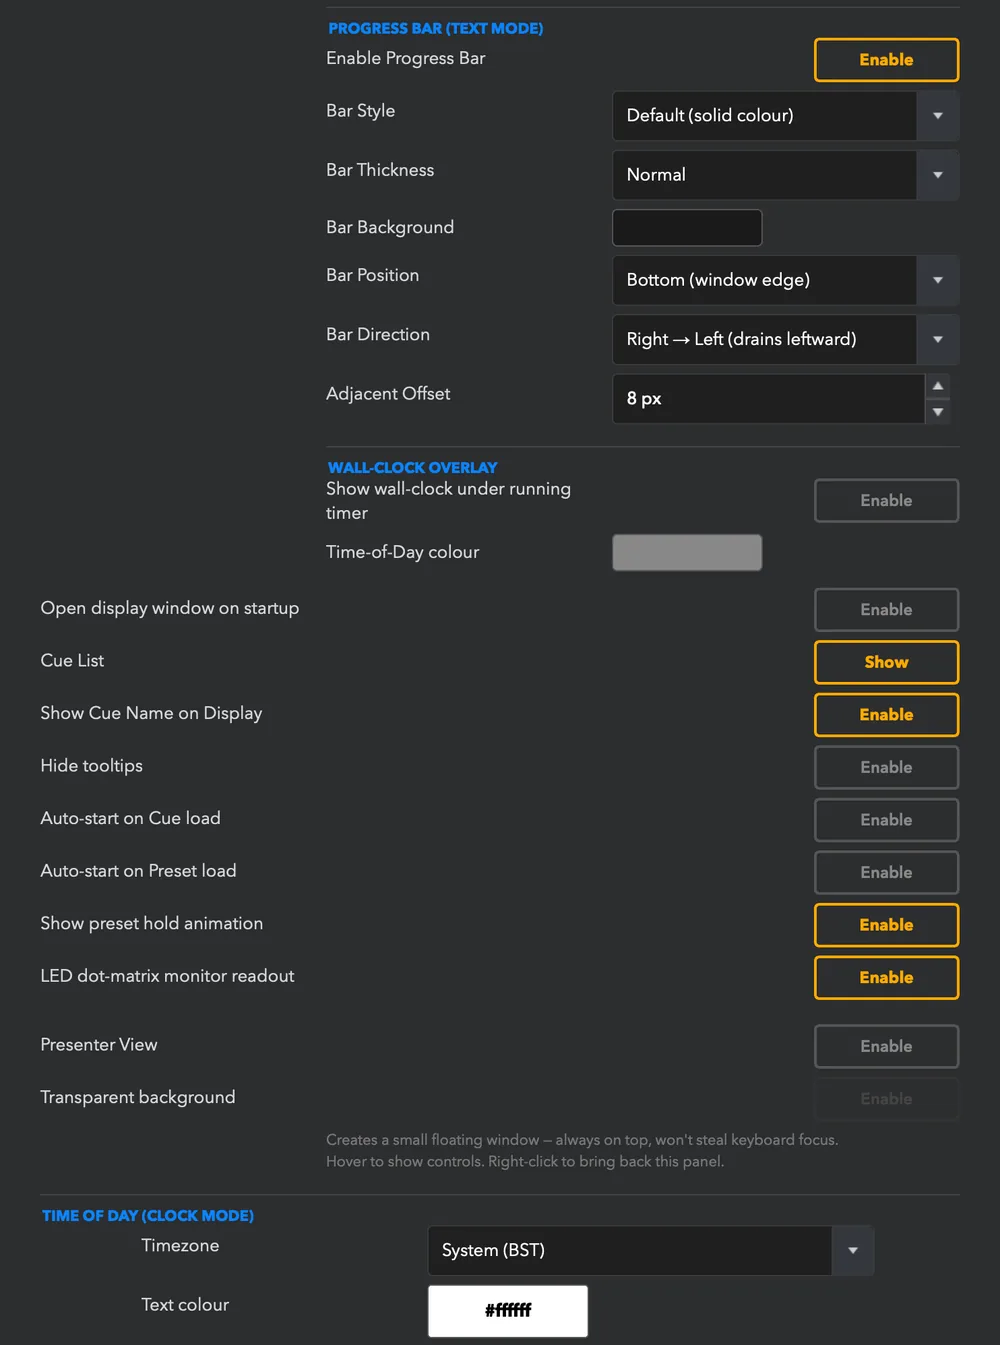
A bar that empties as time passes, so the speaker can judge the time left at a glance without reading digits. In Settings → Display → Progress Bar (Text Mode) you choose the style, thickness, background, position (bottom of the window, top of the window, or tucked directly under the digits with a fine-tuning offset) and direction (drains right-to-left or left-to-right), or switch it off.
Cue name, wall clock and time of day
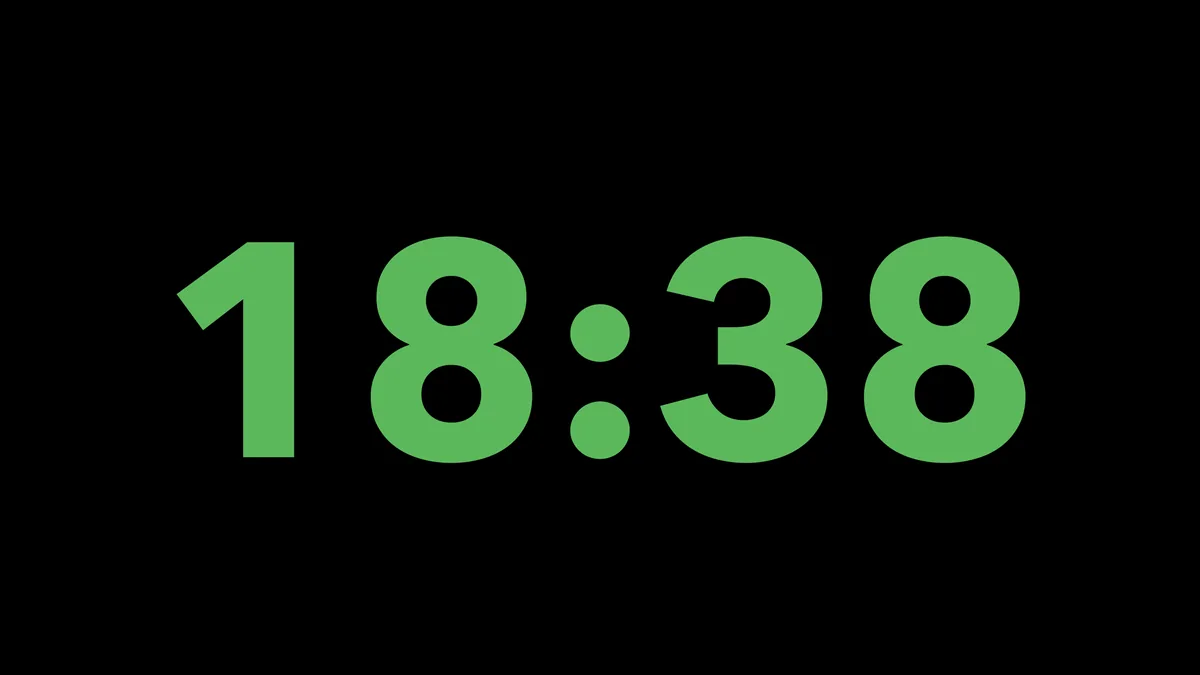
- Show Cue Name on Display puts the name of the loaded cue above the digits.
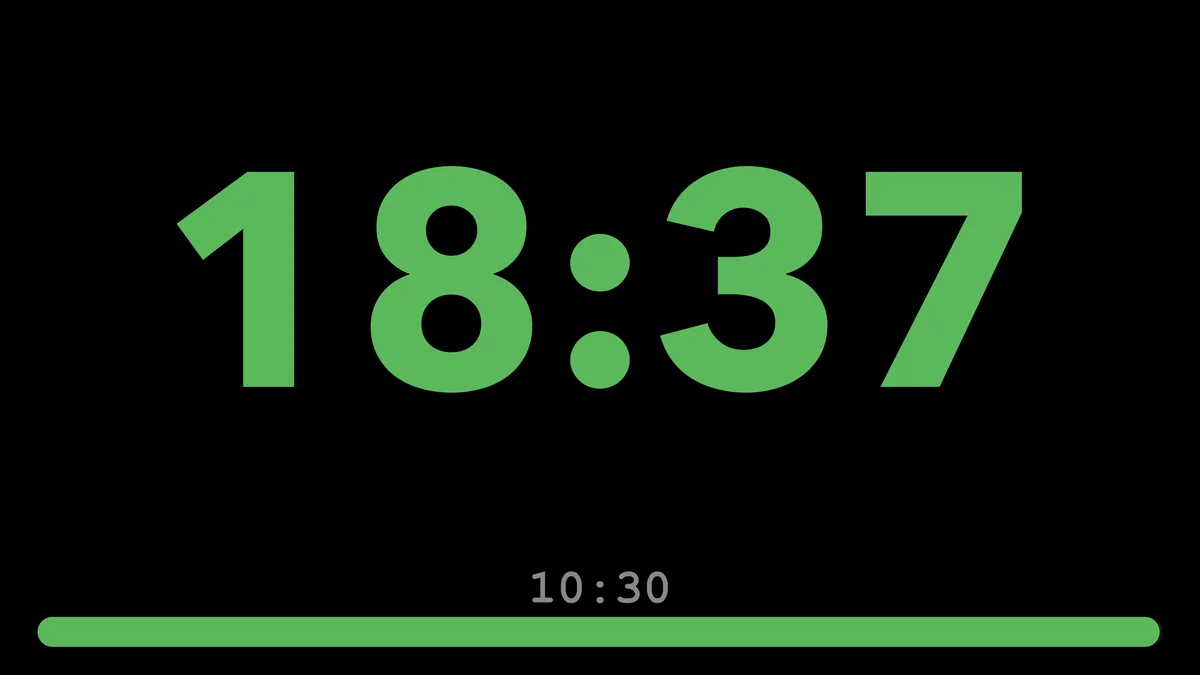
- Show wall-clock under running timer adds a small clock under the countdown, so the speaker sees both the time left and the time of day. It has its own colour.
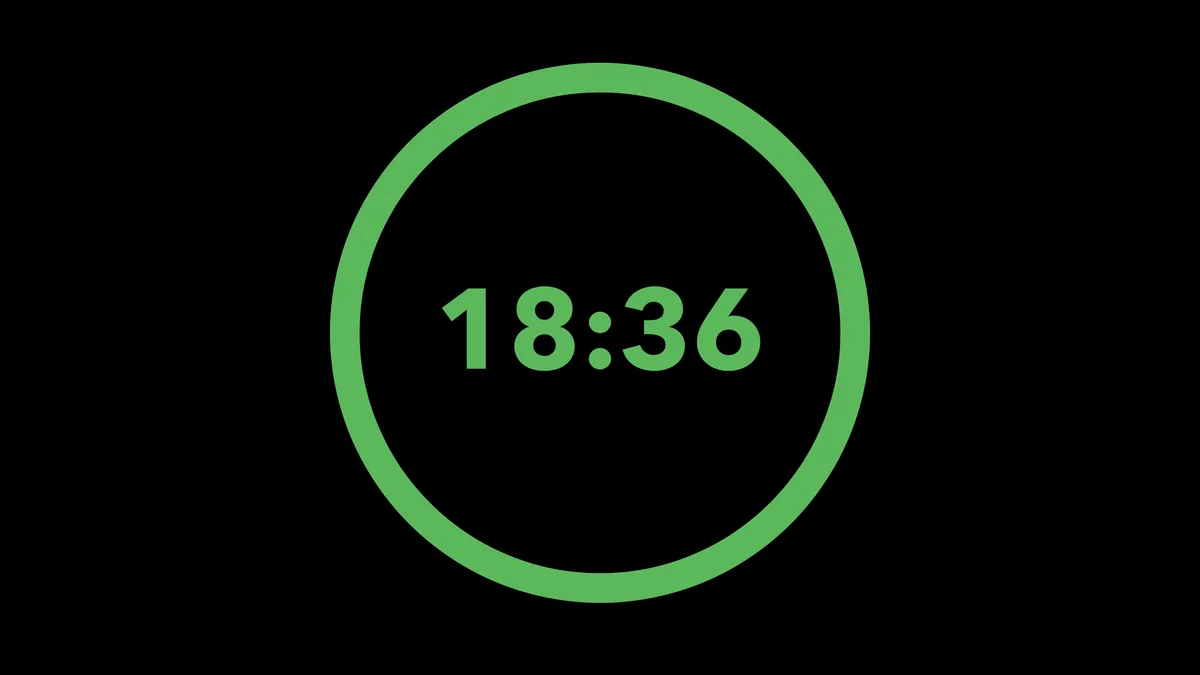
Round (ring) style
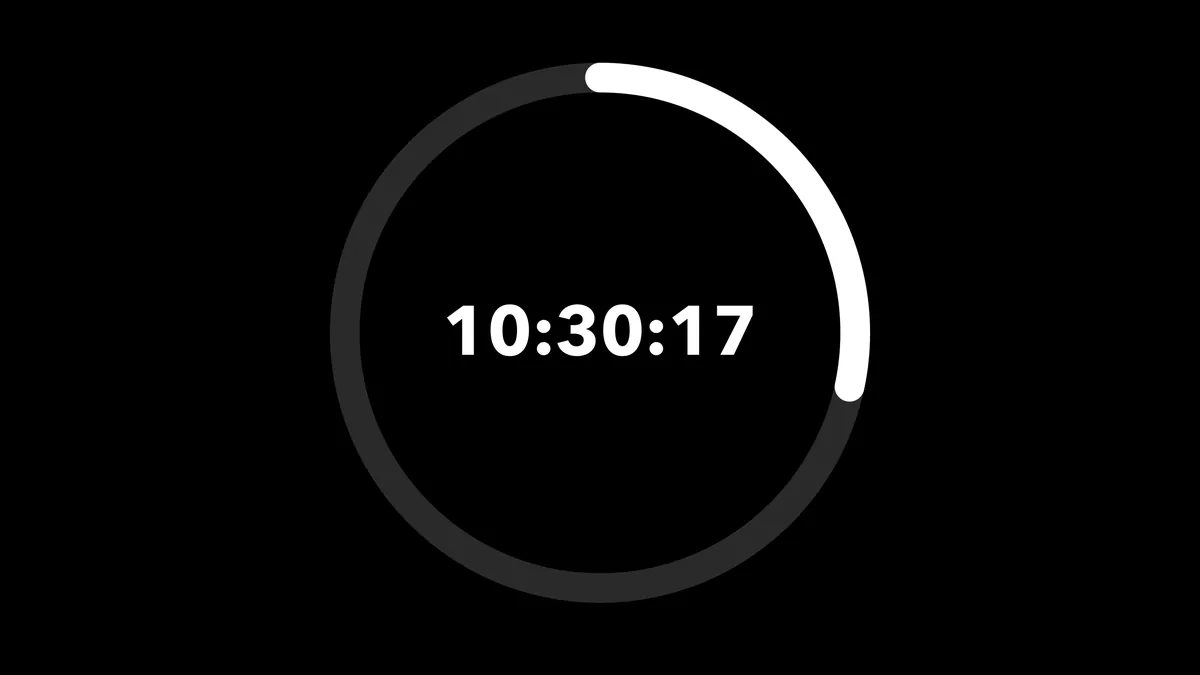
Choose Round as the Timer Style for a circular ring around the digits. The ring has its own colour, direction (clockwise or counter-clockwise), style and outline colour (Ring (Round Mode)).
The clock face
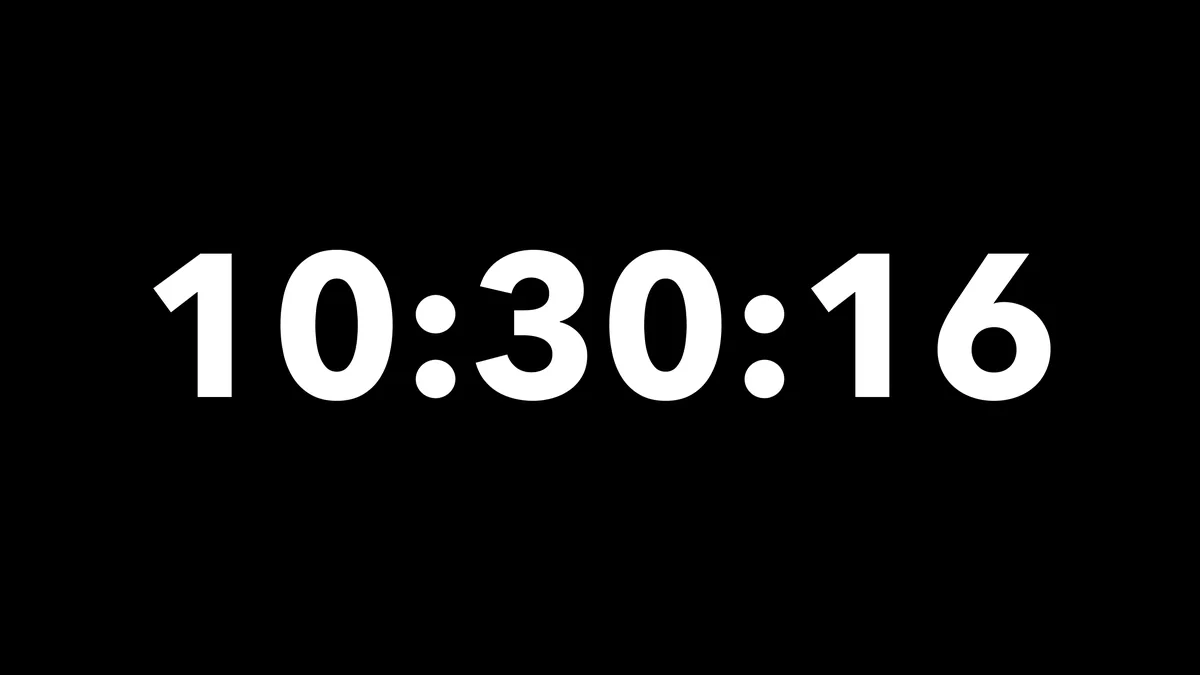
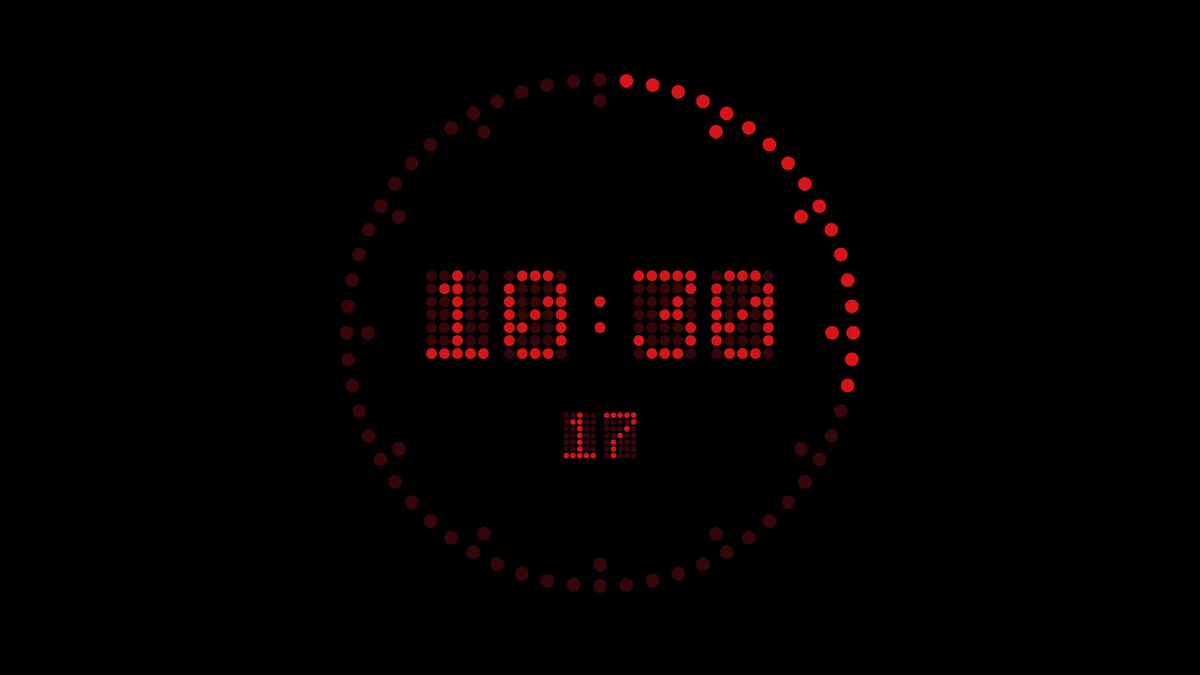
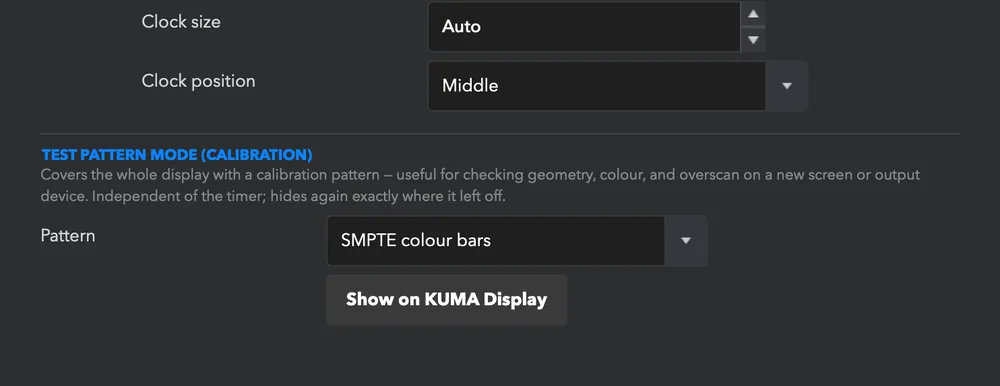
The display can show the time of day (CLOCK button). Pick its look separately from the timer: Text, Round or RounDOT, a broadcast-style dot-matrix clock with two rings of red dots ticking the seconds. Set the timezone (for example Europe/Warsaw; blank = this computer's) and the clock size and position under Time of Day (Clock mode).
Background
A solid colour (default black) or a background image (JPEG, PNG or GIF up to 5 MB, stretched to the window).
Overtime on the display
When the timer passes zero, Settings → Behaviour decides what happens:
- Behaviour at 00:00: Count up (digits keep going in red), Stay at 00:00 (freeze) or Stop timer.
- Change background colour (pick the colour or one of the quick swatches), overtime text colour and Blink the clock in overtime (rate: one second on / one off by default).
- Show “OVERTIME” box: a coloured label with your own text, box and text colours, size, position above or below the digits and a distance from them.
- Send OSC on overtime: one OSC message when time passes zero (default path
/kuma/overtime) for lighting or Companion.
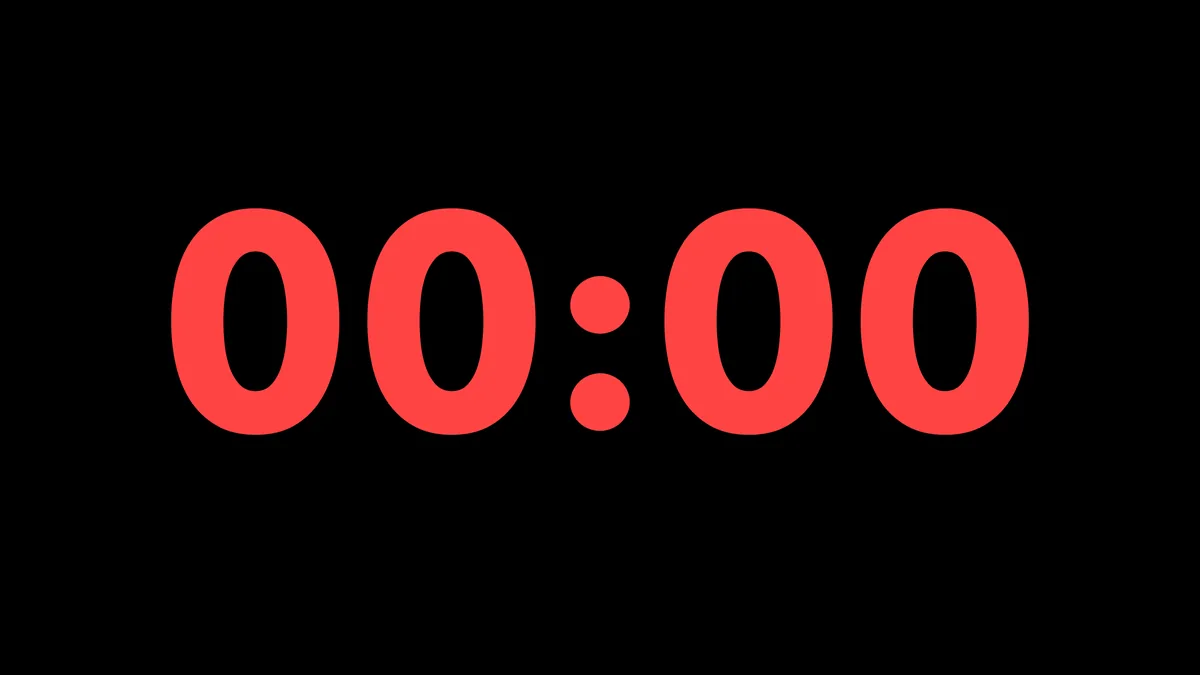
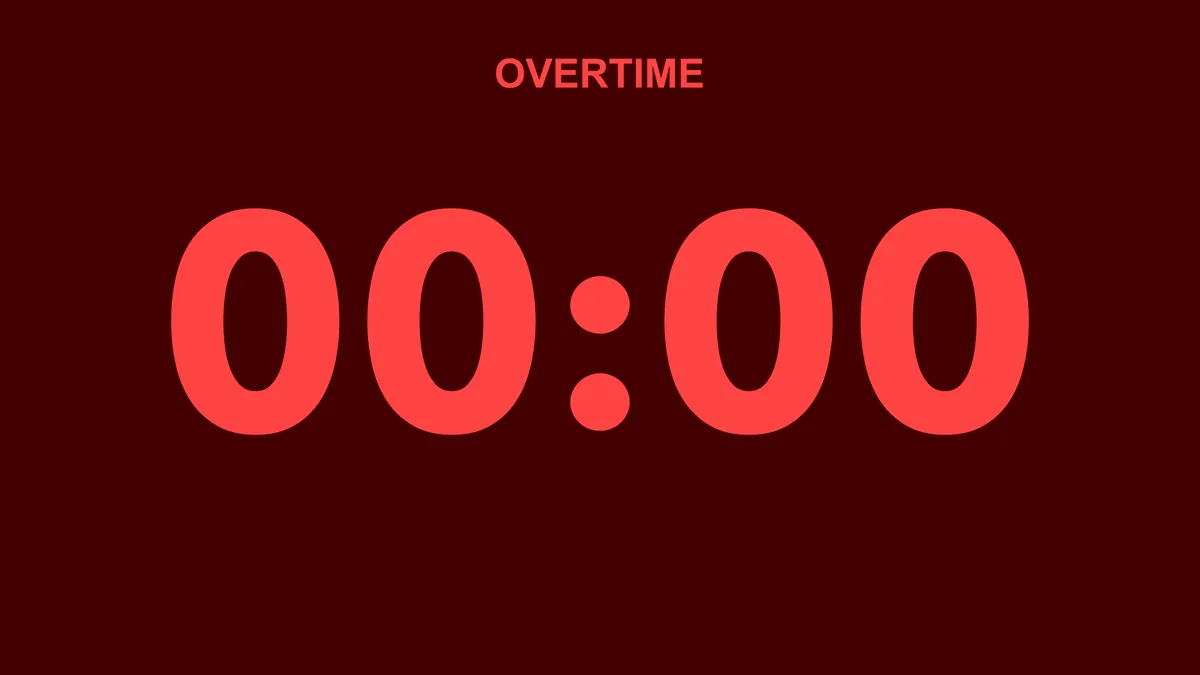
The overtime time reads without a minus sign on the big display (colour and the label already say it is overtime).
The Display settings page
All of the above, in one place. The page is long, so it is shown in three parts.
Messages to the screen (SMS)
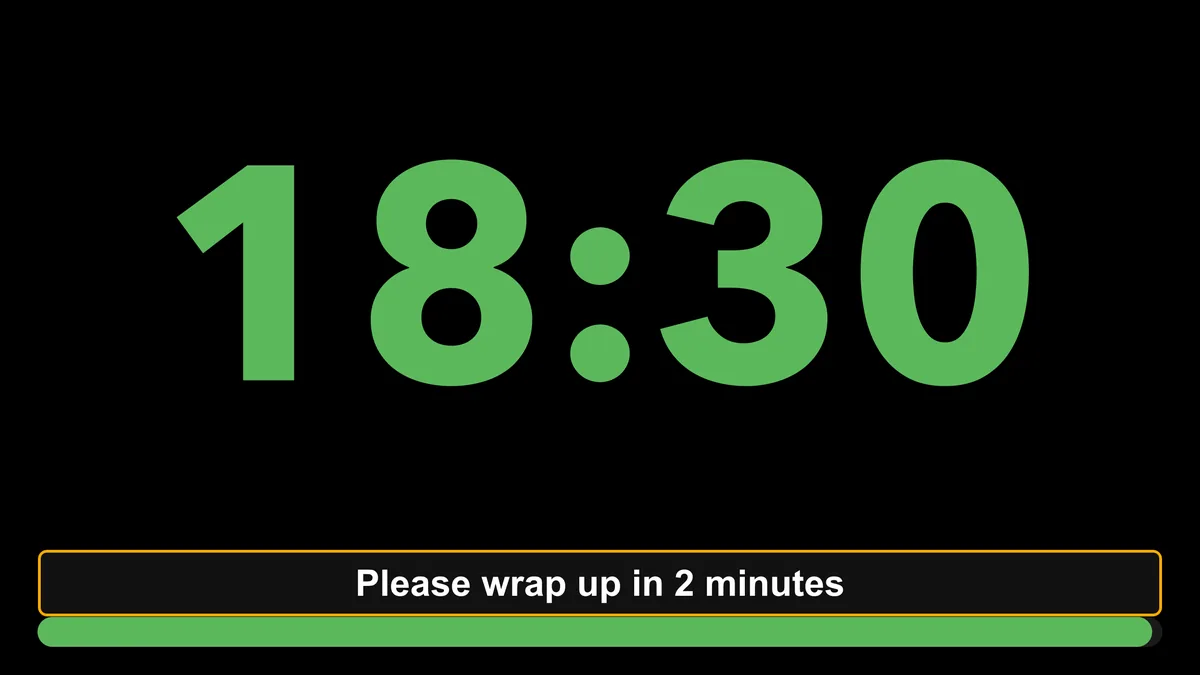
Press SMS to put a text on the display, for example “Please wrap up in 2 minutes”. It is meant for a stage manager talking to the speaker through the screen.
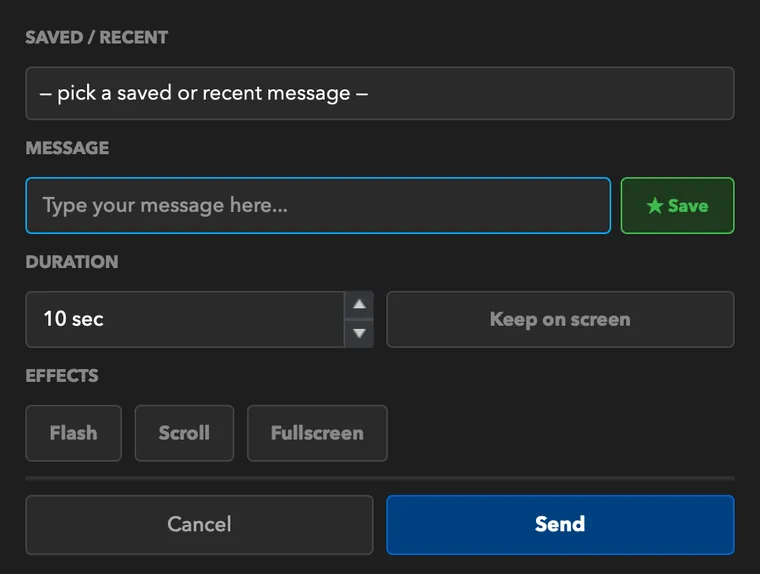
- Duration: 1–600 seconds, or Keep on screen until you cancel.
- Flash flashes the background, Scroll scrolls the text from right to left, Fullscreen takes over the whole display (the timer hides and comes back when the message ends).
- Save (star) keeps a message for next time; the last ten sent messages are also remembered. While a message is showing, the button becomes CANCEL SMS.

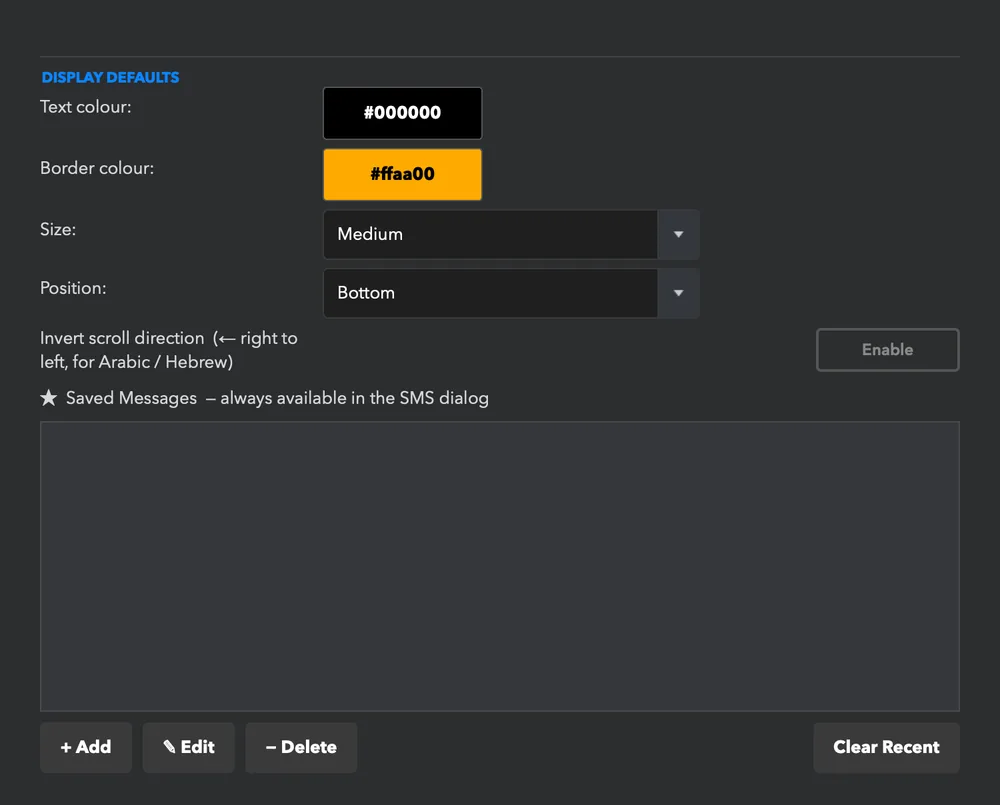
Default colour, border, size and position of messages, the list of saved messages and Invert scroll direction (for Arabic and Hebrew) are in Settings → SMS. Messages also reach the browser mirror, NDI/OMT video, wireless displays (if you enable Mirror SMS to wireless displays) and the Companion app; remote viewers of KUMA Live can send messages too when you allow it.
Time cut: finishing earlier without the audience noticing
The show is running 4 minutes late and the next block must start on time. Time glide / jump brings a running countdown forward so it finishes where you want, without an obvious “we are cutting time” moment. Open TIME GLIDE SETTINGS in the control window.
Choose the Strategy in the drop-down:
- SMOOTH GLIDE (glide) — the seconds tick a little faster than normal until the target is reached. Simple, responsive; best for backstage timers or when nobody reads the clock closely.
- STEALTH JUMP (jump) — seconds stay at exactly one per second, and the missing time is hidden as small skips of 10, 20 or 30 seconds at round moments (preferring :00 and :30). The last three minutes are always left clean. Best for clocks the audience can read.
Then give the target in one of two ways and press APPLY: Cut (how many minutes and seconds to remove) or Target time (finish at a clock time, for example 14:00). CANCEL GLIDE / JUMP drops it at once. A cut also ends by itself when the timer reaches overtime, on reset, or when a new preset or cue loads. Time glide and jump are licensed features; they are not available in the frame-accurate formats. Full details are in the reference manual.
Presenter View: a floating timer over your slides
A small always-on-top window that stays above PowerPoint or Keynote, even in full-screen slideshow, without taking the keyboard focus (your clicker keeps working). Enable it in Settings → Display → Presenter View.
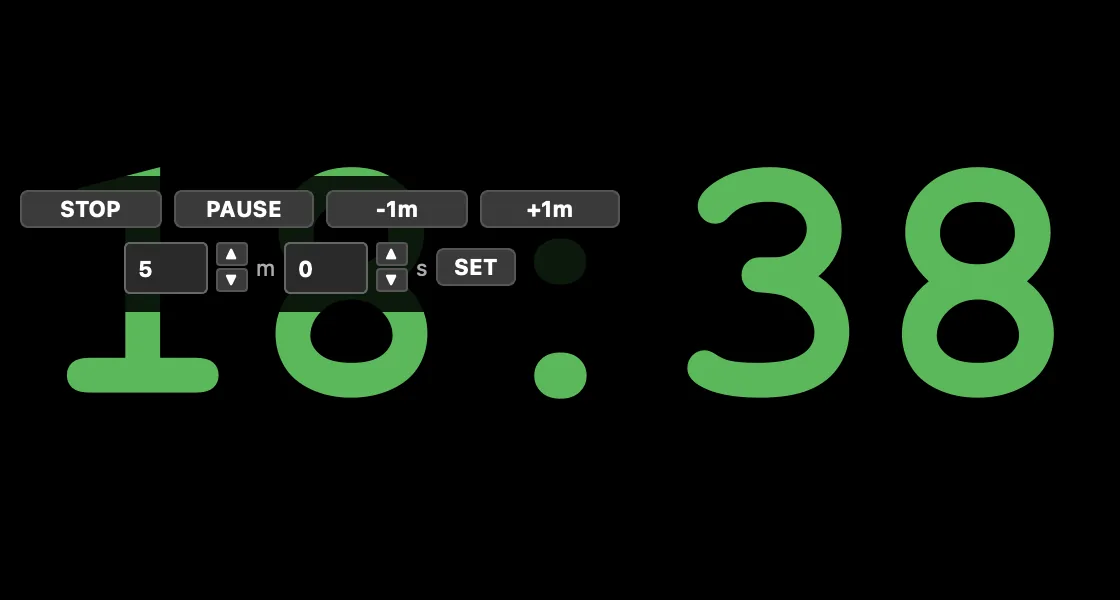
- Drag the middle to move it, drag an edge or corner to resize (the digits resize with it).
- Transparent background lets the slide show through; a dashed orange frame appears only when you hover.
- Right-click the window to bring the control window to the front.
- macOS asks once to allow control of “System Events”: allow it so clicking a PVM button hands focus back to your slideshow.
Layout Editor: design your own display
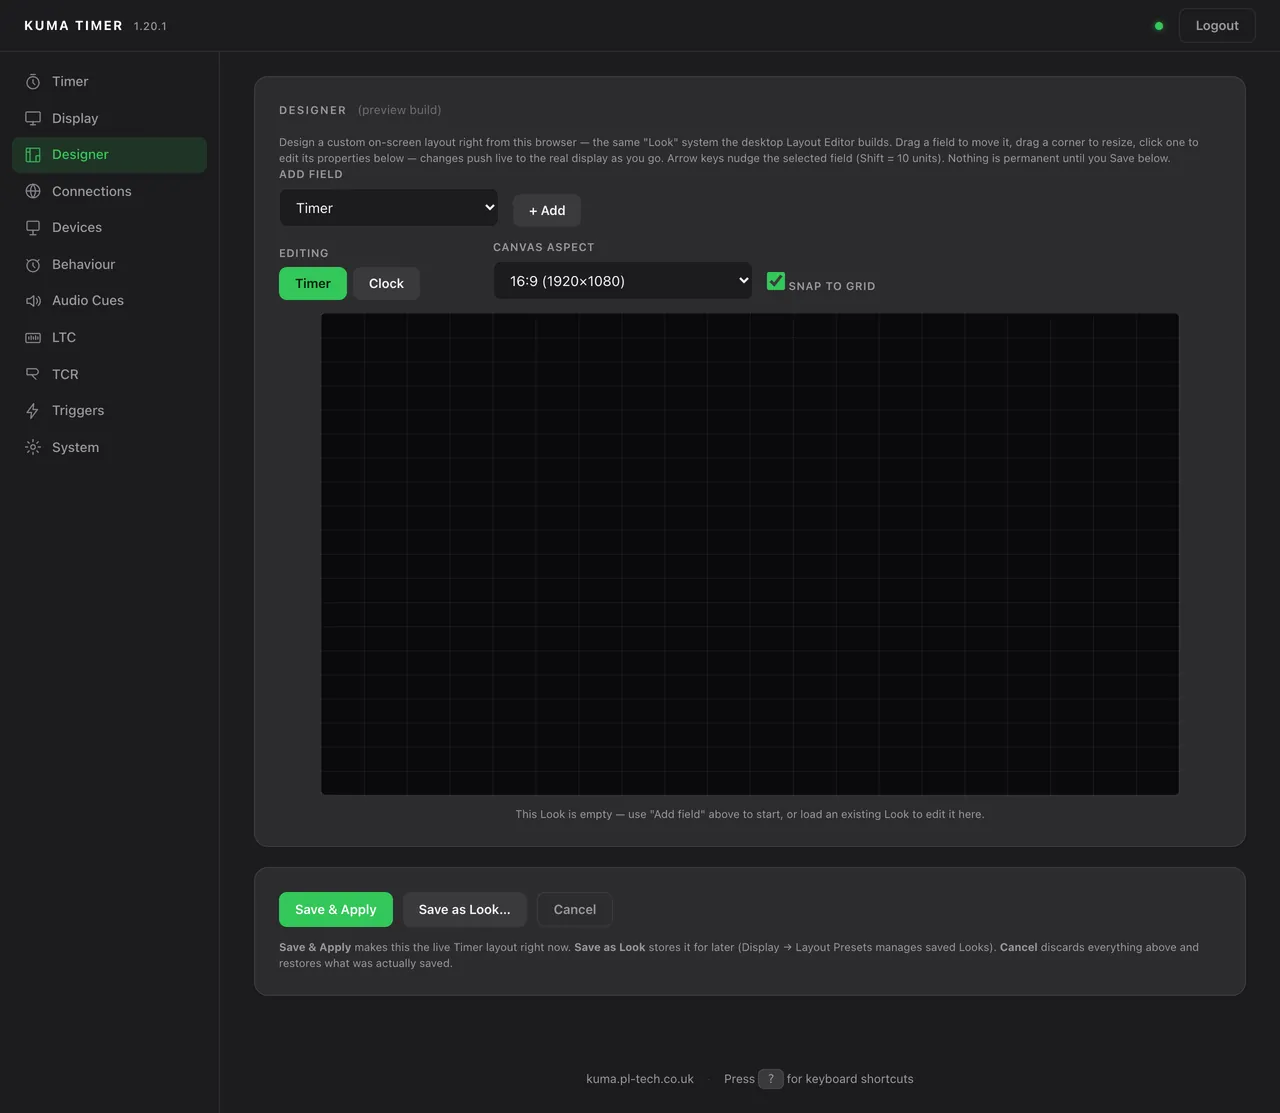
If the built-in looks do not fit, design your own. Settings → Display → Activate Layout Editor opens an editor on the display window: drag and resize the timer, time of day, cue name, progress bar, OVERTIME label, message, TCR lines and more on a 1920×1080 canvas, and set colour, font and size for each element.
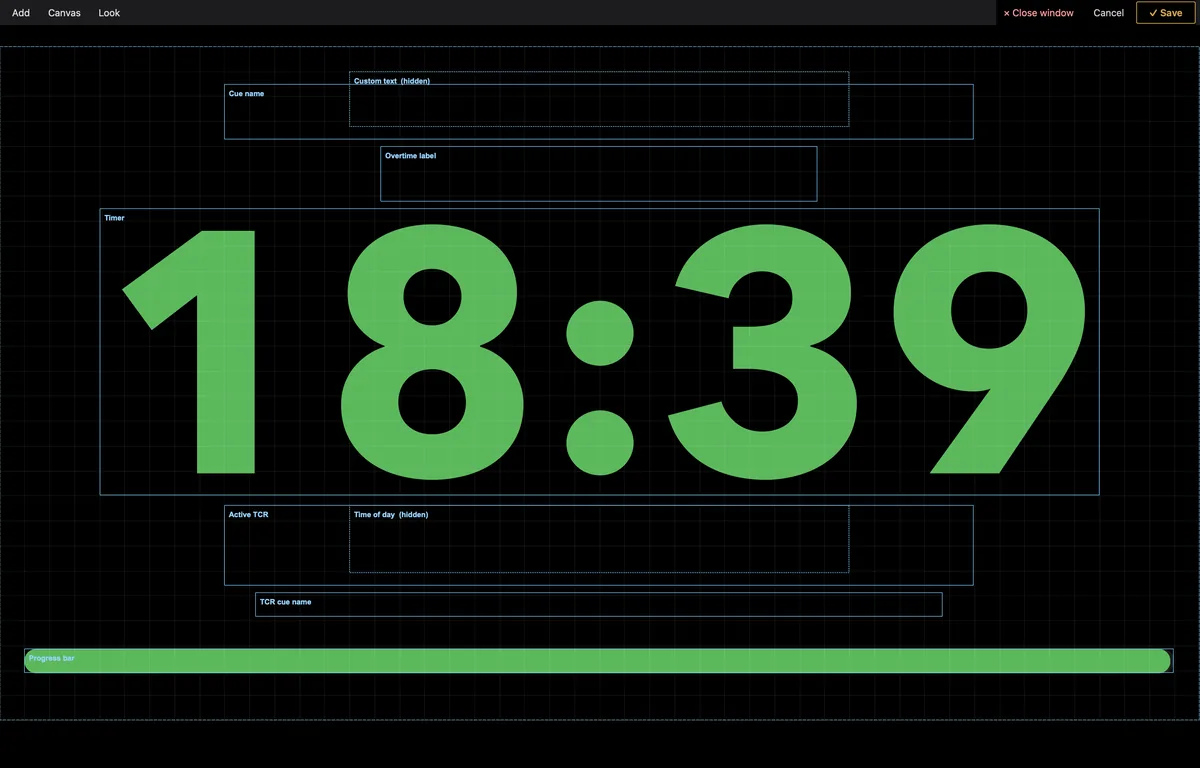
- Add brings in extra fields (for example a second timer line, TCR, received LTC timecode); Canvas changes the canvas aspect; Look saves and recalls your design.
- Save a design as a Look (a named preset) and recall it by name or slot, even from Bitfocus Companion, a TCP command or the browser admin.
- A layout renders the same on the host screen, NDI, OMT, Blackmagic, KUMA Live web view and the Companion app. In Settings → Display each output (NDI, OMT, web, iOS monitor) can use a different Look than the main display.
- You can also design in a browser: the Designer tab of the web admin (below).
- A custom layout replaces Text / Round / RounDOT while it is active.
Test pattern
New screen, new projector, unknown overscan? Settings → Display → Test Pattern Mode covers the display with a calibration pattern (SMPTE colour bars, a crosshatch grid, or a colour cycle). It is never saved, so KUMA never starts with a pattern on.

Audio cues
Chimes that fire at the same moments the display changes colour, so the speaker hears the warning without watching: a chime at the orange moment, a double bell at the red moment and a gong at zero. Open Settings → Audio Cues.
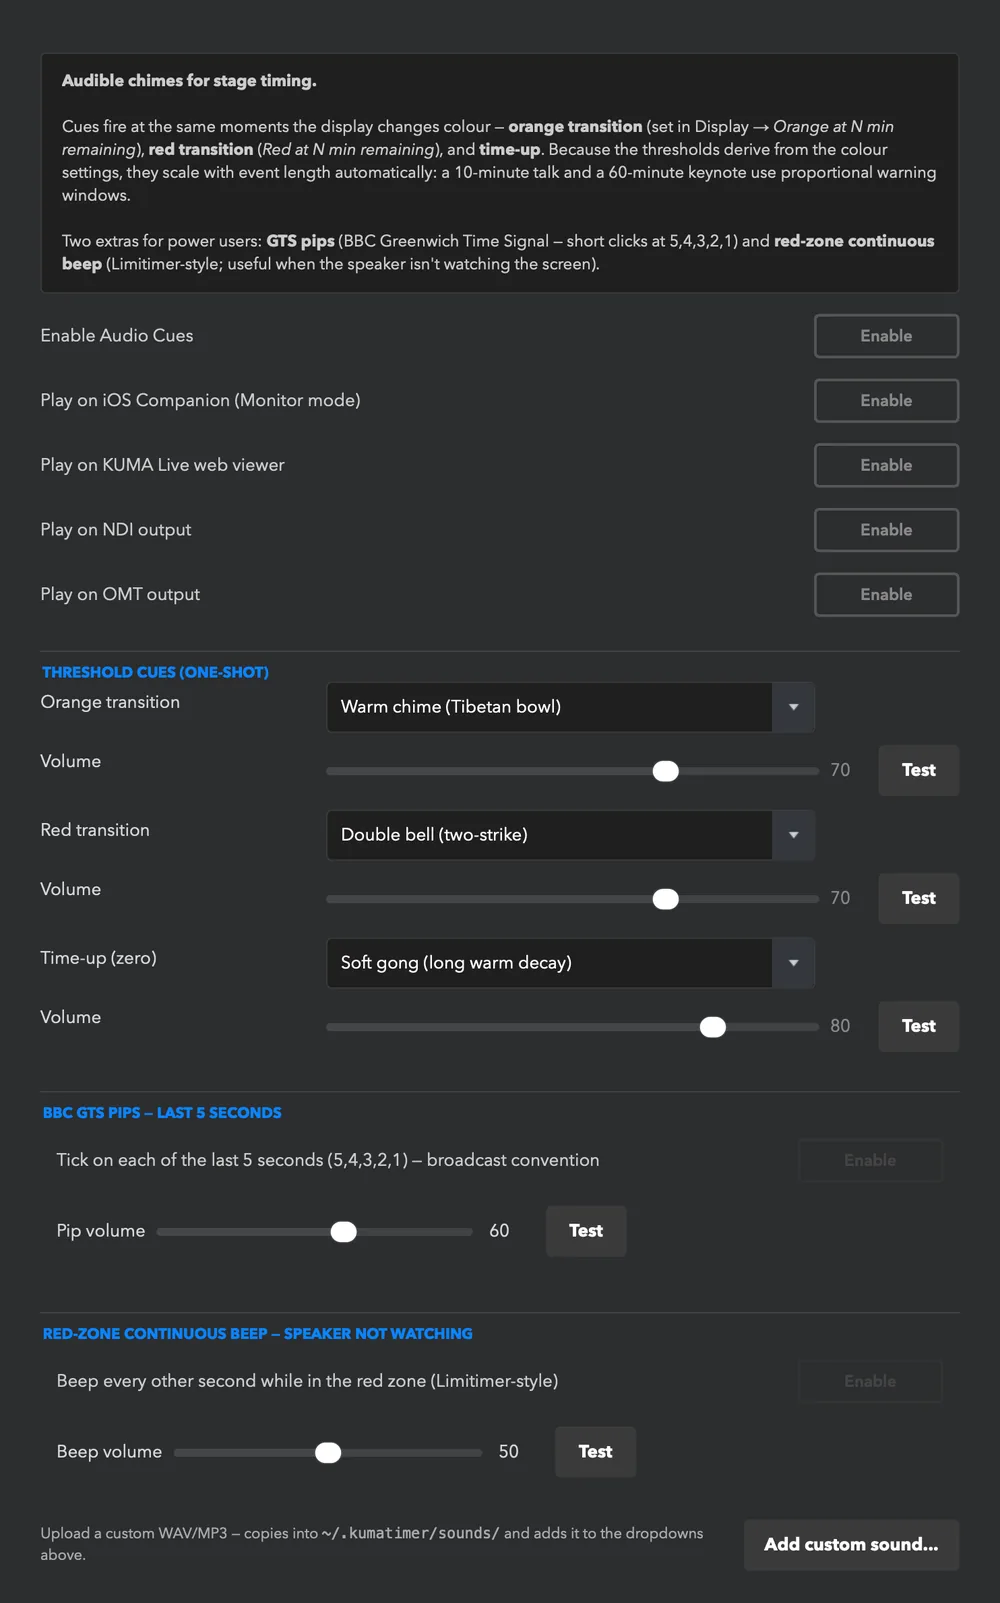
- Each cue has its own sound (six built-in, or Add custom sound… to import a WAV or MP3), volume and Test button.
- BBC GTS pips: short ticks on each of the last five seconds, the broadcast convention.
- Red-zone continuous beep: a beep every other second while in the red zone, for speakers who are not looking at the screen.
- Play on… the iOS/Android Companion (Monitor mode), the KUMA Live web viewer, NDI or OMT (embedded audio) as well as the host speaker.
- After the time-up gong the audio stays silent; visual overtime cues continue.
Getting the picture to other places
Besides the display window, KUMA can send the same picture, or just the time, to many other destinations. Most are set up in Settings → Connections (video and network) or Settings → Devices (hardware).
| Destination | What it is | Where to set it up |
|---|---|---|
| Second screen / projector | The display window, full screen. | Screen drop-down in the control window |
| NDI® | The display as a network video source named “KUMA Timer” for vMix, OBS, Resolume, Wirecast. | Connections → NDI Output |
| OMT | A royalty-free open alternative to NDI; same picture. | Connections → OMT Output |
| Blackmagic SDI / HDMI | The timer straight out of a DeckLink or UltraStudio card. | Devices → Blackmagic Output |
| Ulanzi TC001 | A small 8×32 LED panel showing the time. | Devices → Ulanzi LED Screen |
| ESP32-S3-BOX | A 320×240 colour screen. | Devices → ESP32-S3-BOX Wireless Display |
| CDEther | Interspace Industries seven-segment clocks, by network. | Devices → Interspace CDEther |
| DSAN Limitimer | Drives a Limitimer over RS-485. | Devices → Dsan Limitimer |
| LTC out | Generates SMPTE timecode audio. | LTC → Generator Settings |
| KUMA Live | Share the timer to remote speakers in a browser. | Connections → KUMA Live |
NDI and OMT
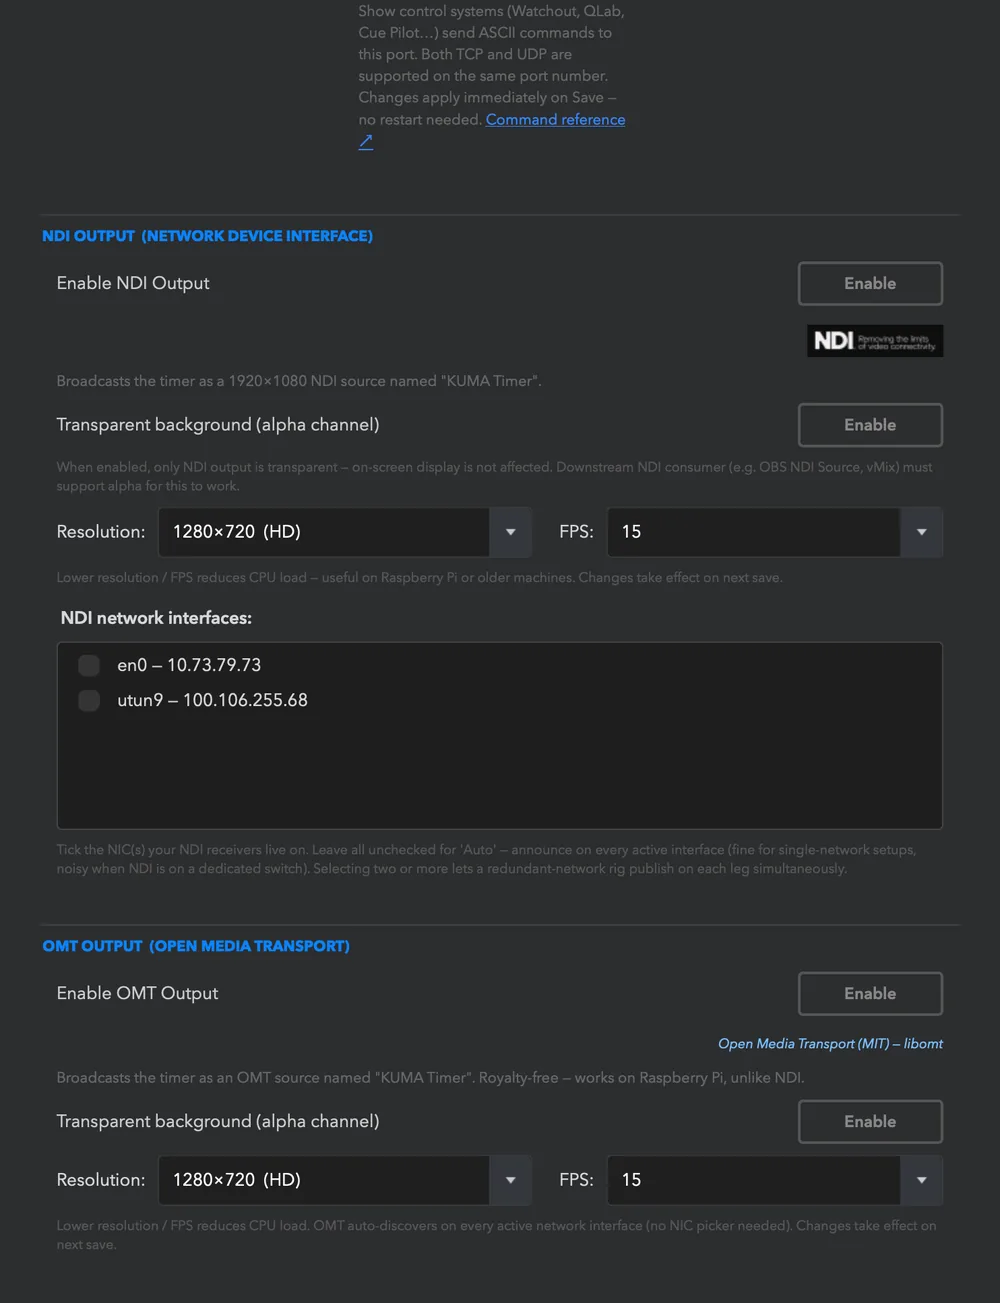
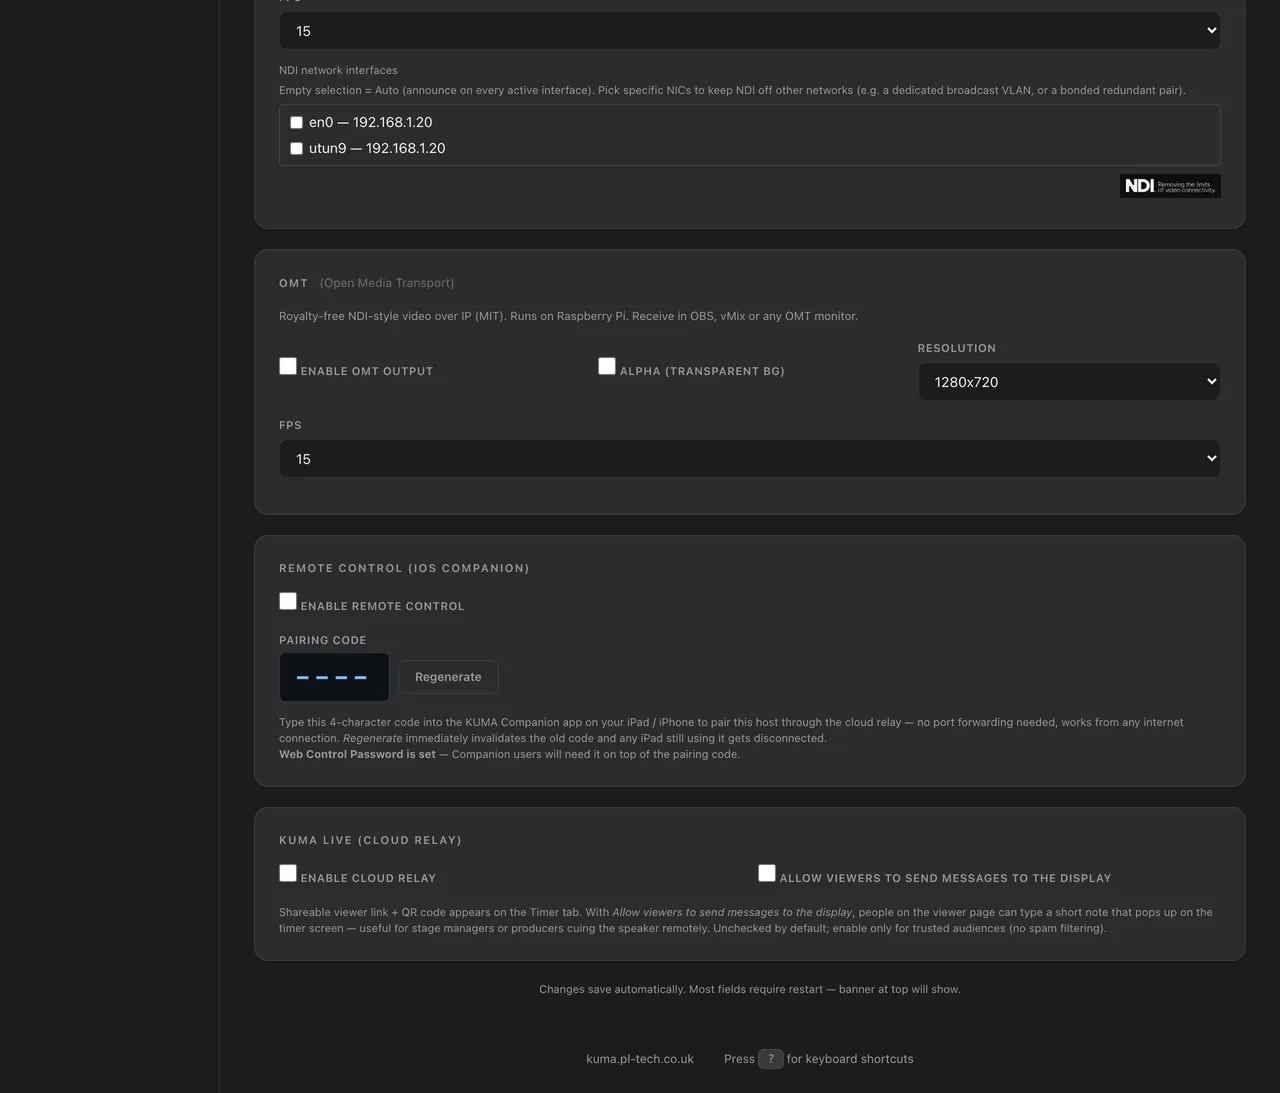
Tick Enable NDI Output (a one-time licence acceptance appears the first time) and the footer shows NDI turning green when the stream is live. Choose resolution and frame rate (lower values save CPU on small machines) and tick the network interface(s) your receivers are on, or leave them all unticked for automatic. Transparent background (alpha) sends the timer with a see-through background so it keys over other video. OMT works the same, with no licence dialog and no network-card picker. The NDI runtime is bundled; nothing else to install. Both carry your custom layout and (if you enable Play on NDI/OMT output) the audio cues.
Blackmagic
For SDI/HDMI straight from the computer (macOS and Windows). Pick the device and the output mode (the default is 1080p25), choose Live KUMA Timer or a calibration pattern, and (on cards with a hardware keyer) choose Fill only or Fill + Key. KUMA reconnects automatically after a restart. The status chip is green only while the output is really on air.
Wireless displays
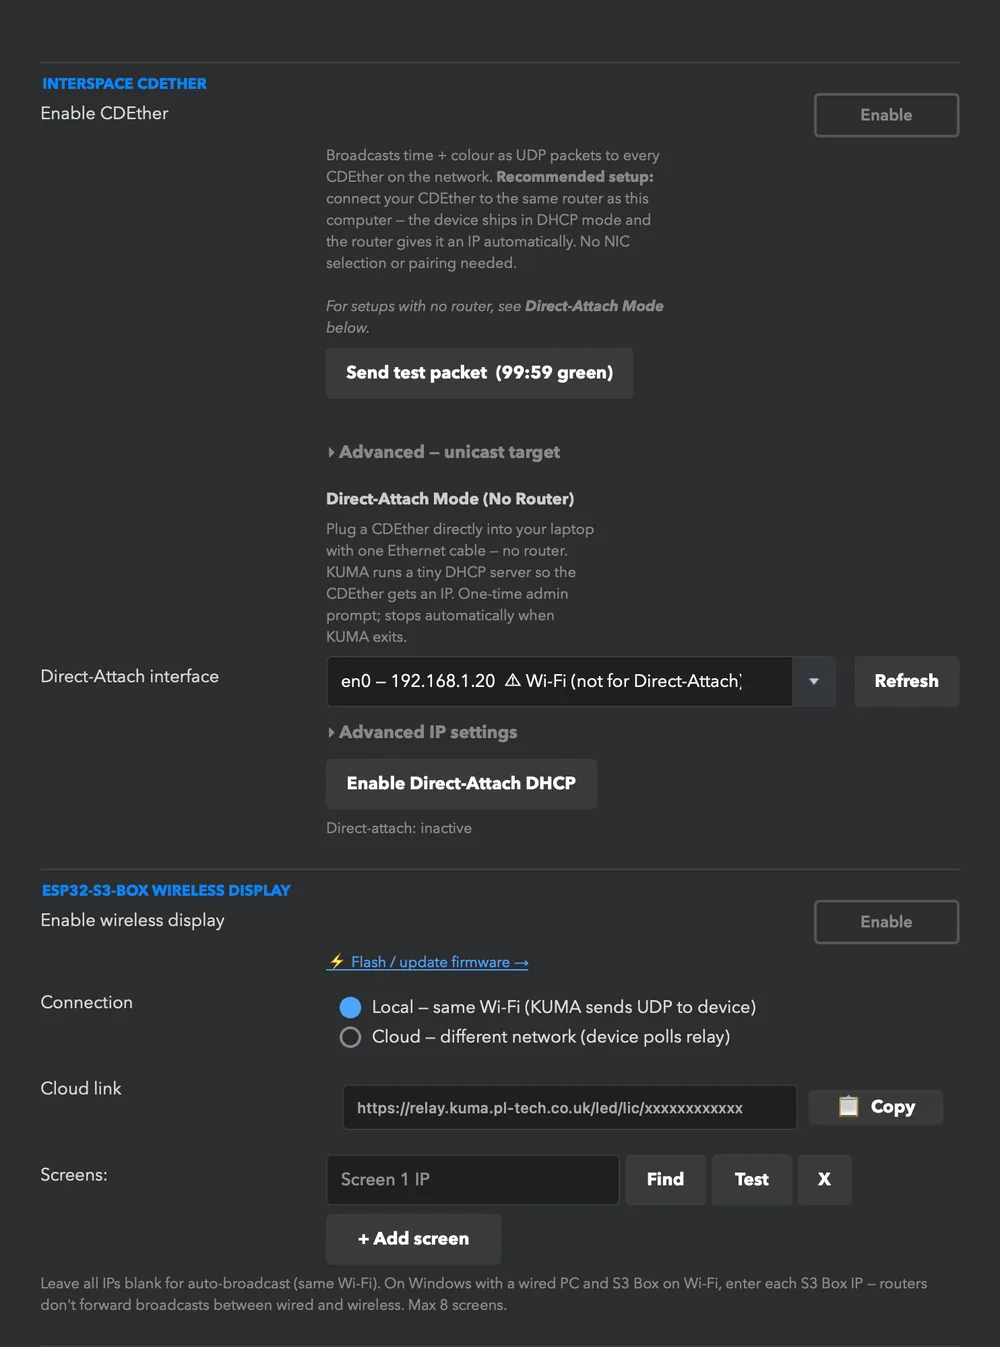
The Ulanzi TC001 (about $50) and the ESP32-S3-BOX-3 (about $40) mirror the countdown, zone colours, overtime blink, progress and messages over Wi-Fi, without cables or extra software. Flash them once from the browser (Chrome or Edge) on the flasher pages, then connect them in Settings → Devices: Local mode when they are on the same Wi-Fi, Cloud mode for another network (the device polls a Poll URL you copy from KUMA). Ulanzi extras: Rainbow text during overtime, Rotate 180° for upside-down mounting, brightness, default and overtime backgrounds. Button controls of the TC001 and firmware updates are in the reference manual.
CDEther and Limitimer
CDEther: plug it into the same router as your computer and enable the integration; KUMA broadcasts the time to every CDEther on the network. Without a router, Direct-Attach Mode lets KUMA hand the CDEther an address (it needs an administrator password once; allow 20–30 s). Limitimer: choose the RS-485 serial port (a USB adapter works; install the FTDI driver if the port is not listed).
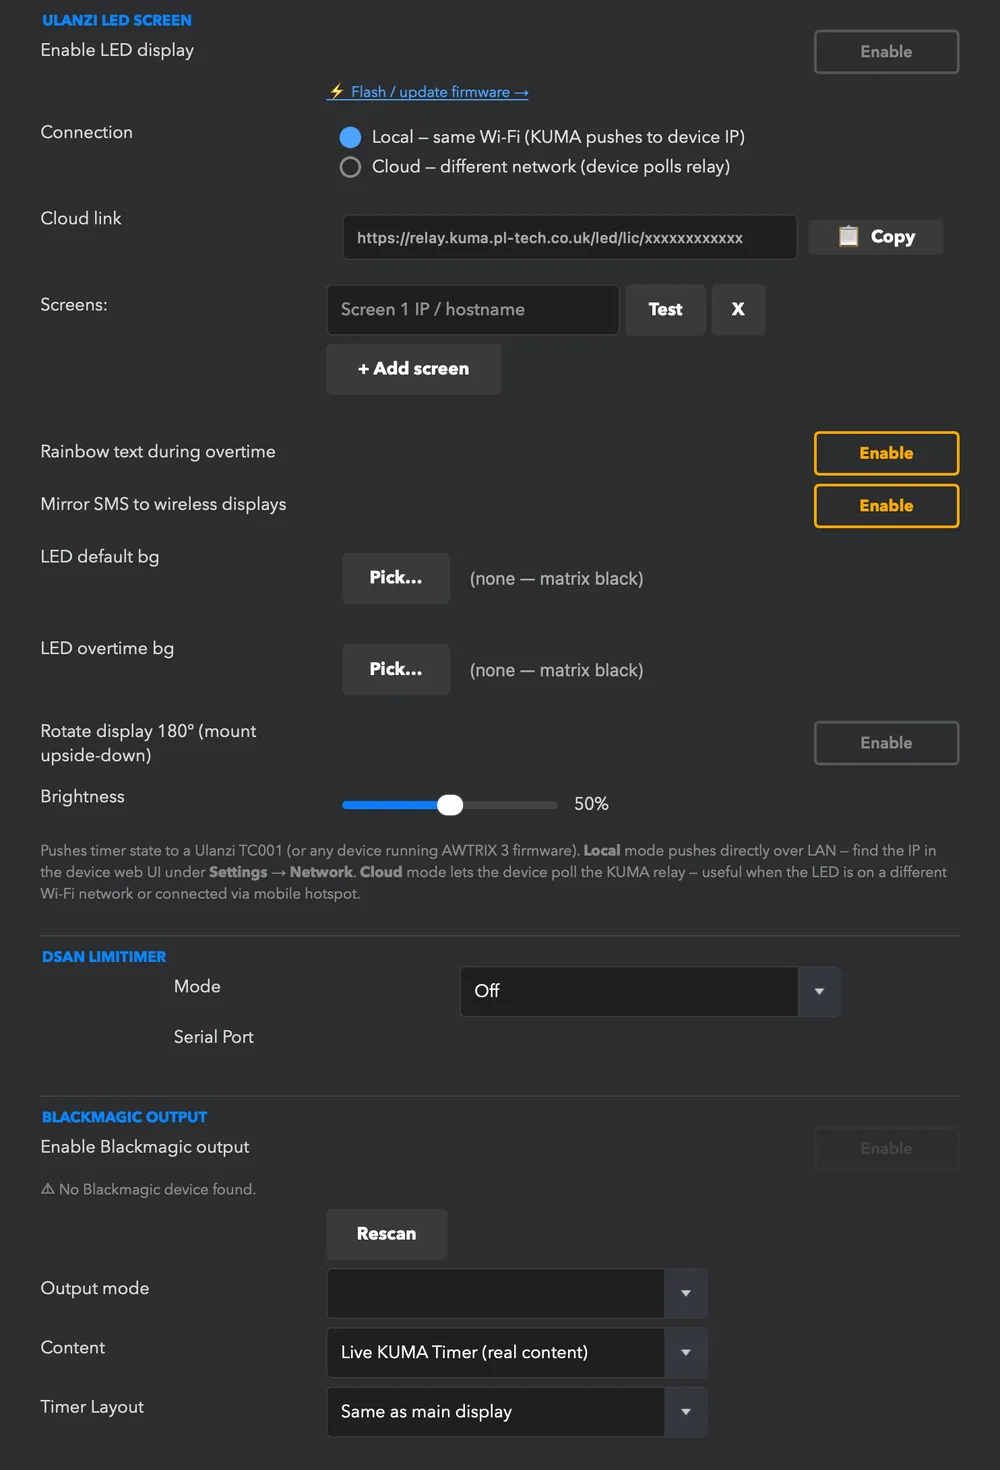
Controlling KUMA from elsewhere
| How | Good for |
|---|---|
| Browser pages on the same network | A tablet or second laptop. Three pages: mirror (view only), controller (basic transport) and admin (everything). |
| KUMA Companion app (iPhone, iPad, Android) | The show caller at front of house or in the gallery. Free with a Full licence. |
| Bitfocus Companion (Stream Deck, Companion Satellite) | Hardware buttons and feedback. |
| OSC / TCP / UDP | QLab, Watchout, lighting desks and other show control. |
| KUMA Dashboard | A touch control screen next to KUMA. See the guide. |
Switching on network access and a password
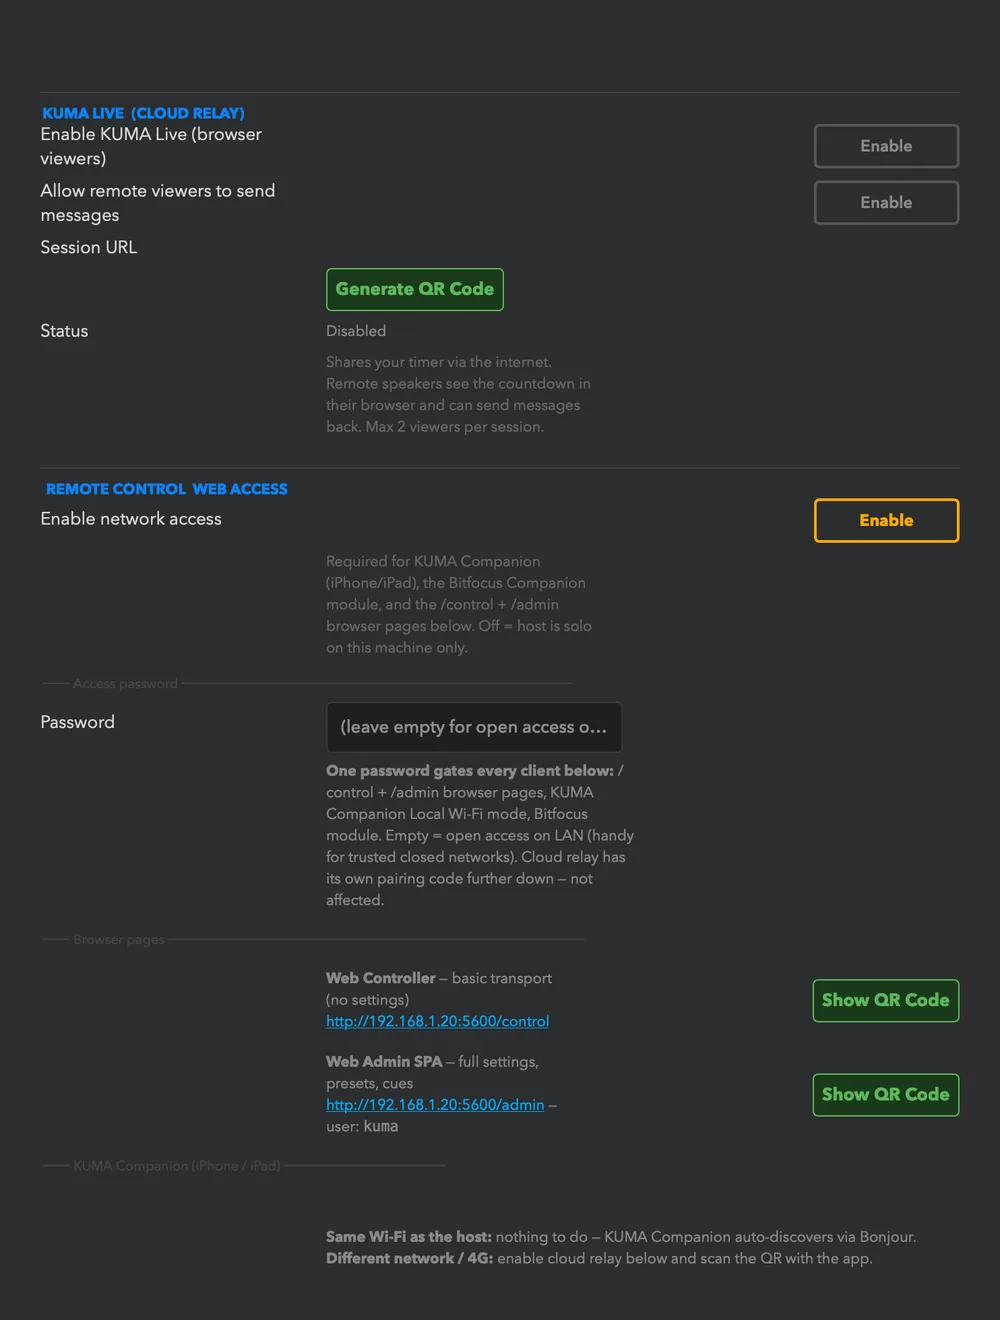
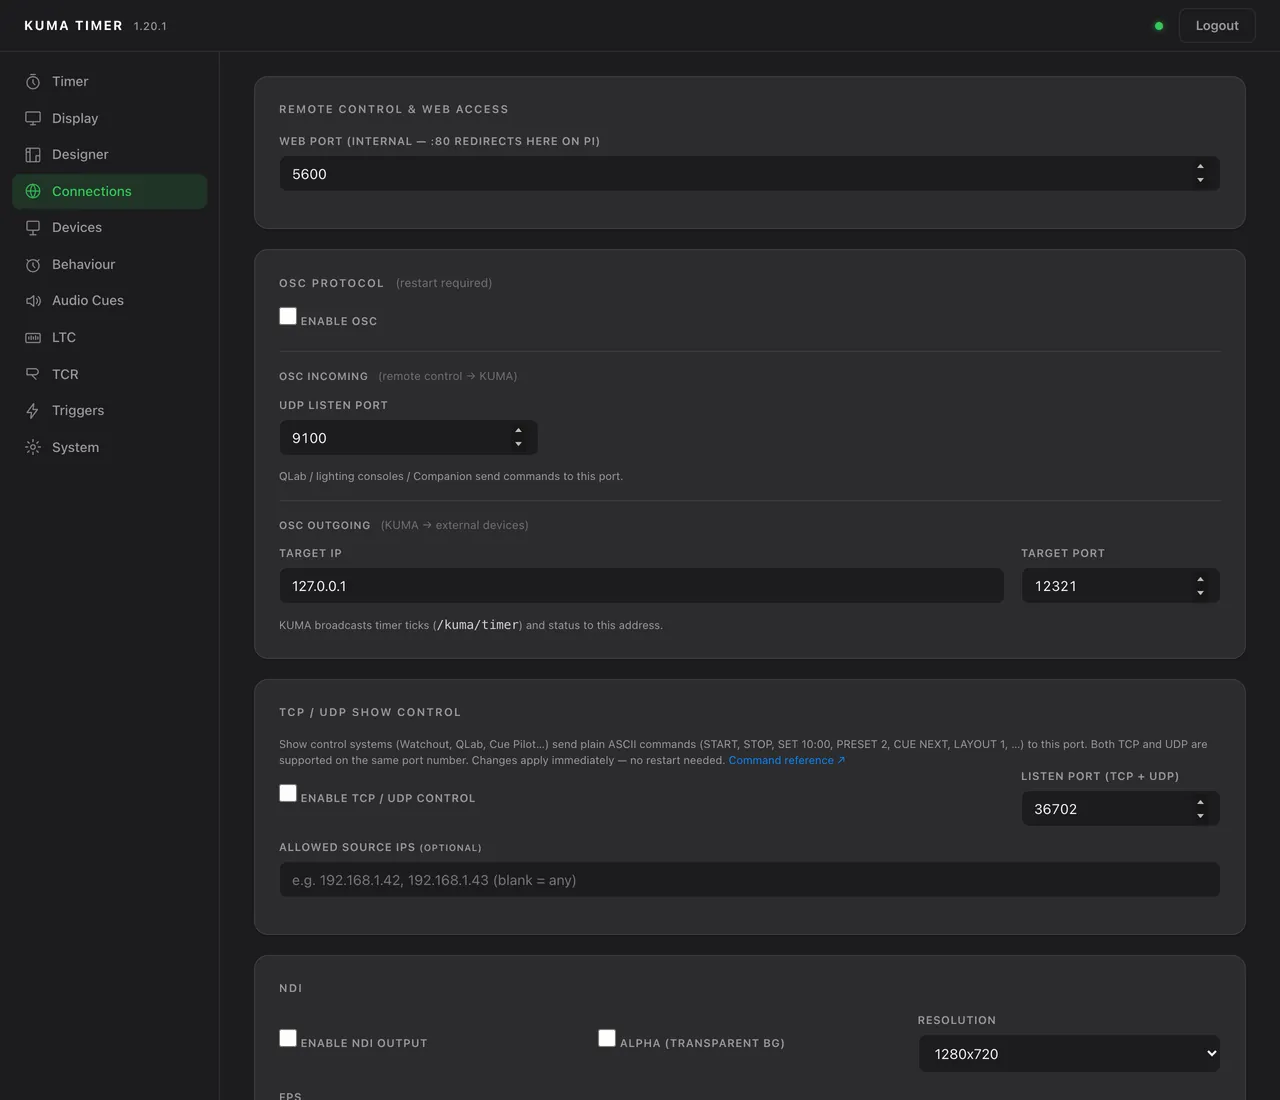
In Settings → Connections → Remote Control & Web Access turn on Enable network access. Set an access password: one password gates the controller and admin pages, the Companion app on local Wi-Fi and the Bitfocus module. With no password, local clients are open (fine on a closed show network; set one on a shared network). The settings page lists the exact addresses and QR codes for the pages below.
Web mirror
Open http://<computer-ip>:5555/ in any browser to see a copy of the display: a confidence monitor on a tablet or TV. If several KUMA hosts share a network give each its own port (5555, 5556, …).
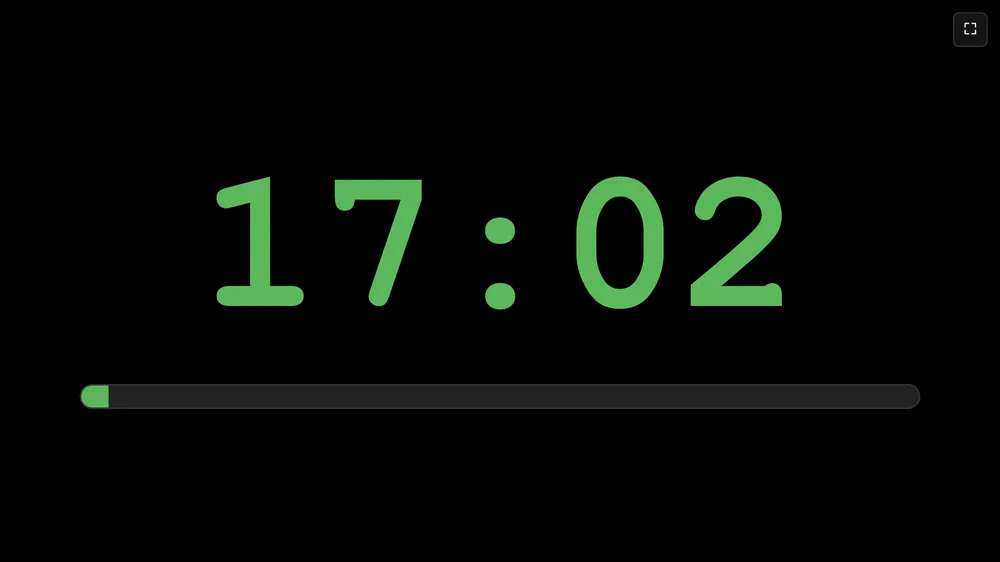
Web controller
/control is a phone-sized control page: timer, START / PAUSE / RESET / HIDE, ±1 minute, presets, previous and next cue, the cuesheet and a message form. It needs the access password (without one it stays locked) and cannot change settings.
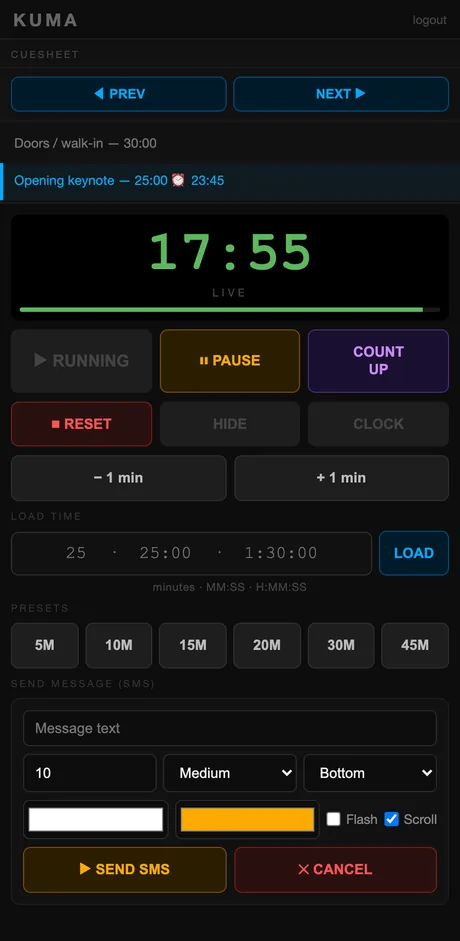
Web admin
/admin is the whole control window and the whole Settings dialog in a browser, so a director on a tablet can edit everything. Sign in as kuma with the access password (a fresh install uses kuma / kuma and shows a banner to change it). Tabs match the desktop Settings, plus a Designer and a System tab:
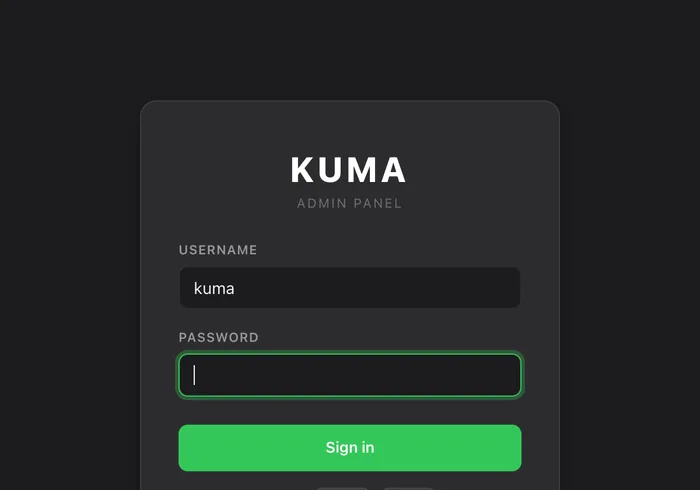
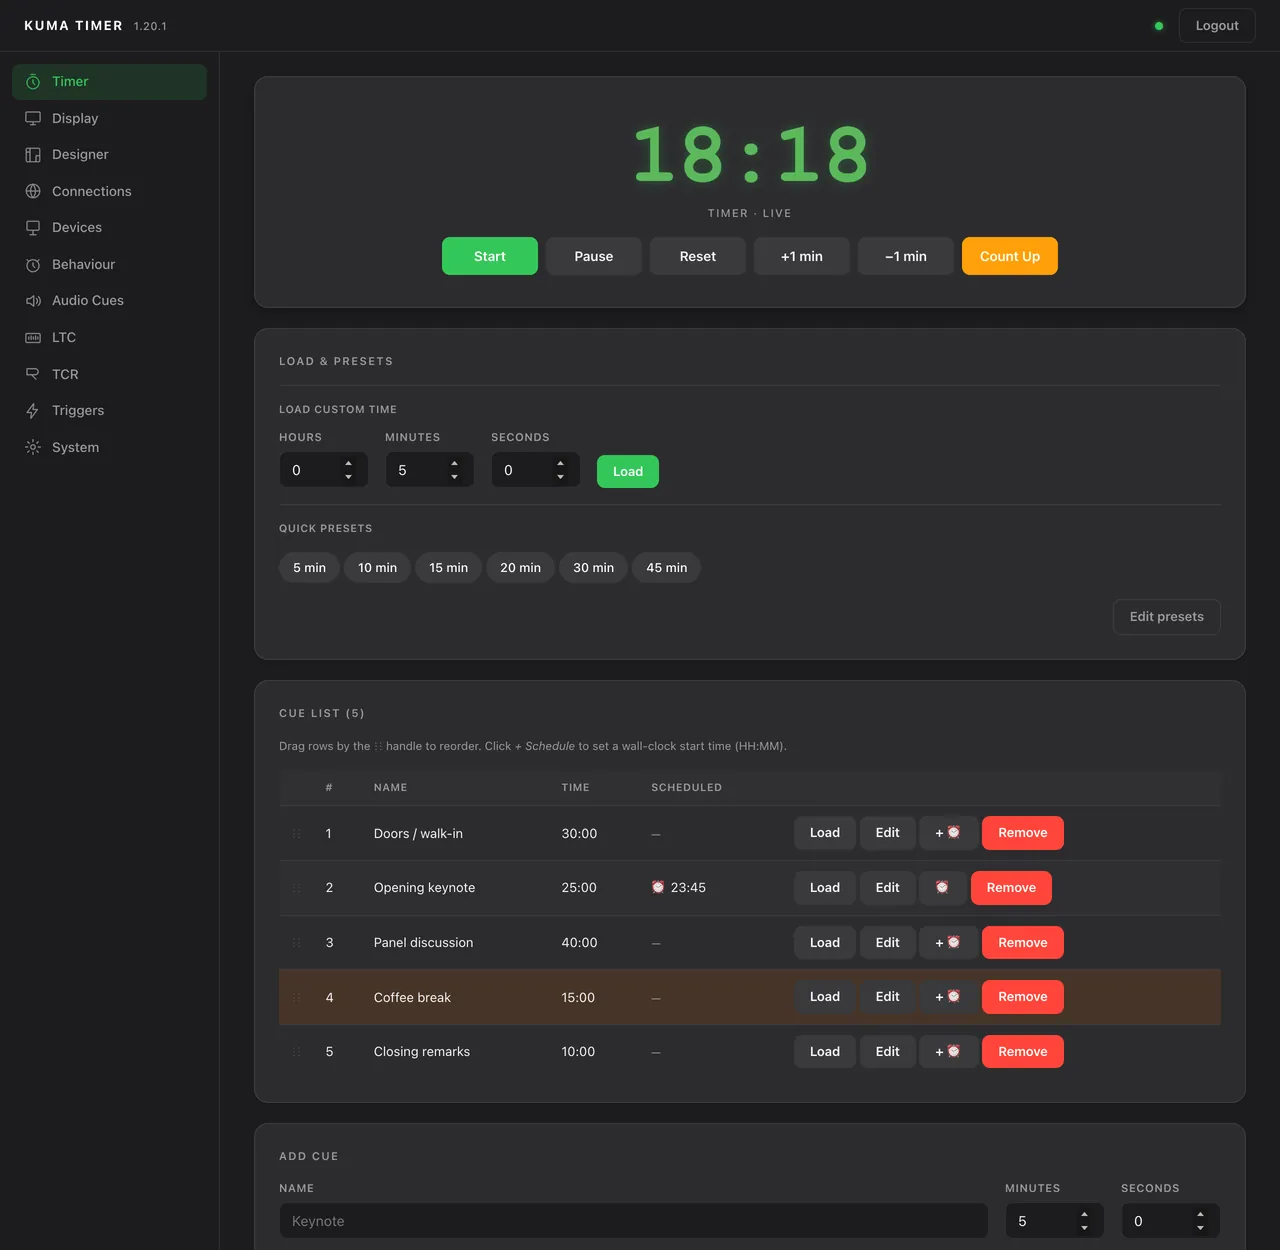
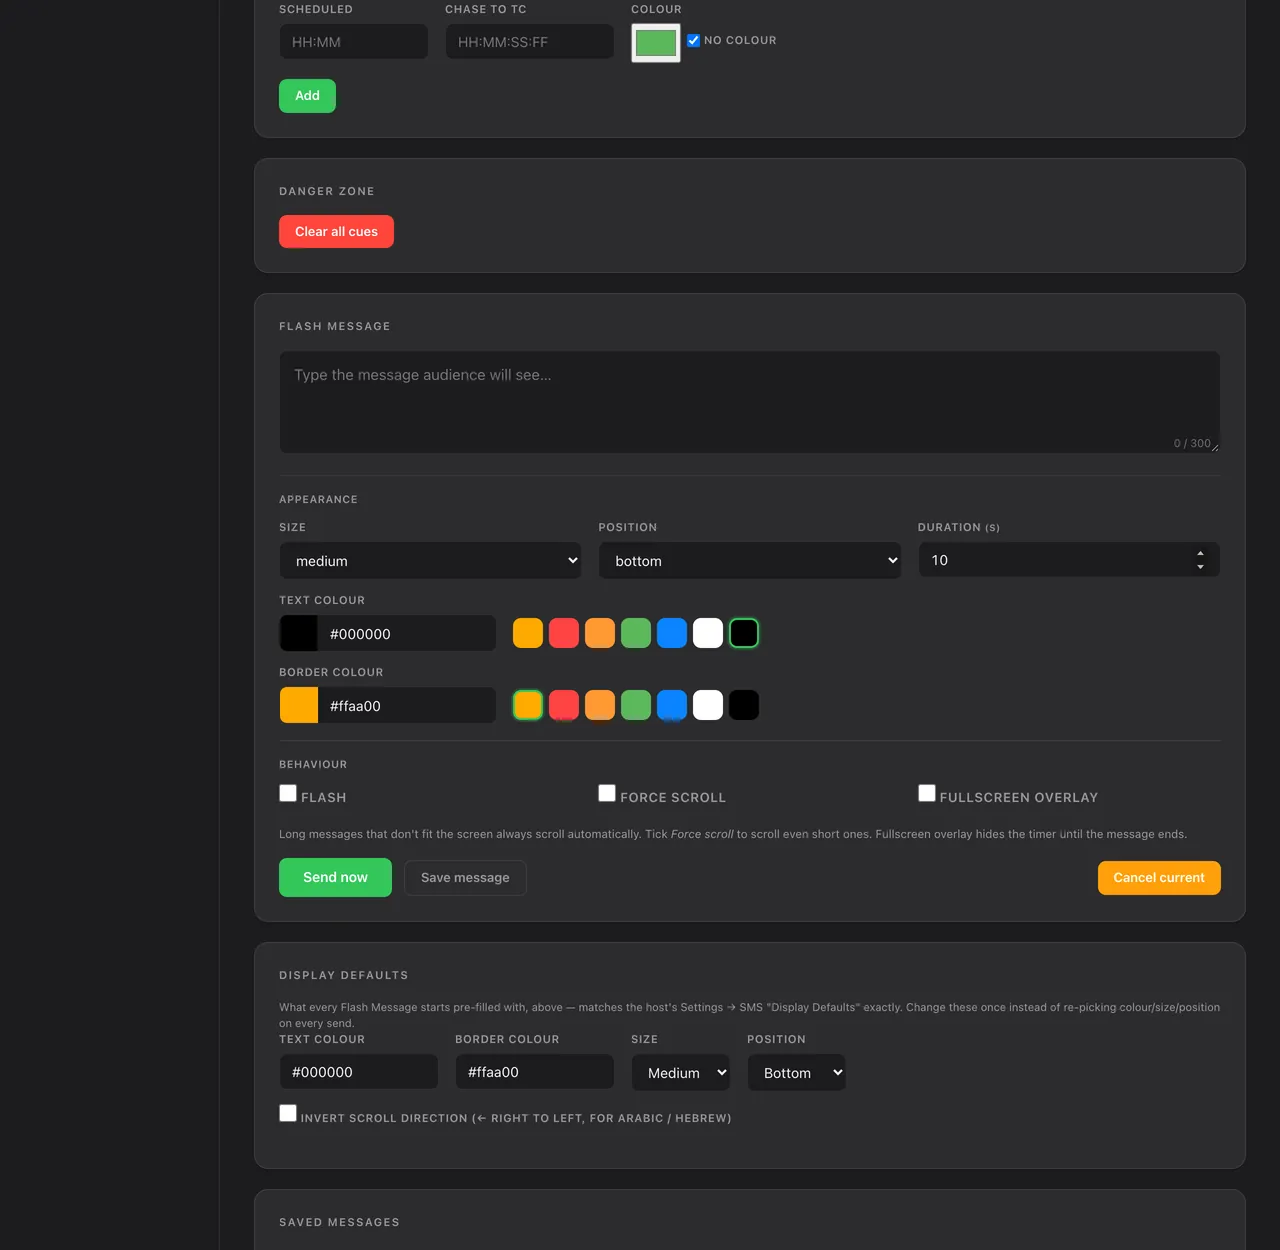
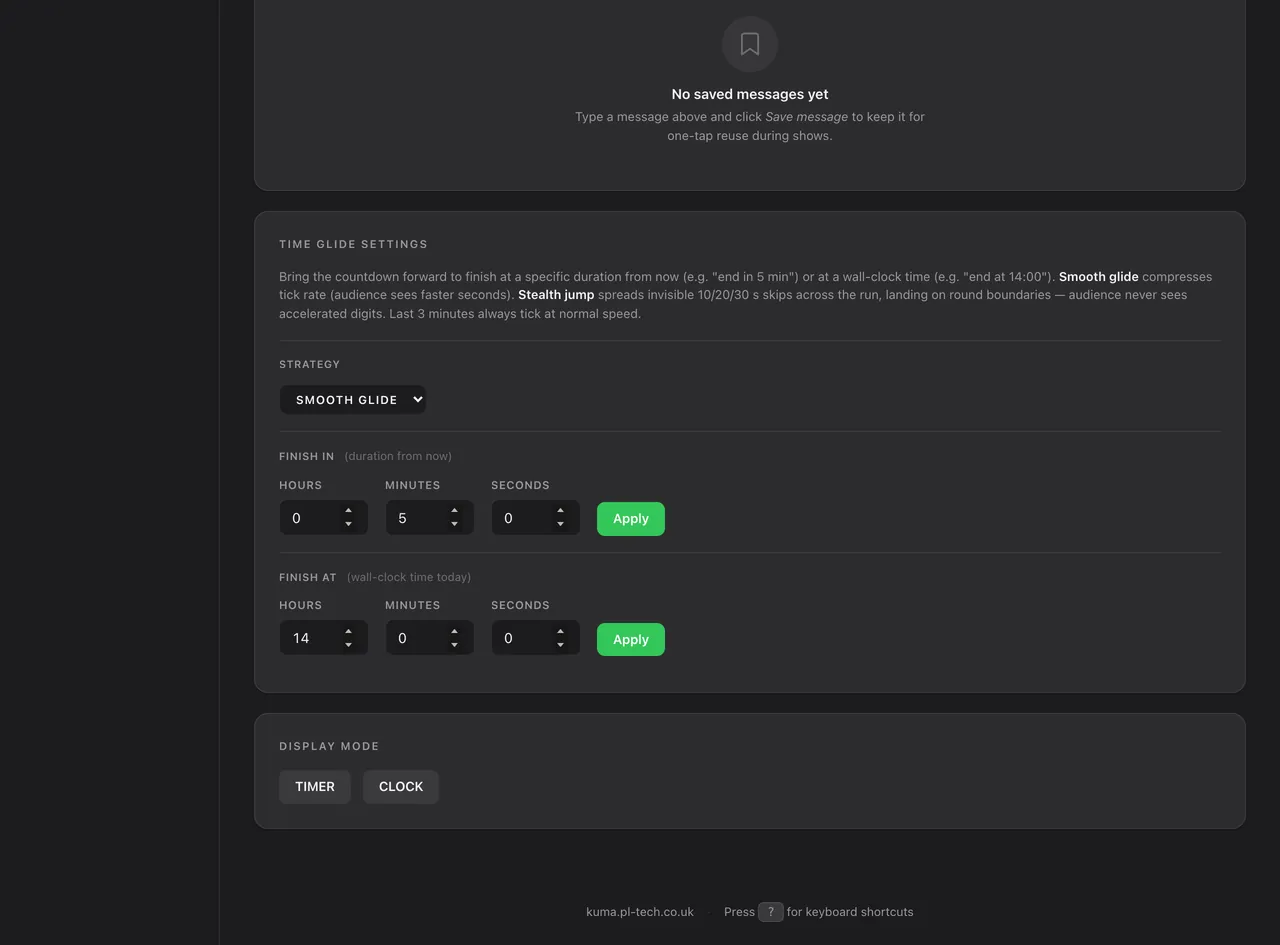
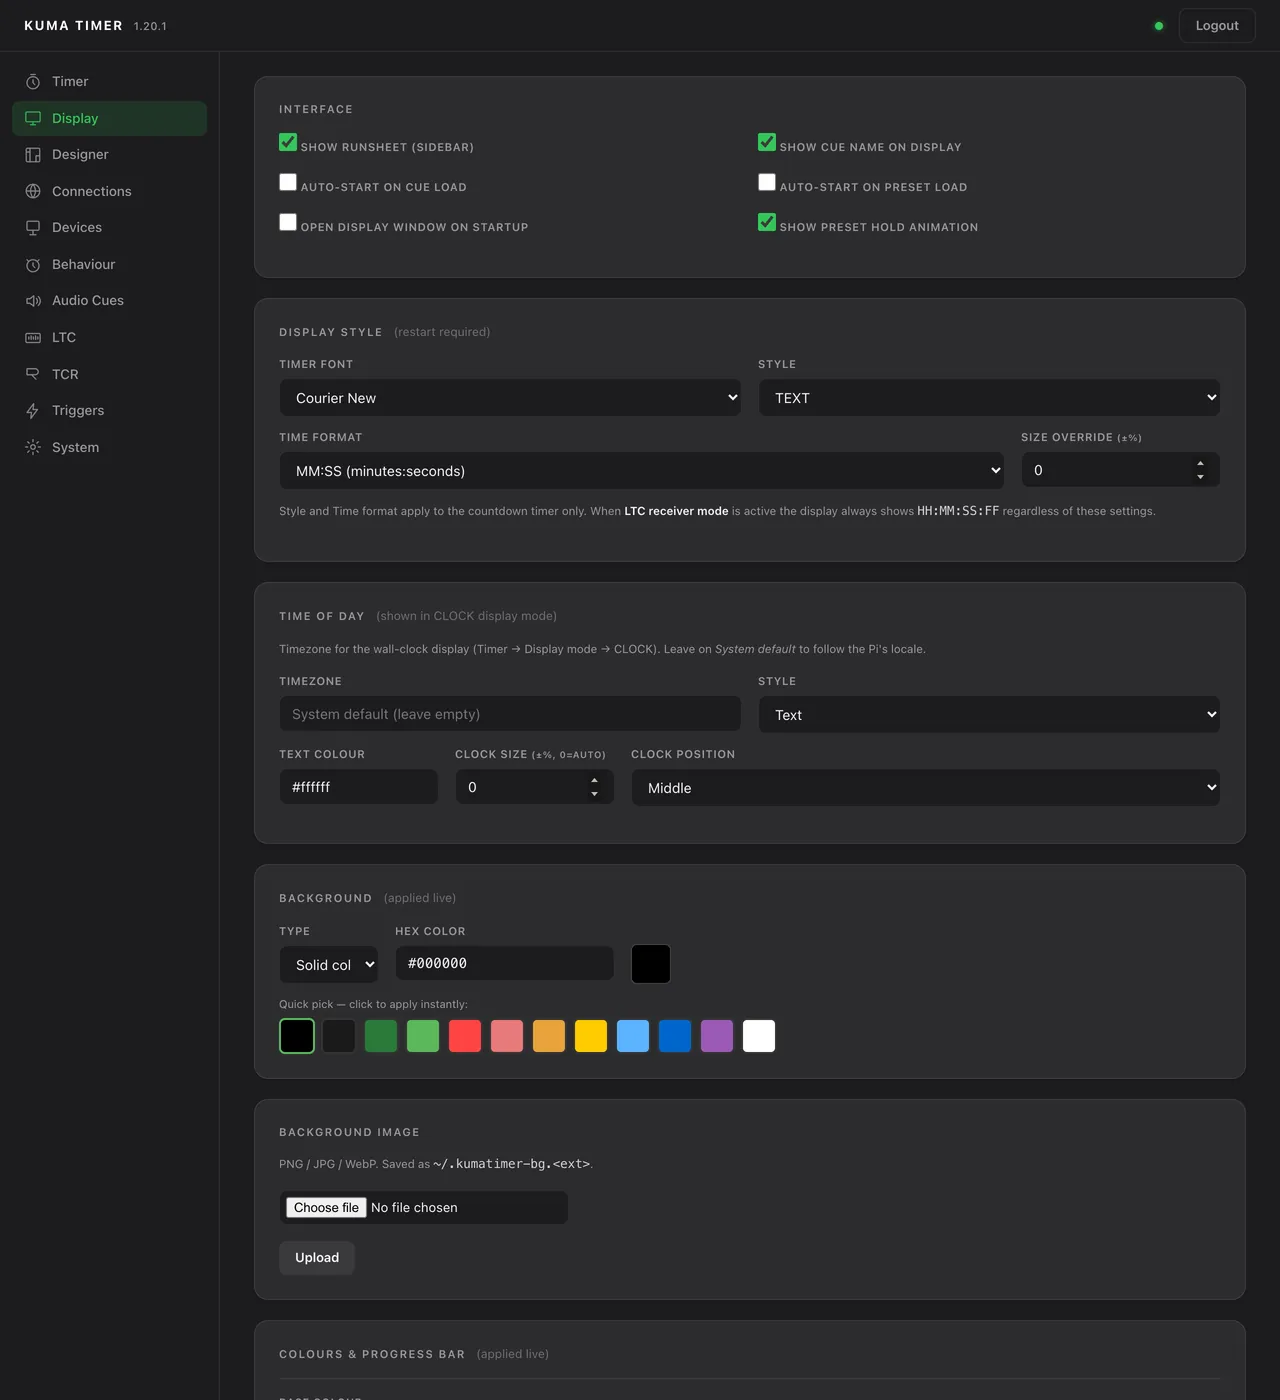
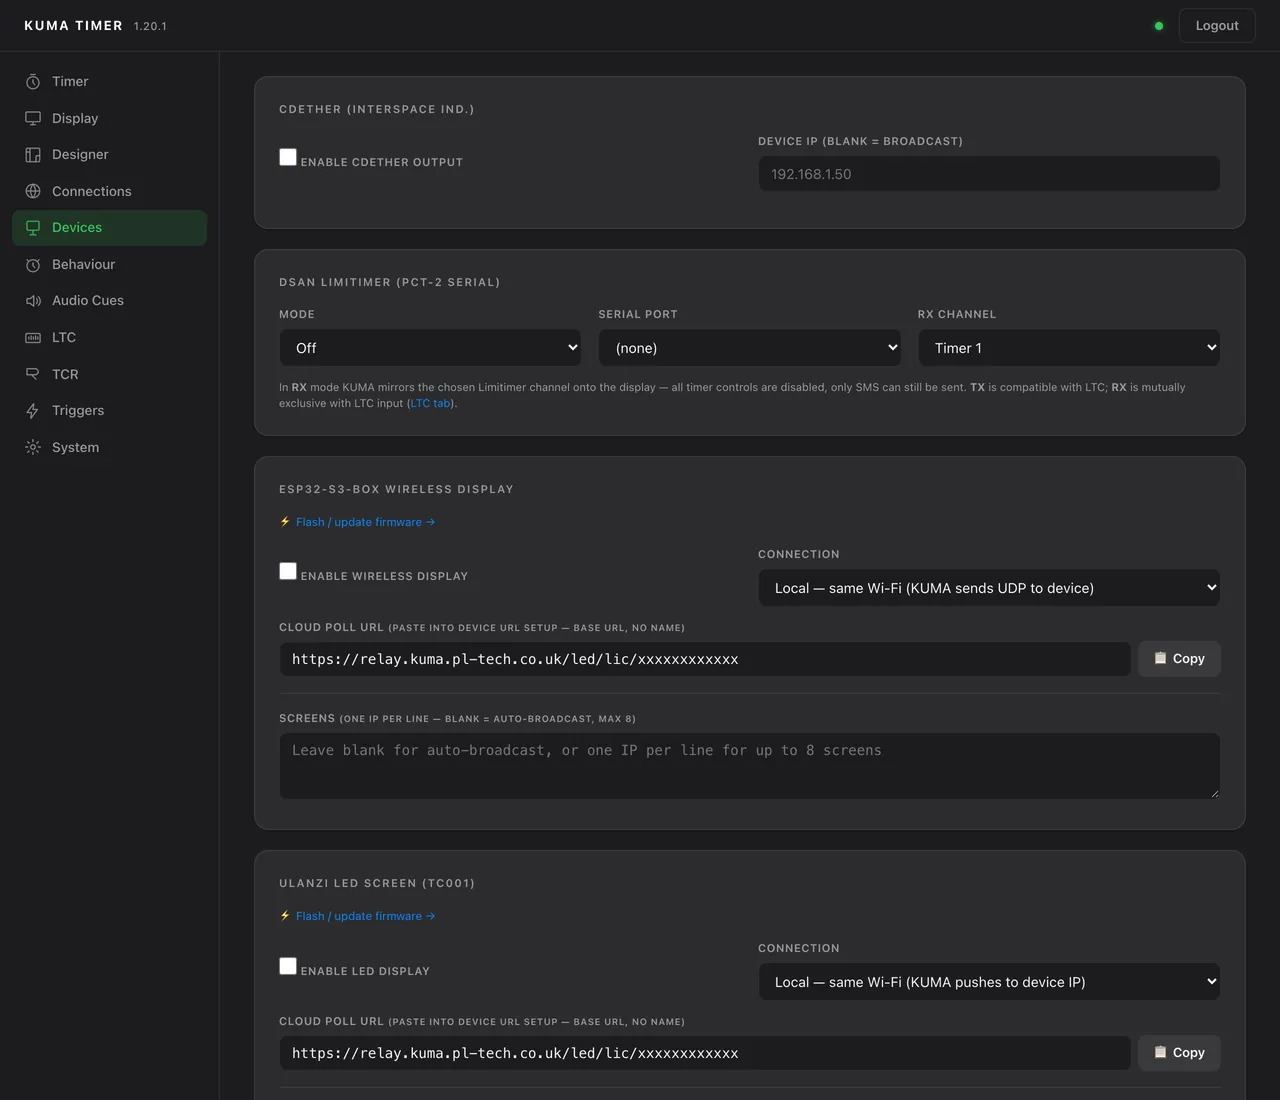
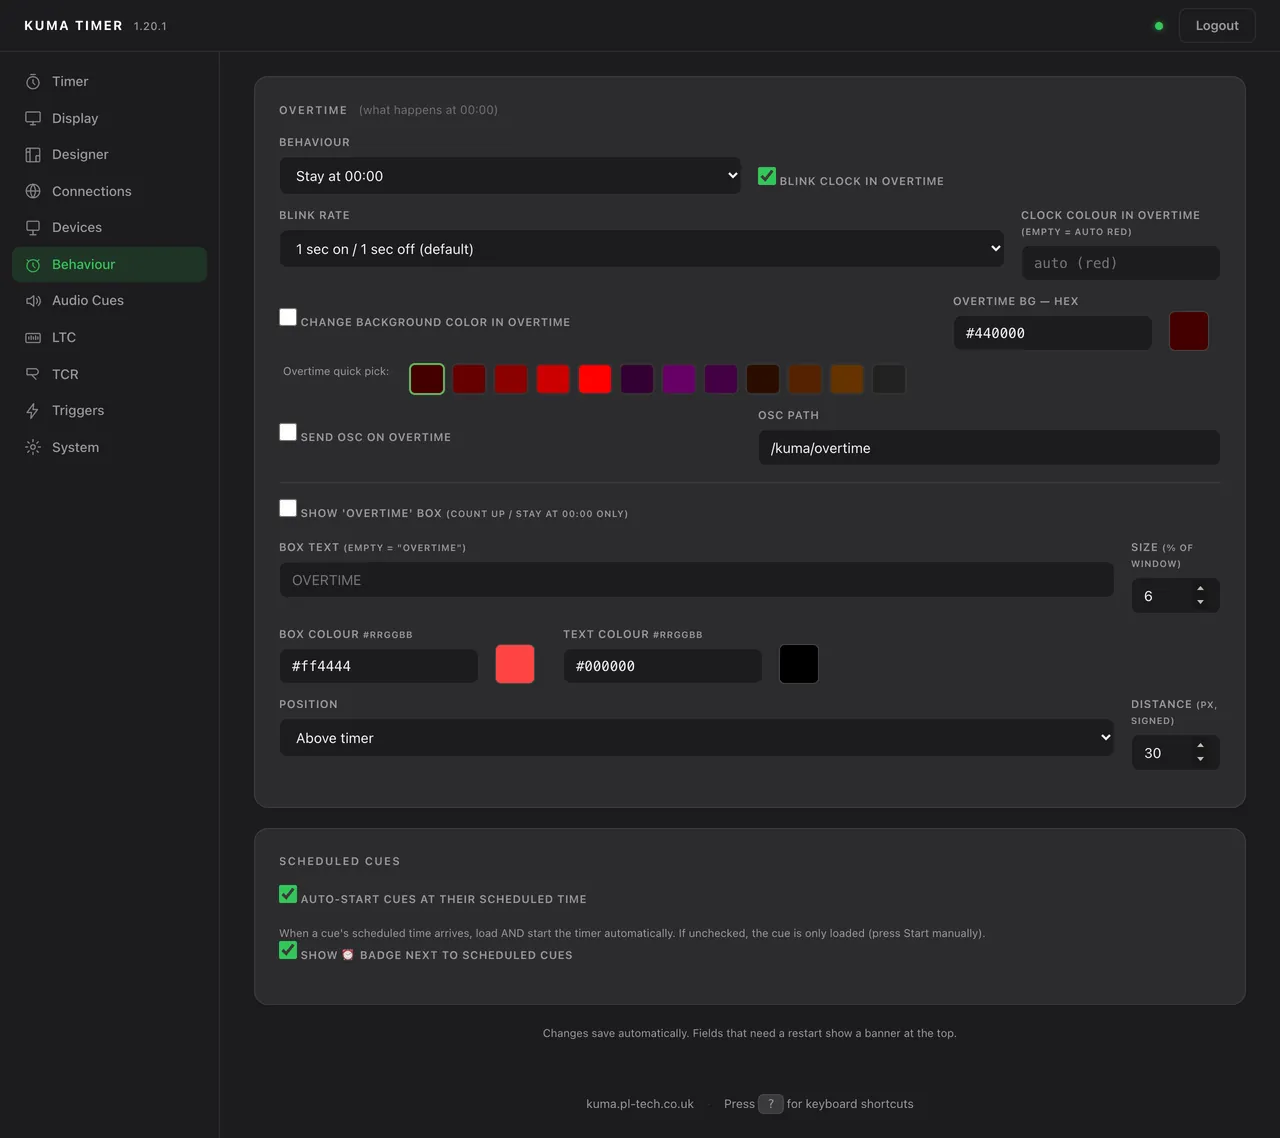
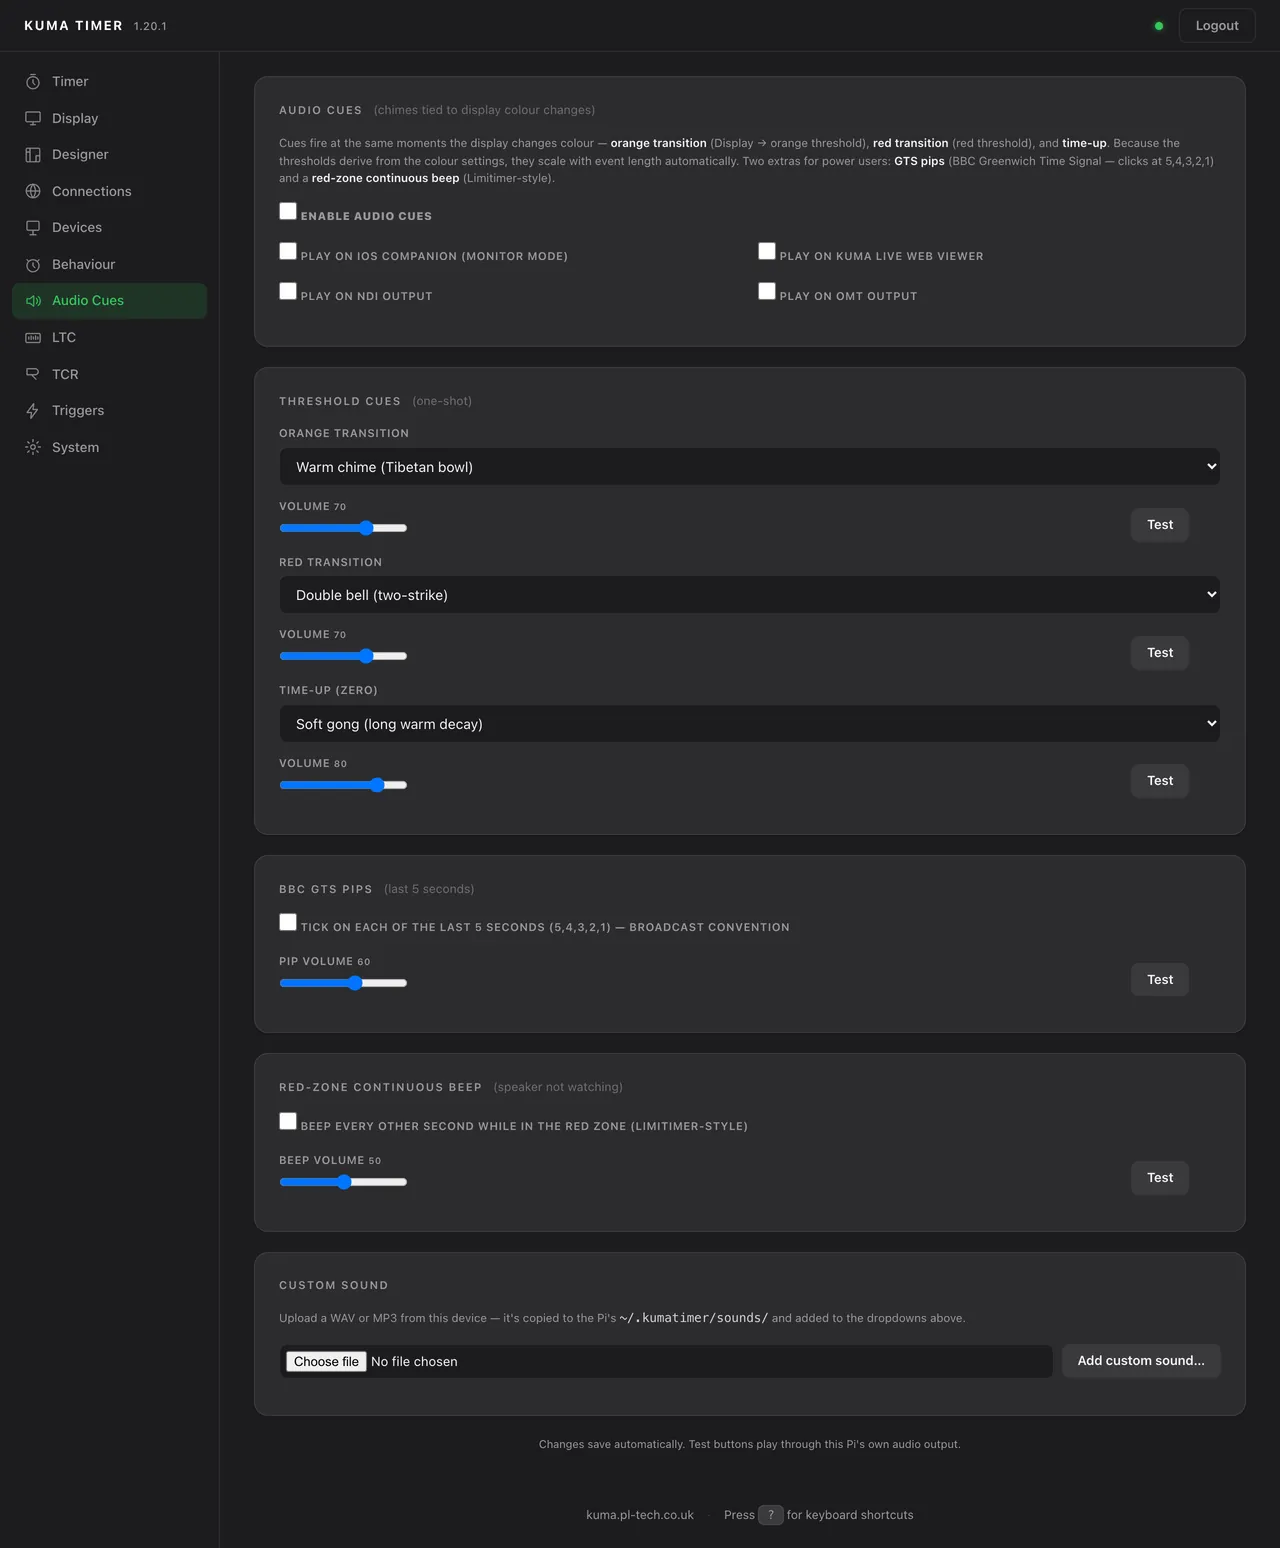
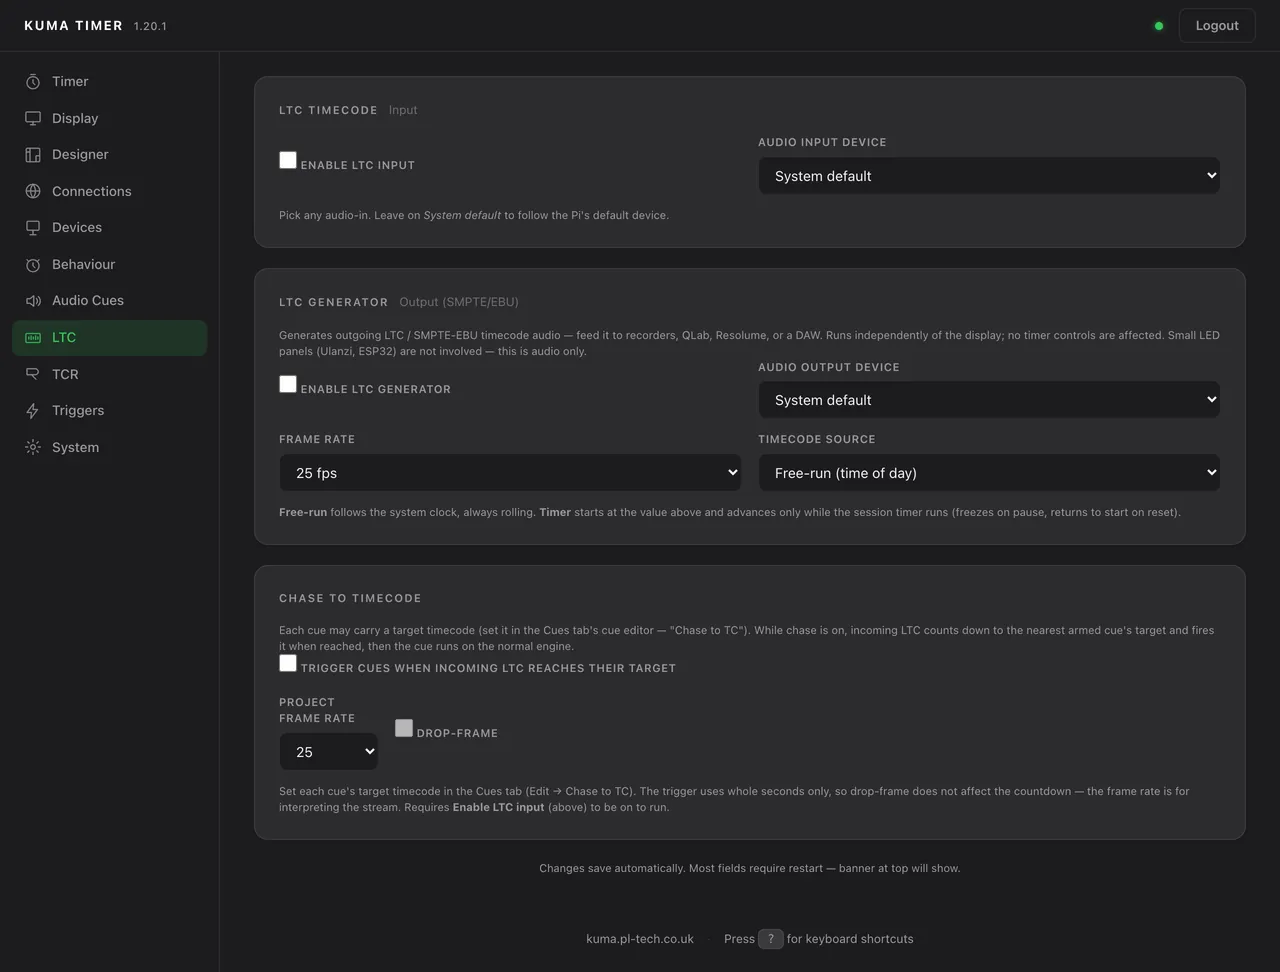
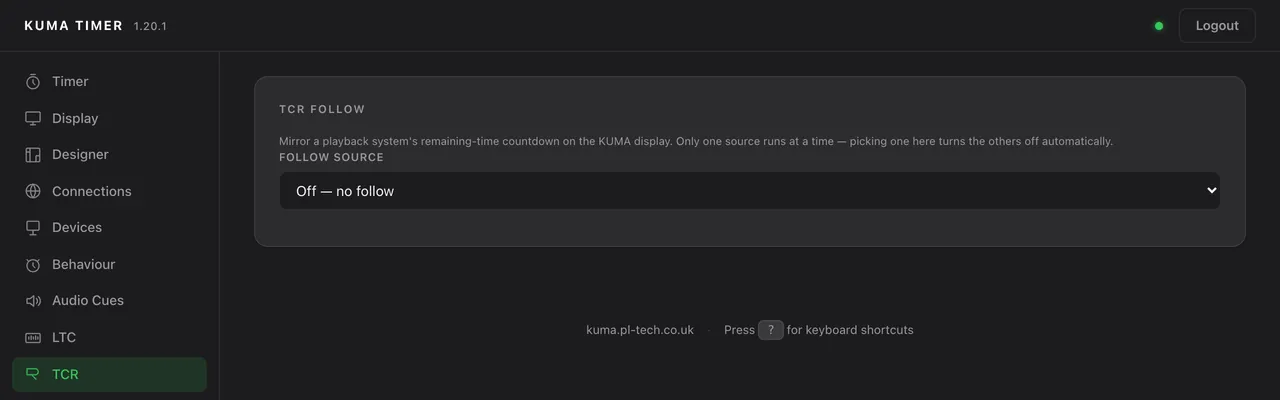
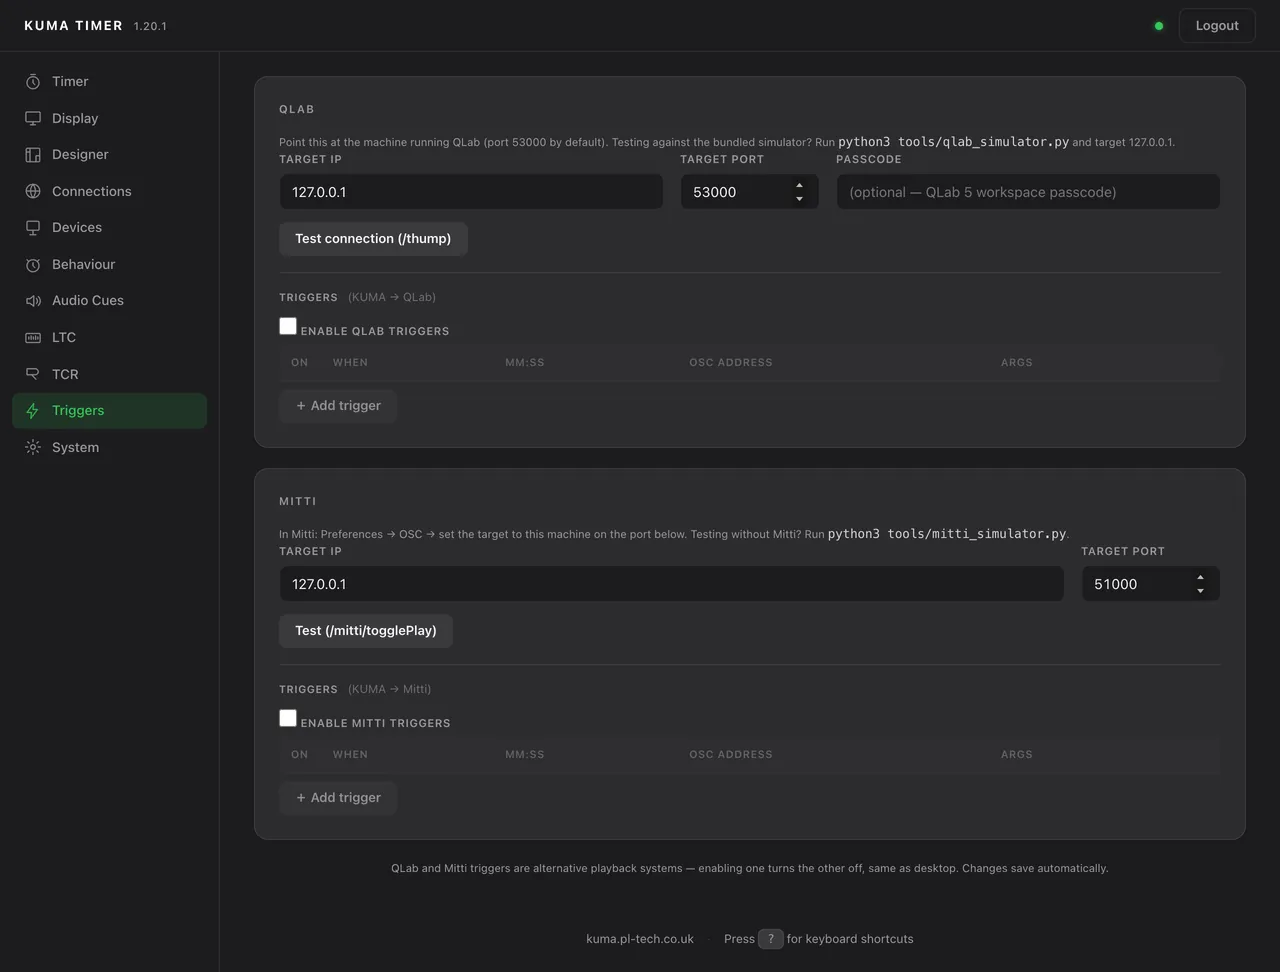
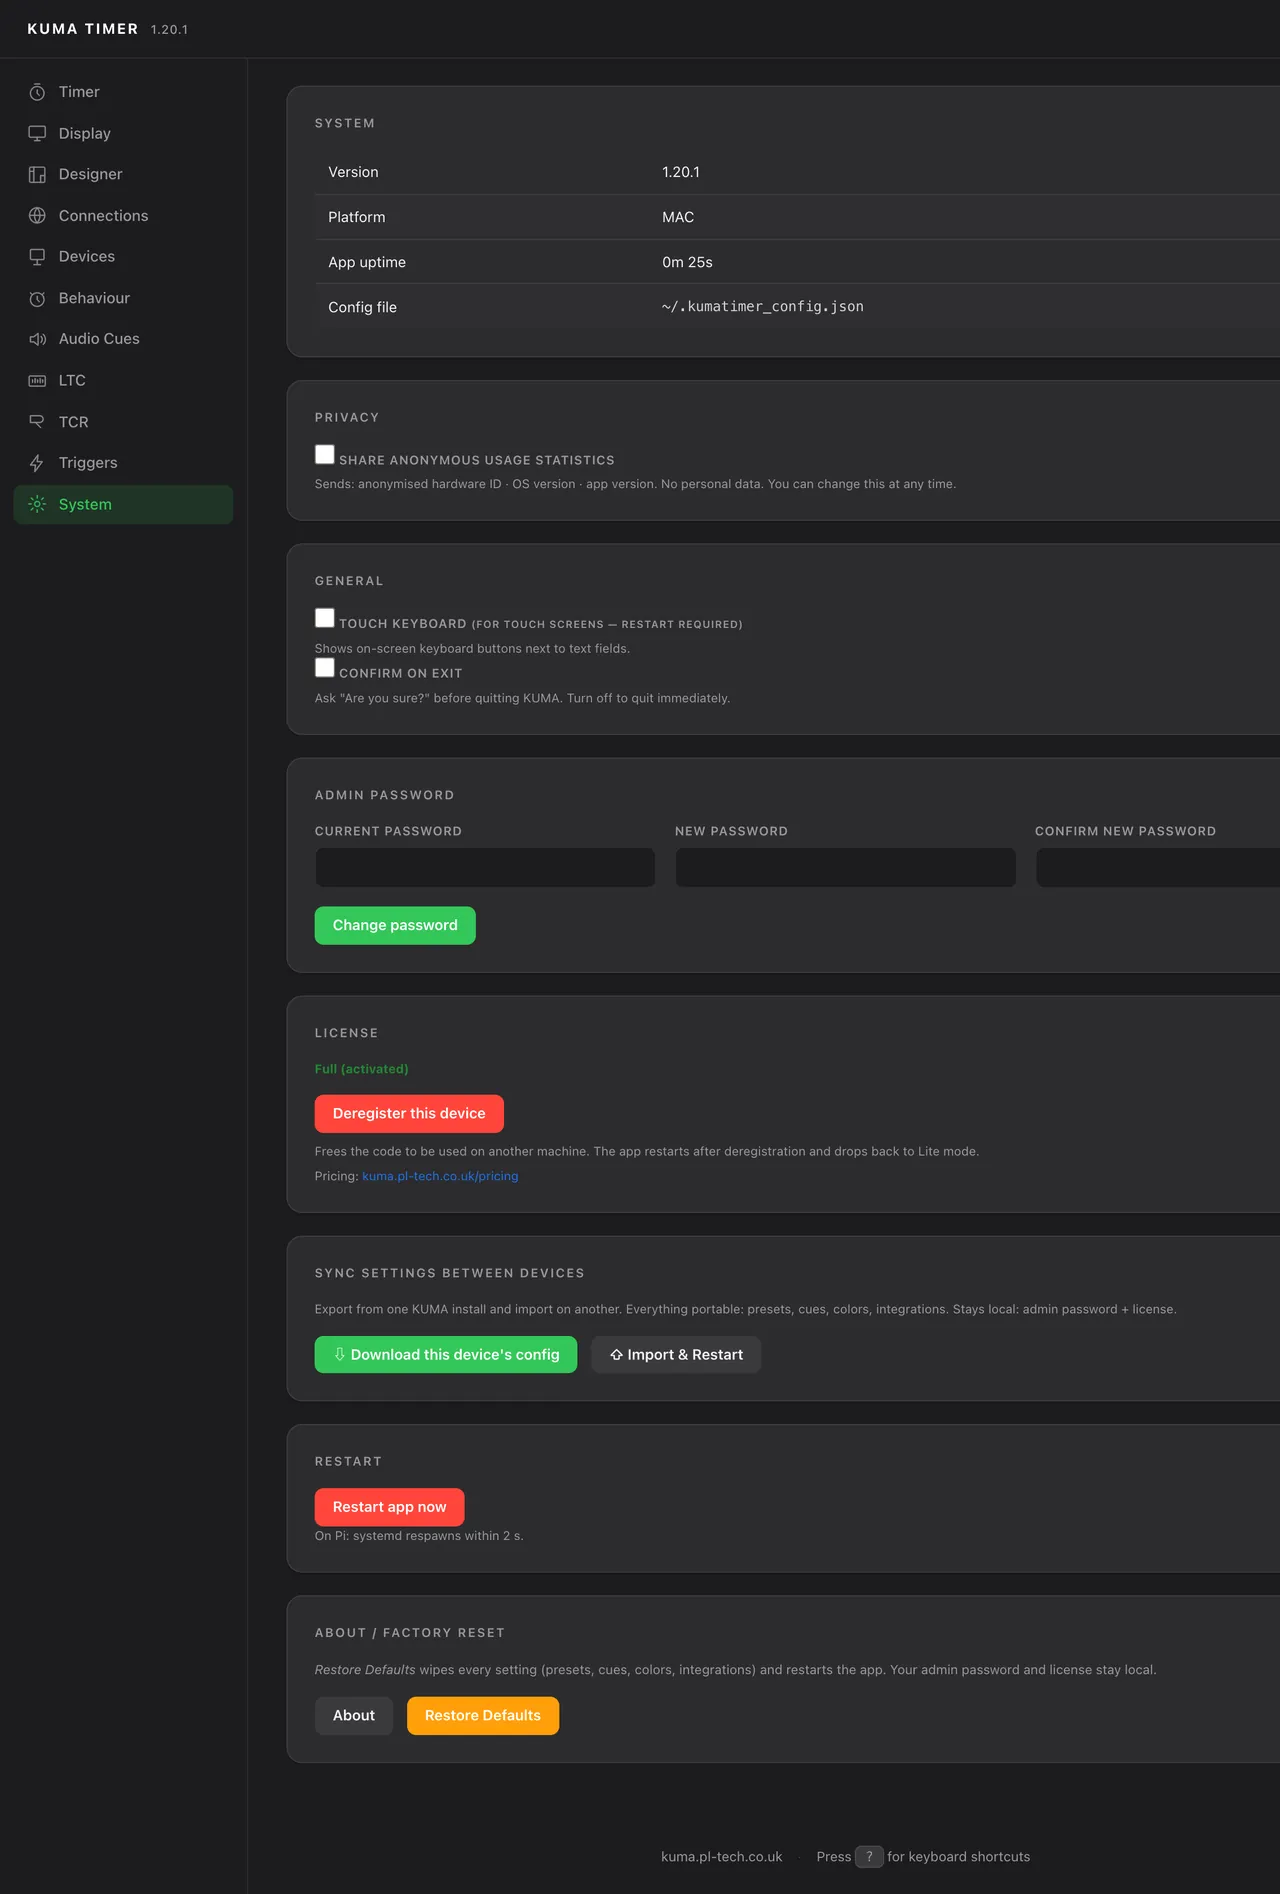
The System tab also holds Download this device's config and Import & Restart, the easy way to copy your presets, cues, colours and integrations from one computer to another (the password stays local).
KUMA Companion app (iPhone, iPad, Android)
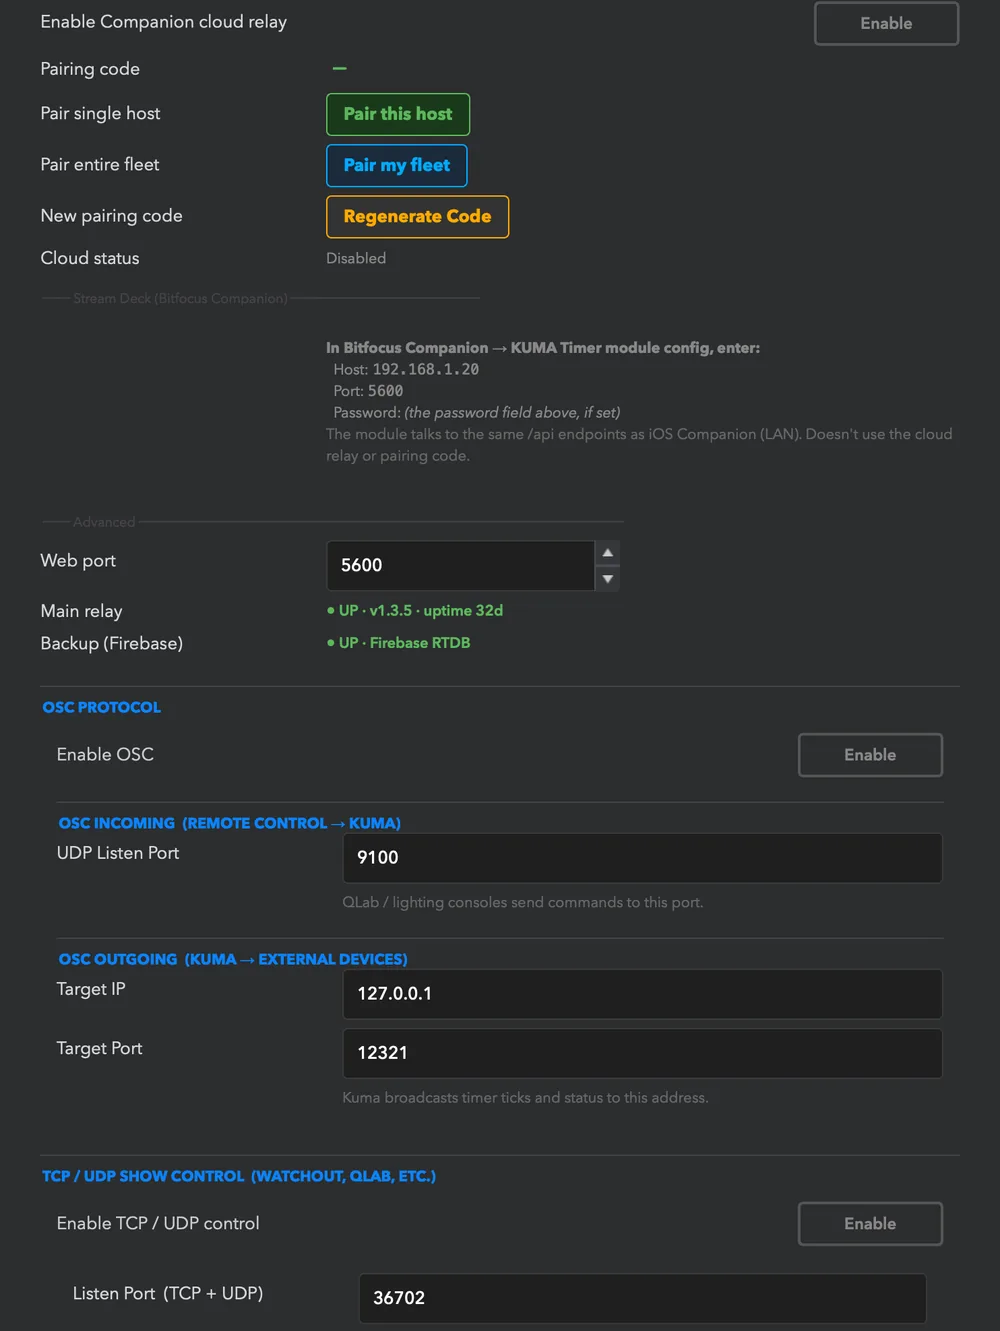
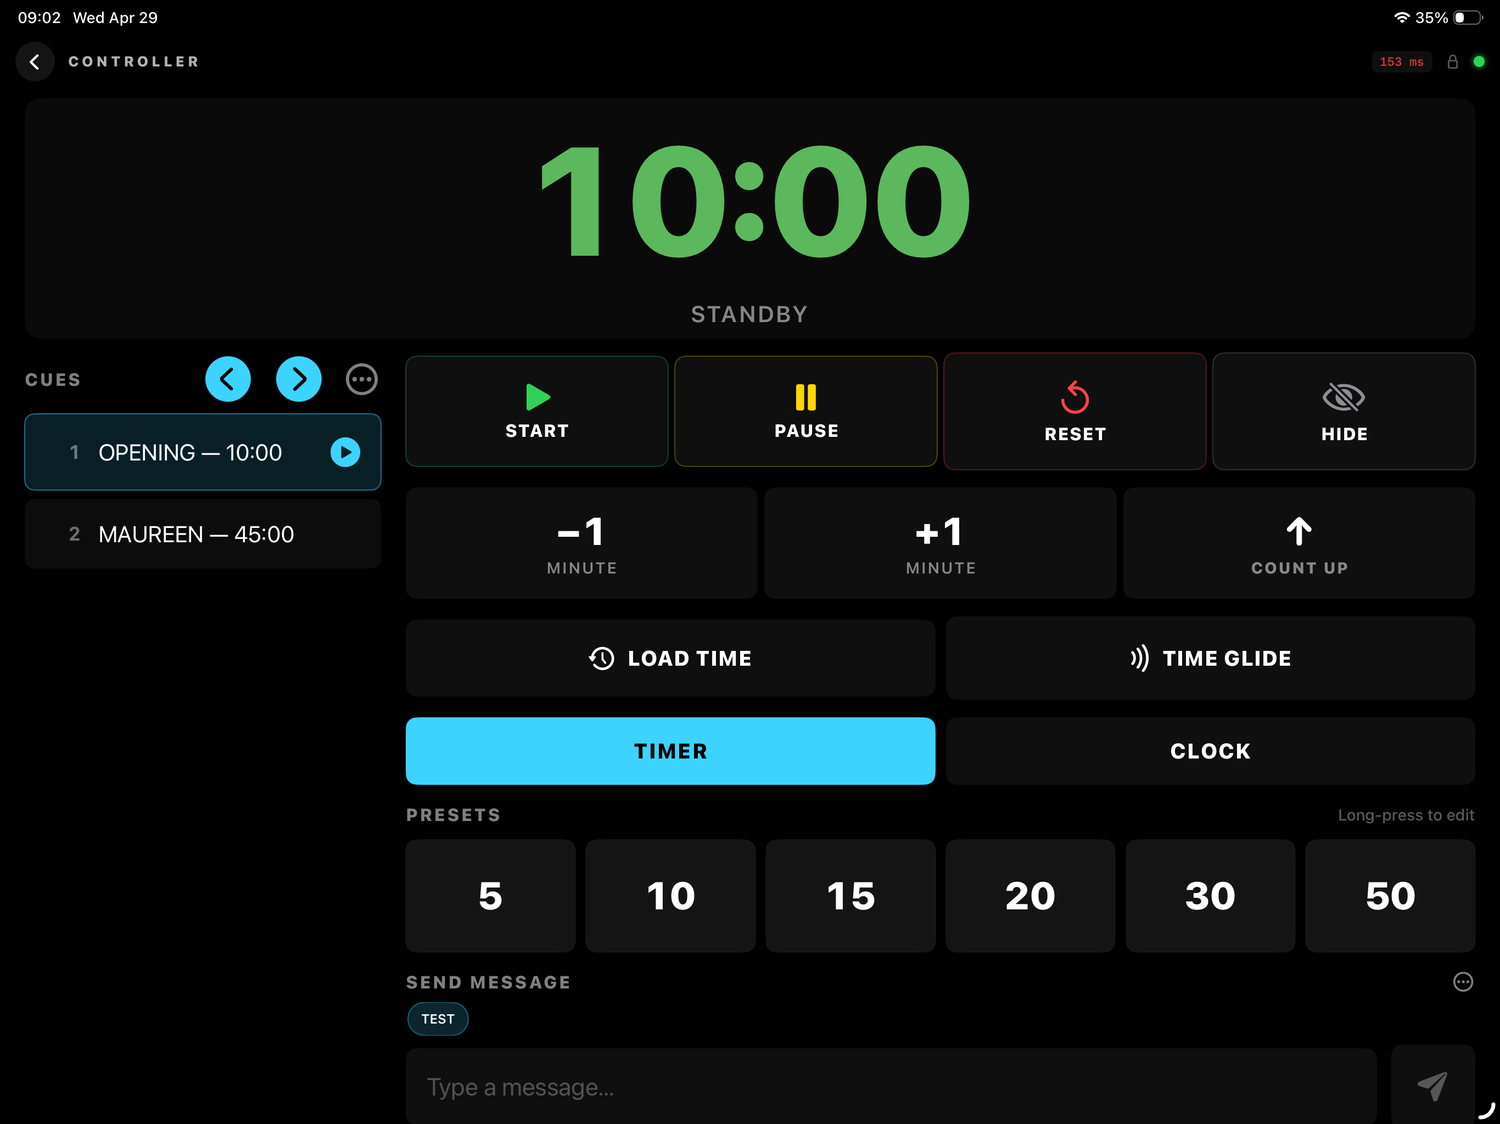
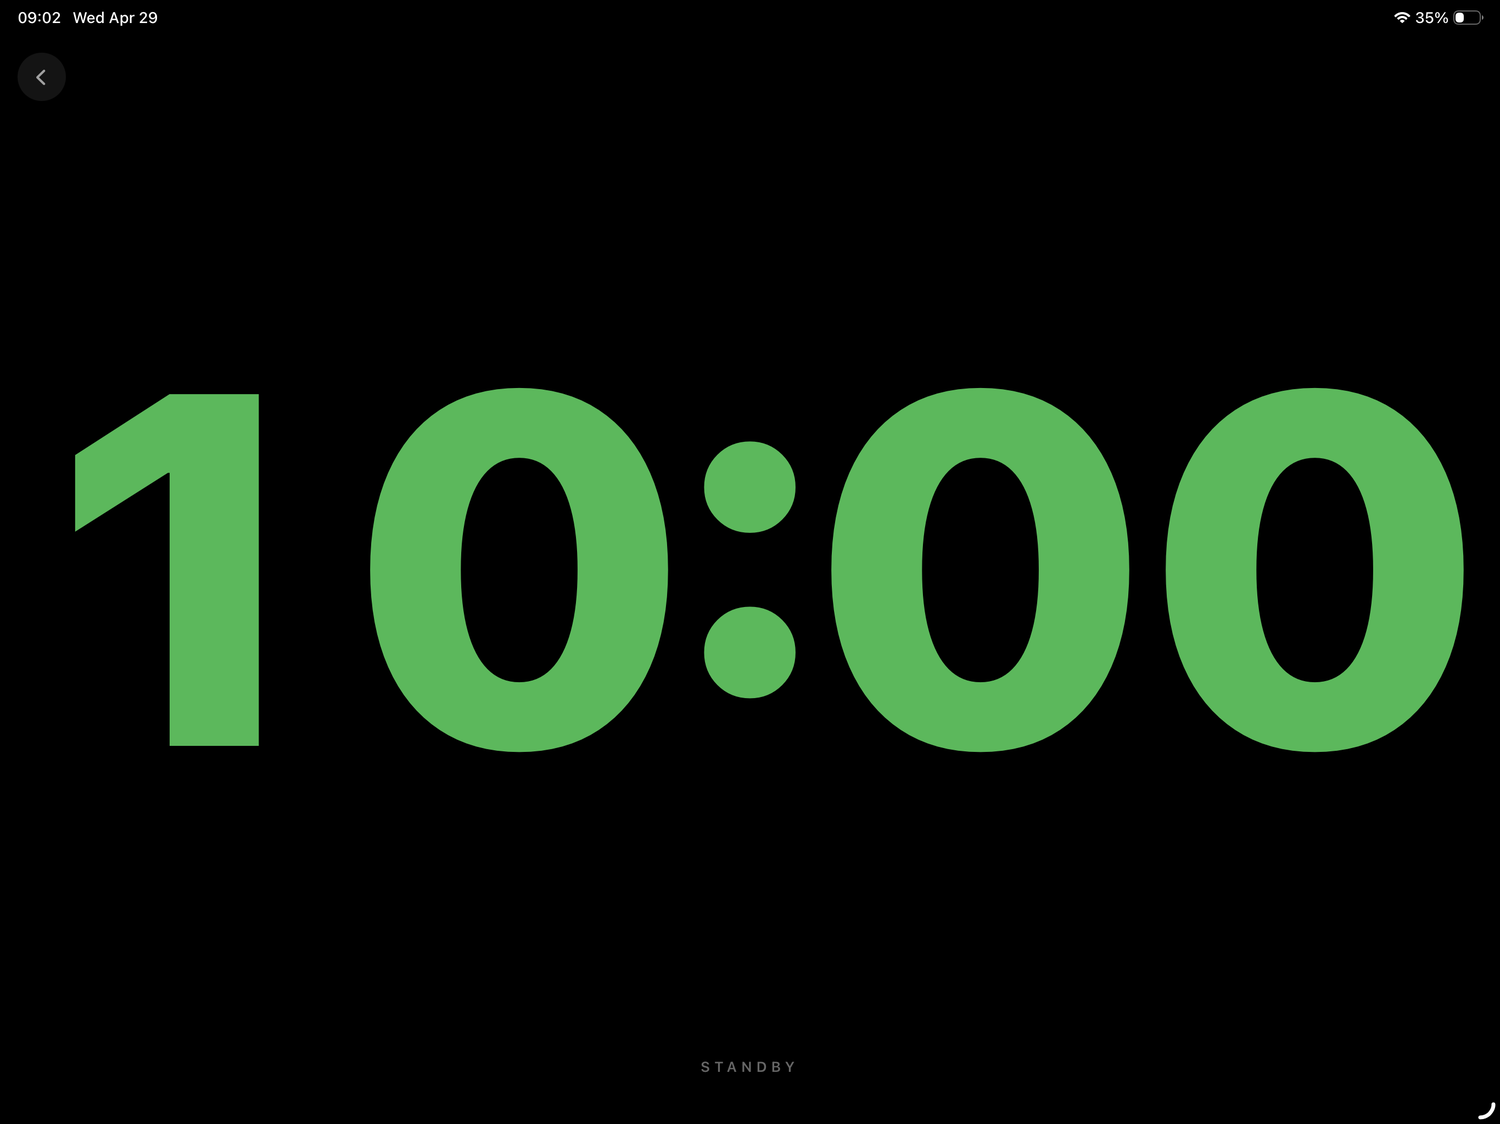
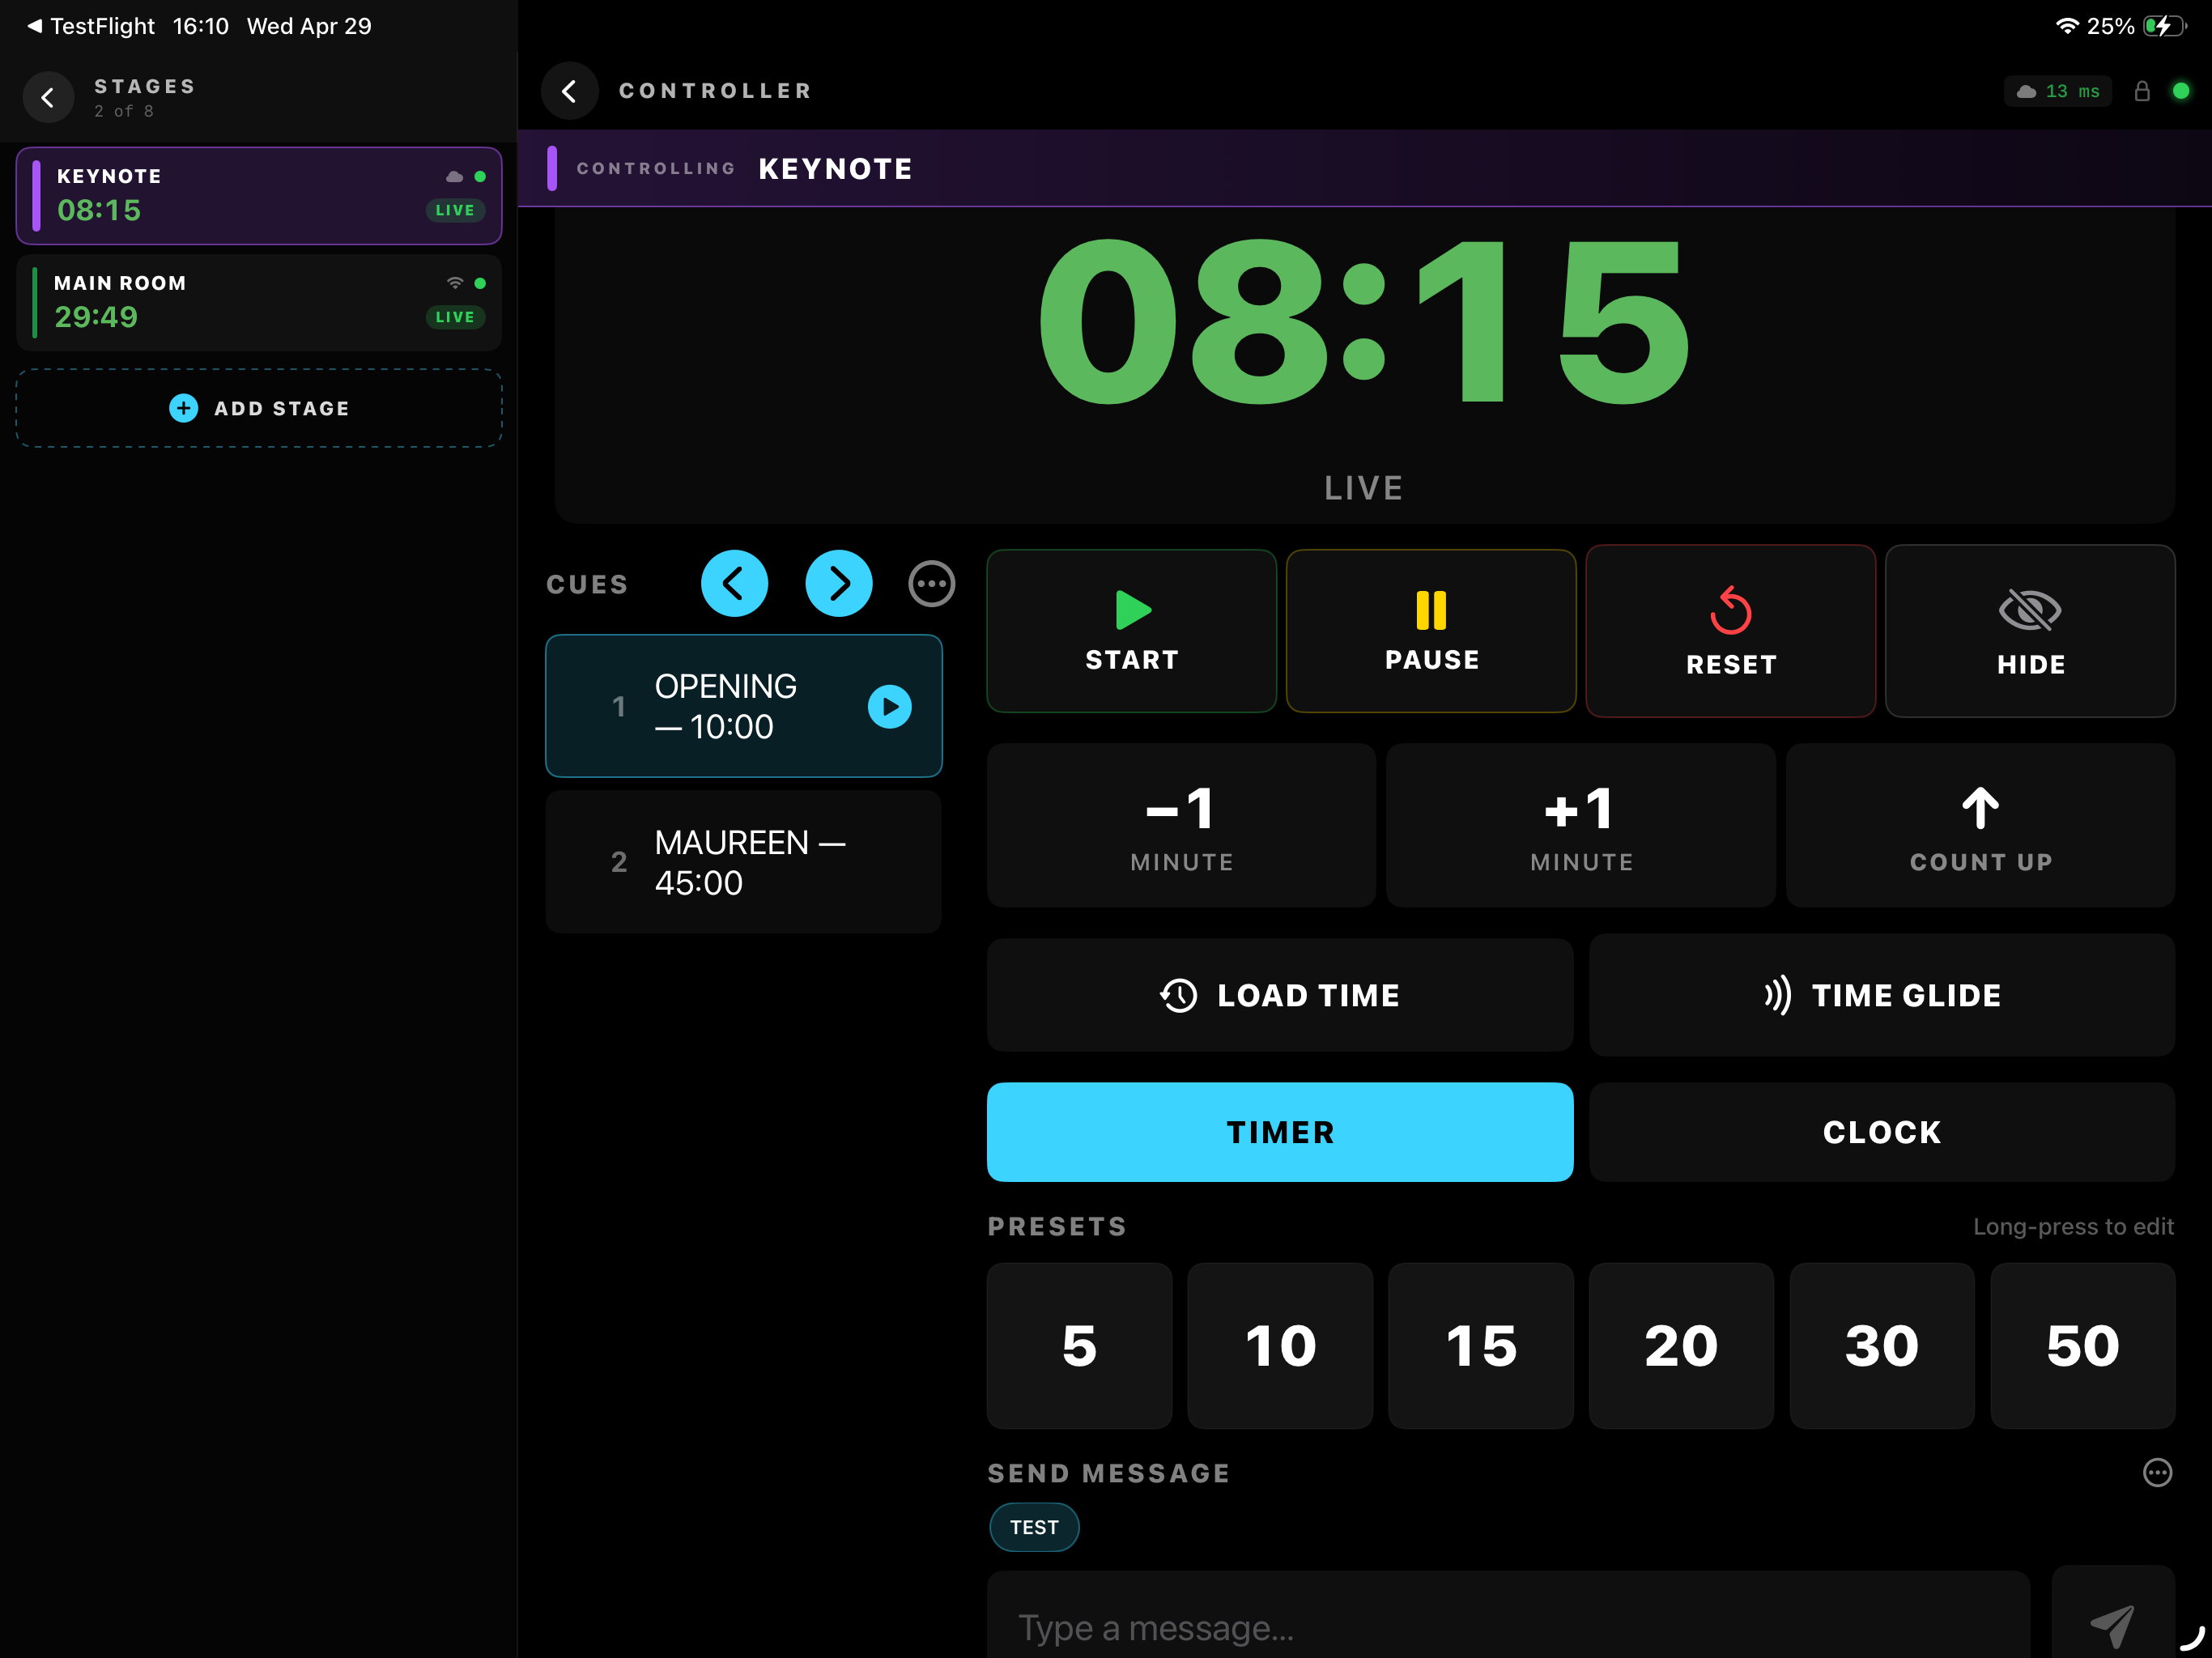
Free for every Full licence, on the App Store and Google Play. Two views: Controller (full control surface) and Monitor (a full-screen timer for the talent). On an iPad, Stages controls several hosts from one app. Pair on the same Wi-Fi (the host appears by itself), by typing an IP address, or over the internet with a short pairing code or a QR code from Settings → Connections → Remote Control. Pair this host pairs just this computer, Pair my fleet lets the app list every host on your licence.
Bitfocus Companion and Stream Deck
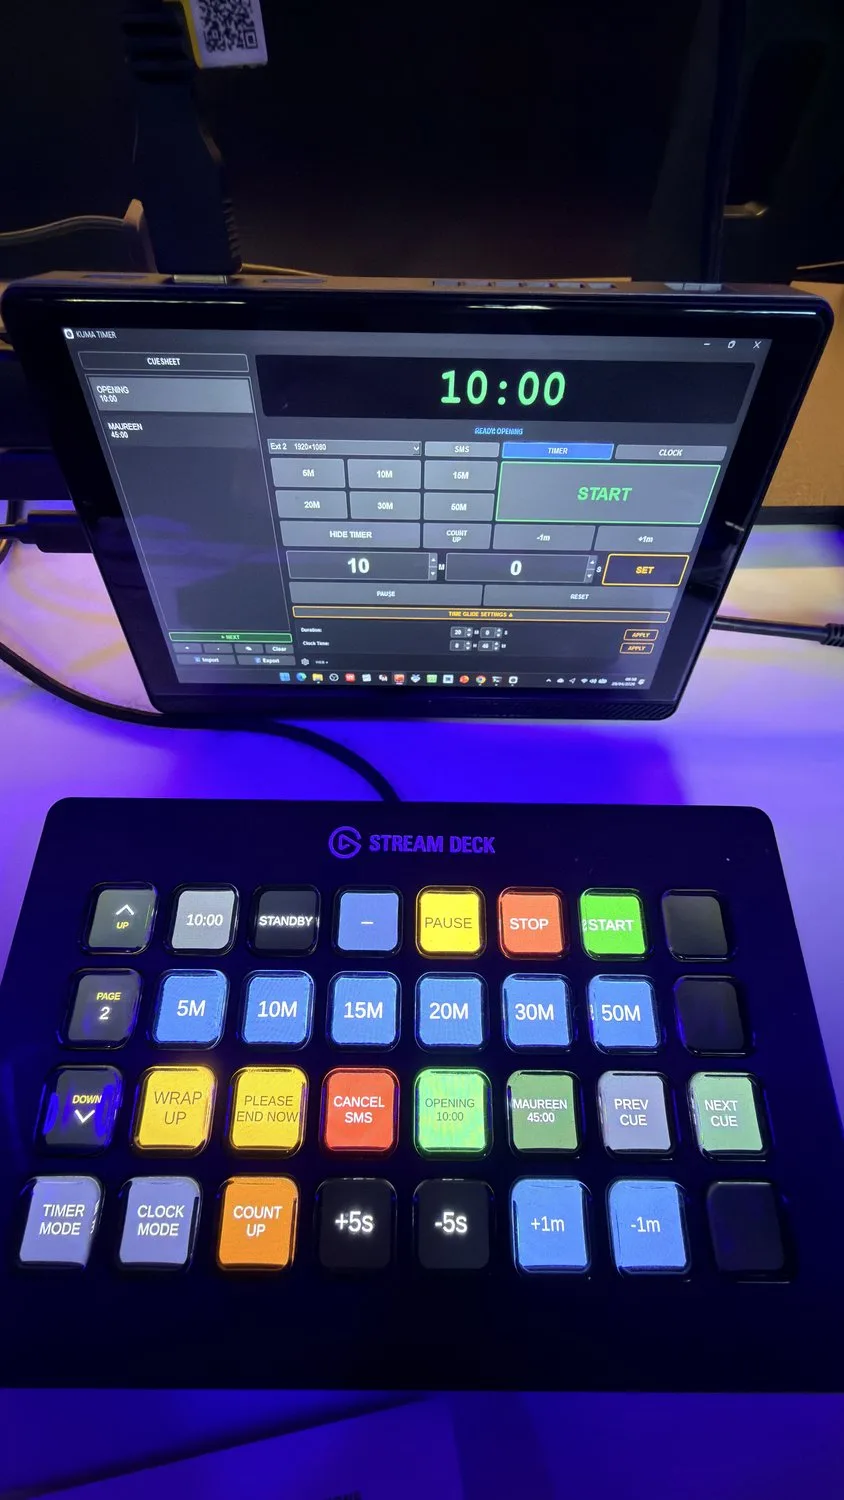
The KUMA Timer module in Bitfocus Companion gives a Stream Deck (or any Companion surface) buttons and live feedback: start, pause, presets, cues, SMS, time cuts, layout recall, and variables for the timer, state, cue and TCR. In Companion add the “KUMA Timer” module and enter the host address and port shown in Settings → Connections. The full list of actions, feedbacks and variables is in the reference.
KUMA Live (remote viewers)
Press Generate QR Code in Settings → Connections → KUMA Live and share the link or QR with up to two remote speakers; they see the countdown in their browser, from anywhere, with no account. Tick Allow remote viewers to send messages to let them message you back. End Session disconnects everyone.
OSC and TCP / UDP
Turn on Enable OSC (listen port 9000 by default; sends the timer to a target address) or TCP / UDP control (port 36702, plain text commands like START, SET 10:00, CUE NEXT) for QLab, Watchout, Cue Pilot or Green Hippo. The command tables are in the OSC reference and TCP / UDP show control.
Following your show: TCR and timecode
TCR: time left in the playing video
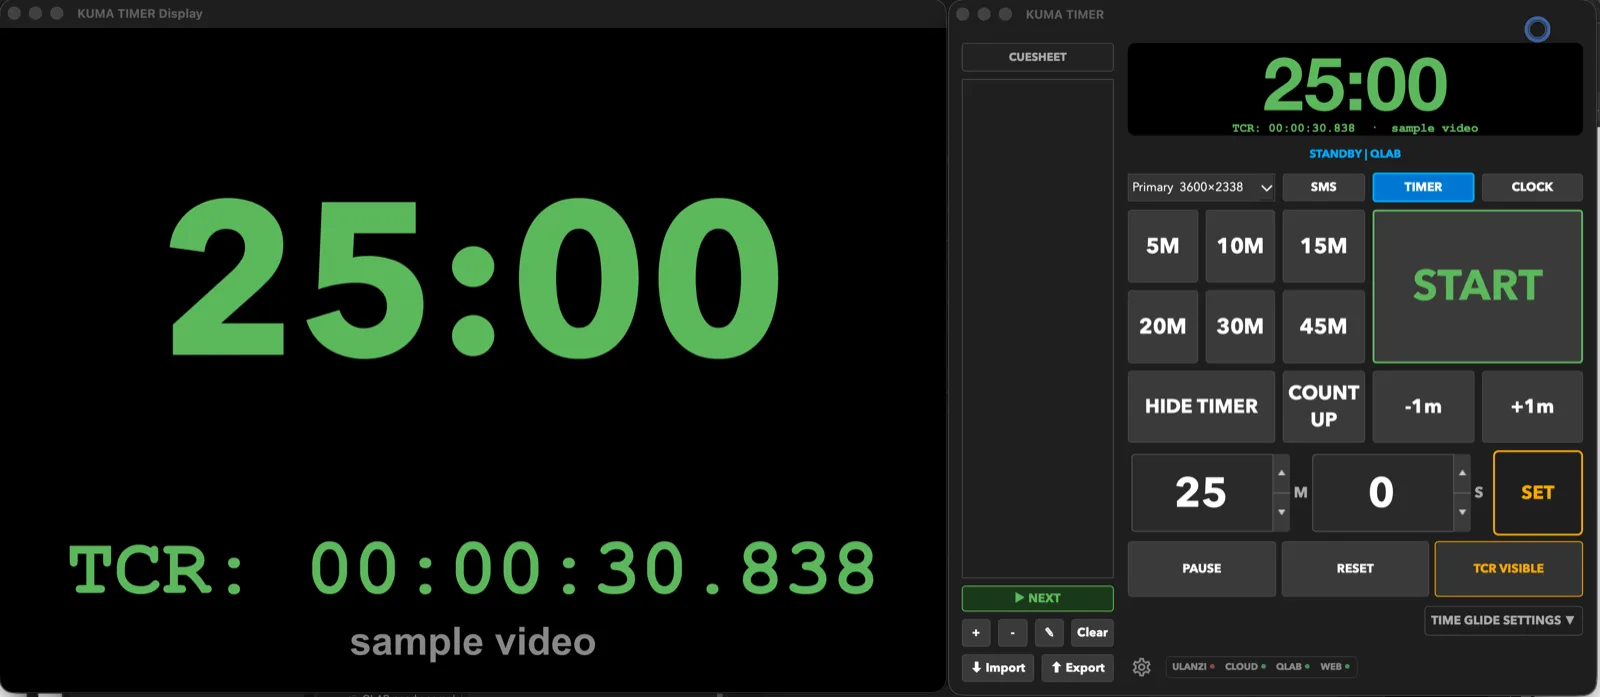
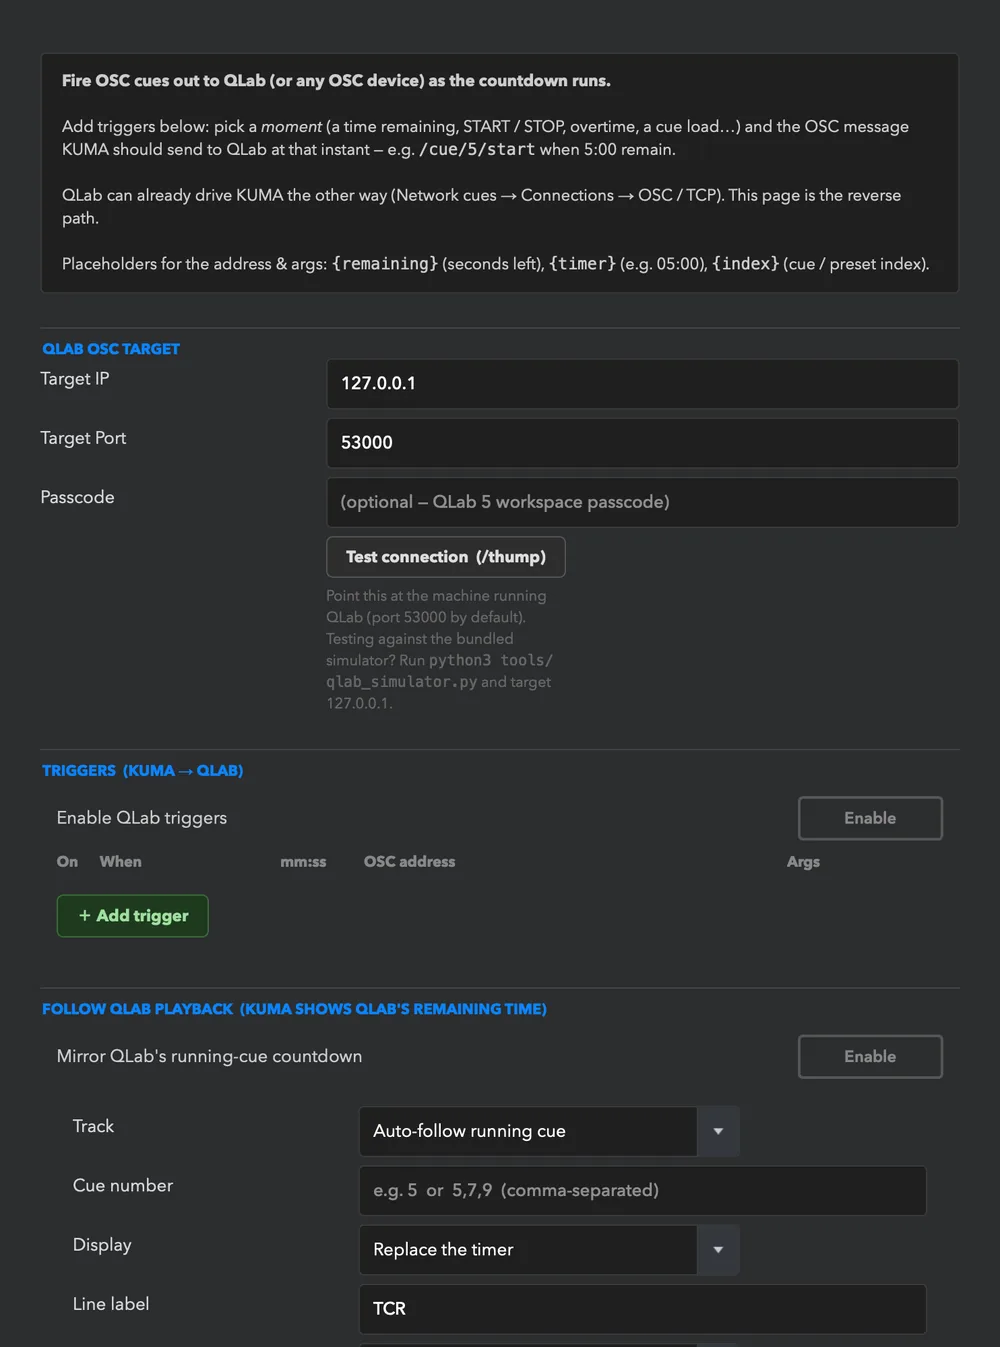
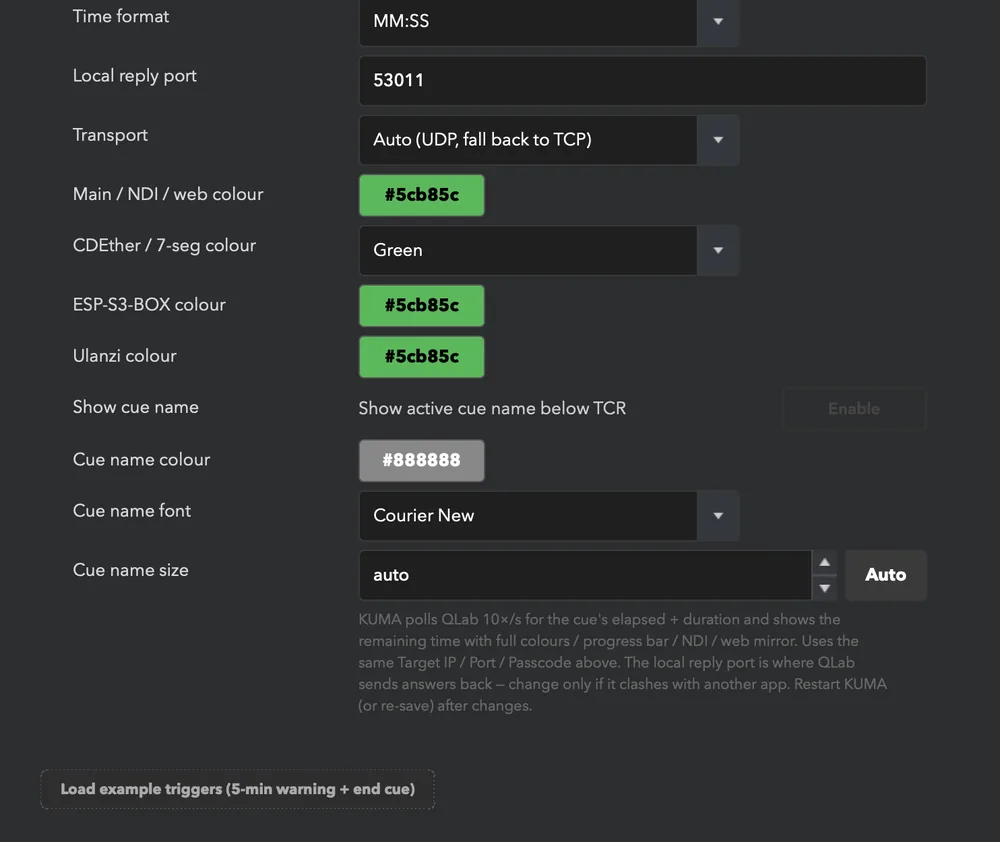
TCR (Time Code Remaining) shows how long the clip that is playing in QLab, Mitti, Millumin or PowerPoint has left. KUMA either takes over the main digits or shows the TCR as a line under your own countdown, and can follow several sources at once. Choose and set up the sources in Settings → TCR.
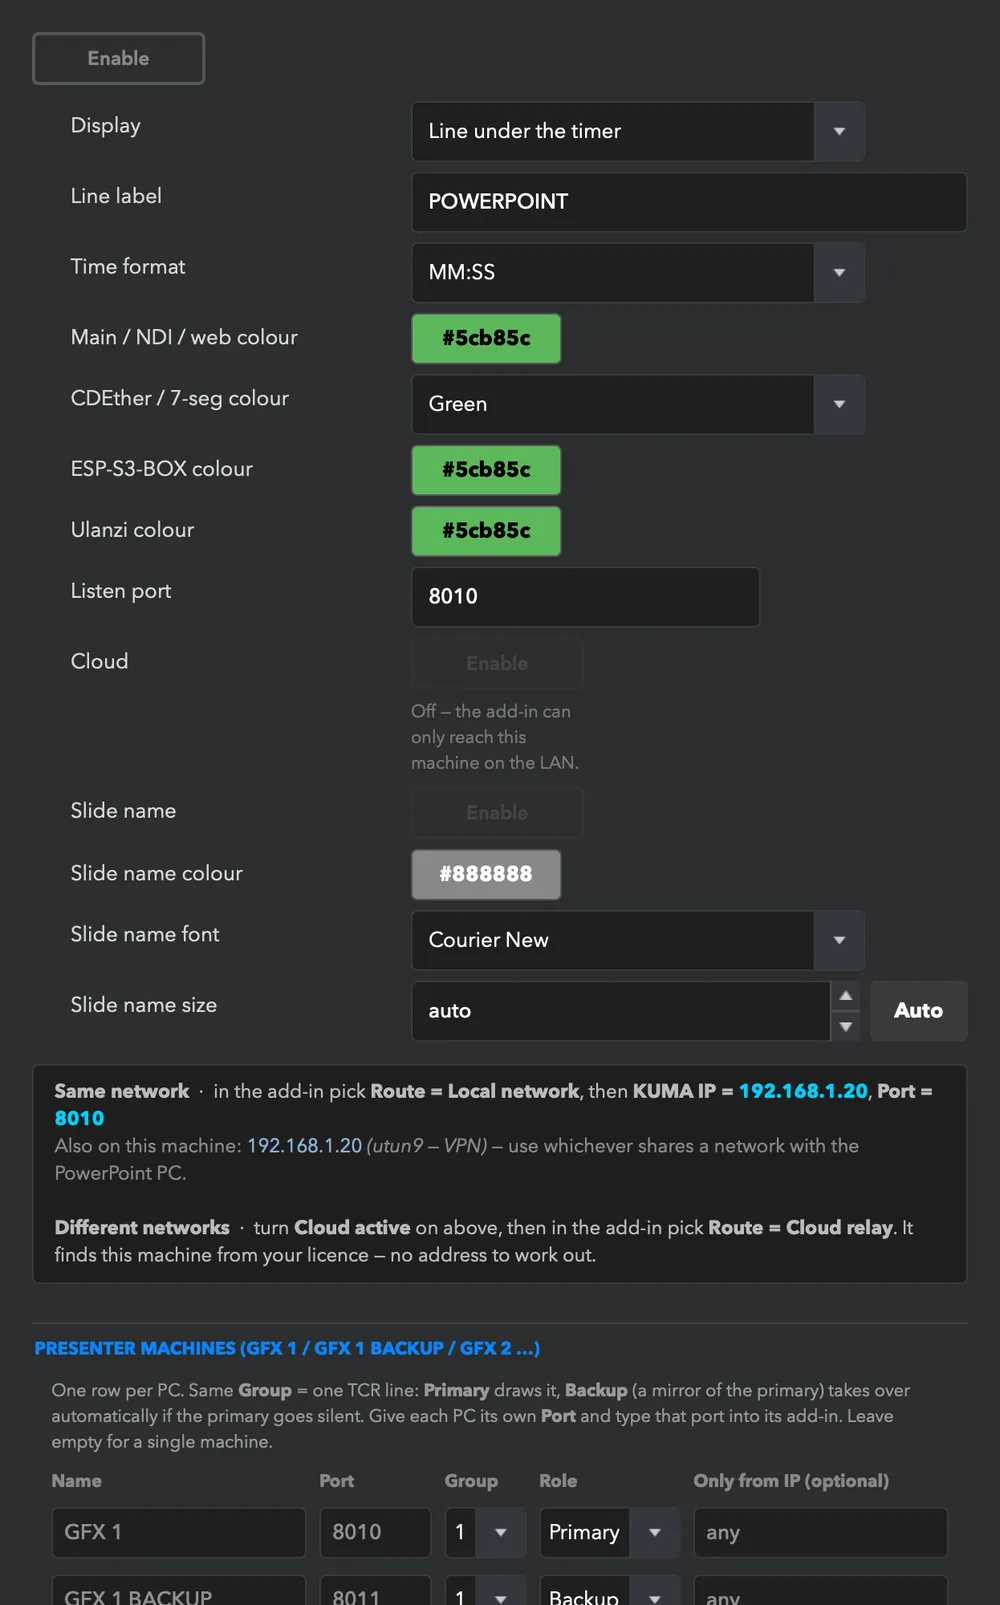
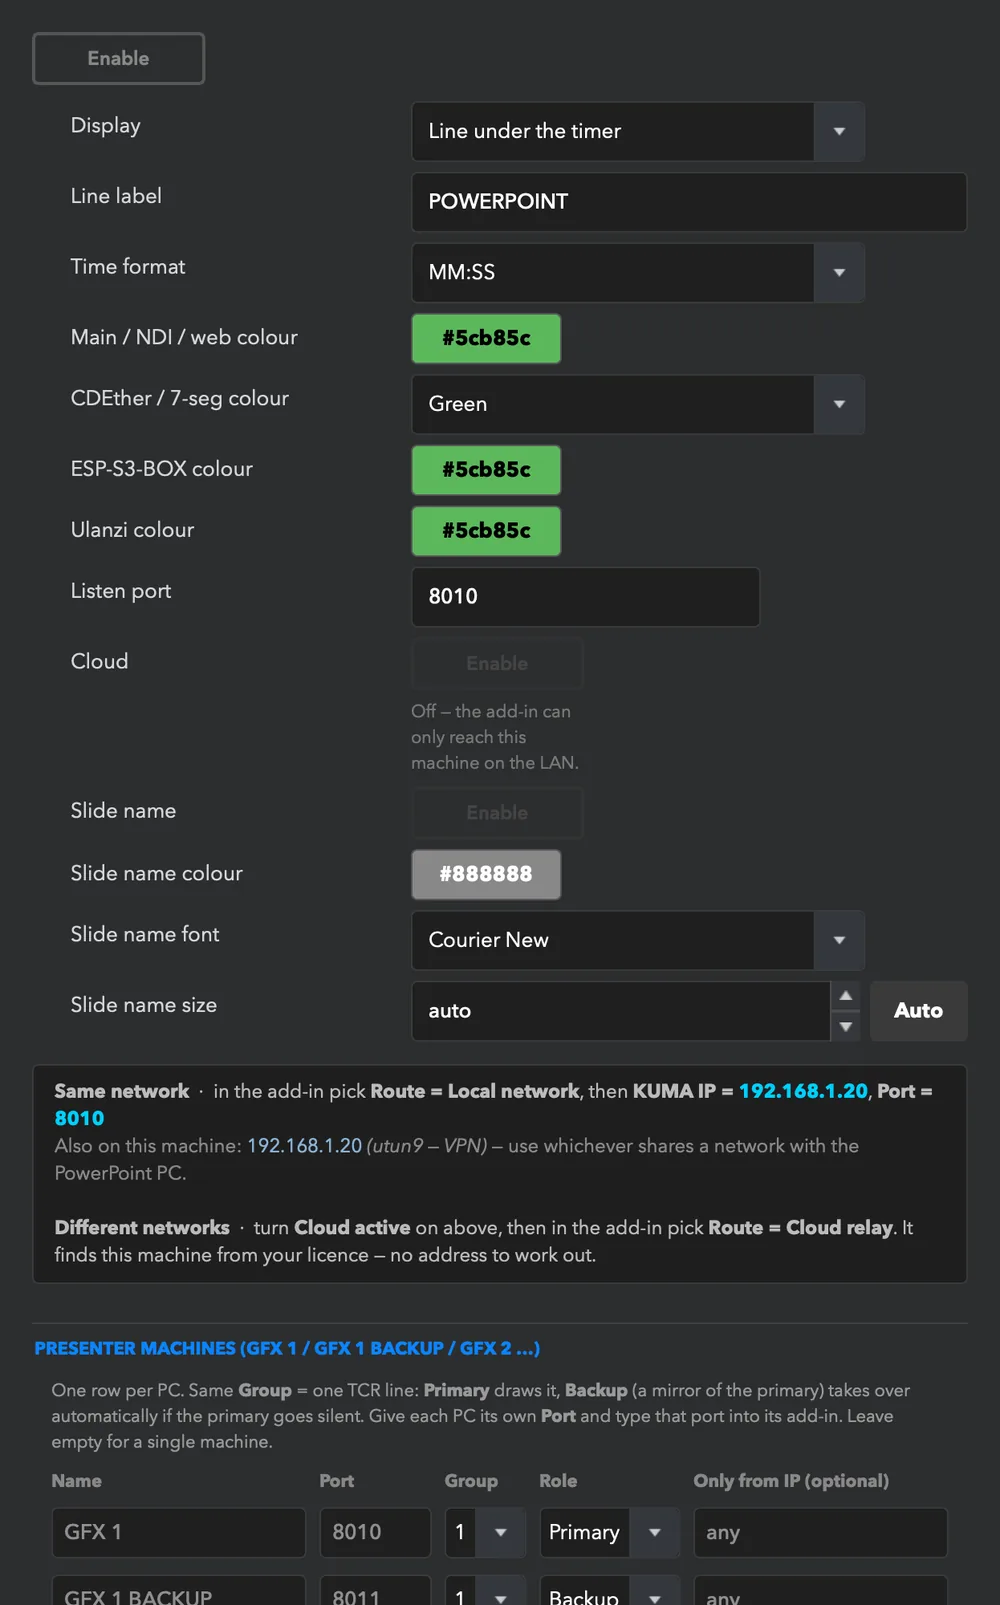
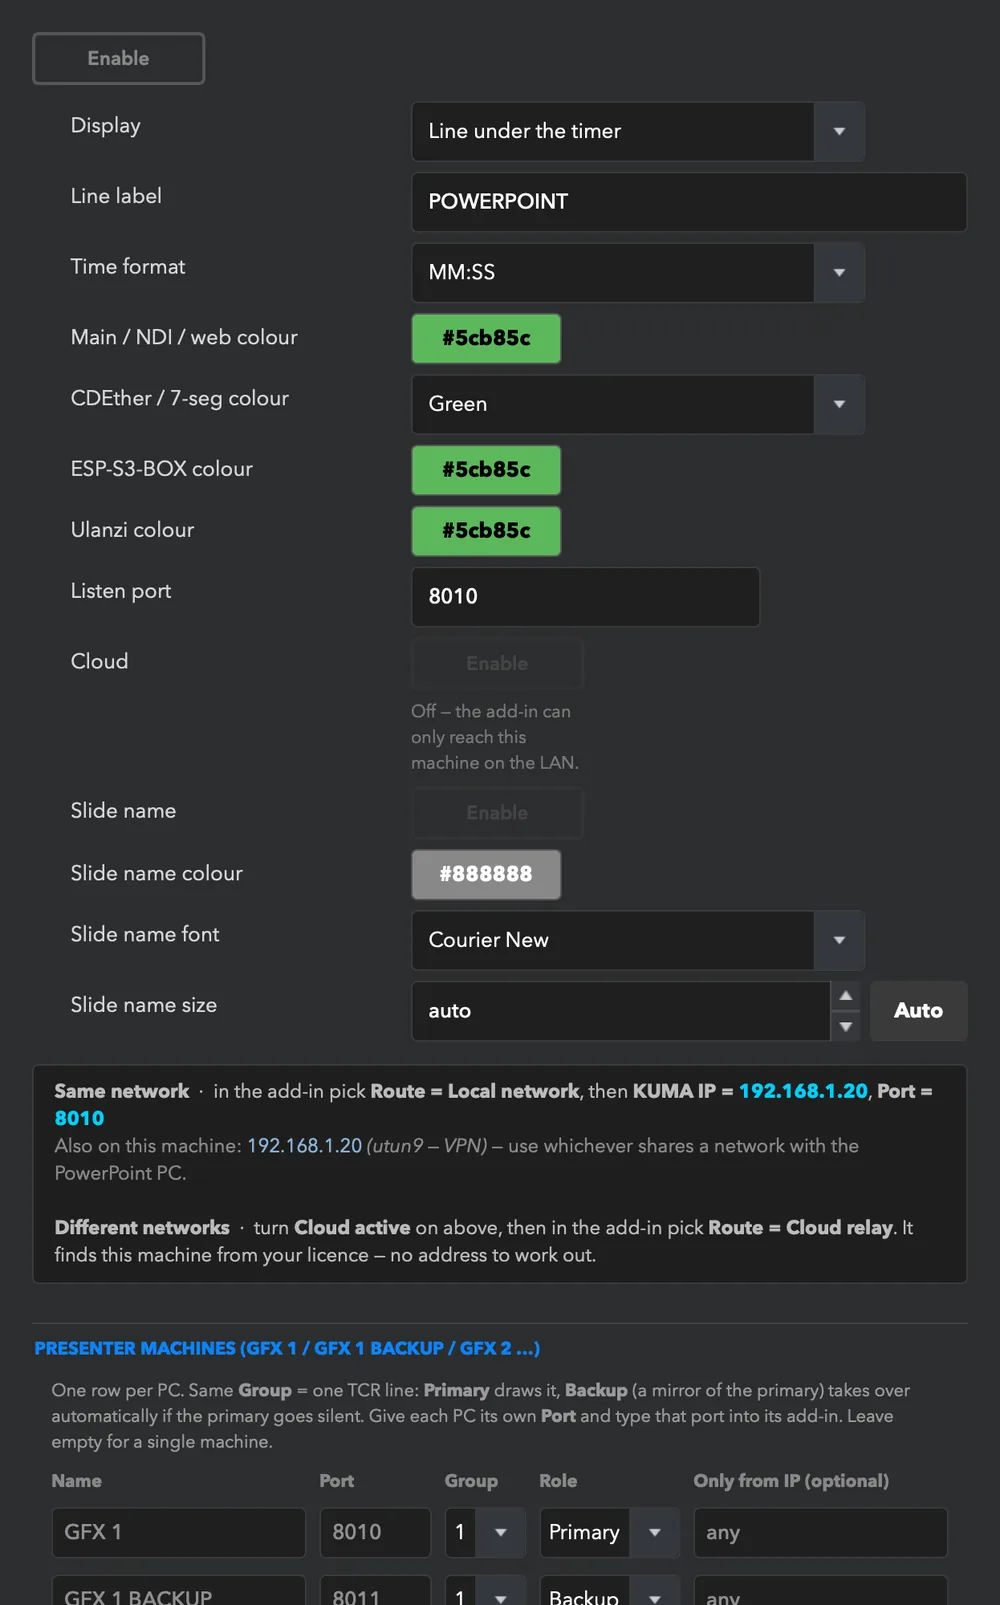
- QLab (setup in QLab: allow OSC access) and Mitti can also receive triggers from KUMA (an OSC message at a chosen moment) — see the Triggers tab.
- Display mode: Replace (the clip time becomes the main timer) or Line (your timer stays and the clip time shows beneath it). The label (default “TCR”), time format and the colour on each output are adjustable.
- Ignore TCR when loop hides a looping background clip.
- QLAB HOLD / TCR VISIBLE freezes the audience screen on your timer while you audition a clip.
PowerPoint: KumaPoint
The KumaPoint add-in (Windows) tells KUMA how long the video on the current slide has left, plus the file name, slide number and animation builds. Several presenter machines can feed one KUMA, each with its own port; a backup machine takes over from a primary if it goes quiet.
Install and connection steps: KumaPoint in the reference manual.
LTC timecode (SMPTE / EBU)
Connect a timecode source to an audio input and KUMA can read it (the display shows HH:MM:SS:FF), chase it (start each cue when the timecode reaches the cue's target) or generate timecode on an audio output (free-running with the clock, or following your timer). Input and generator cannot run at the same time.
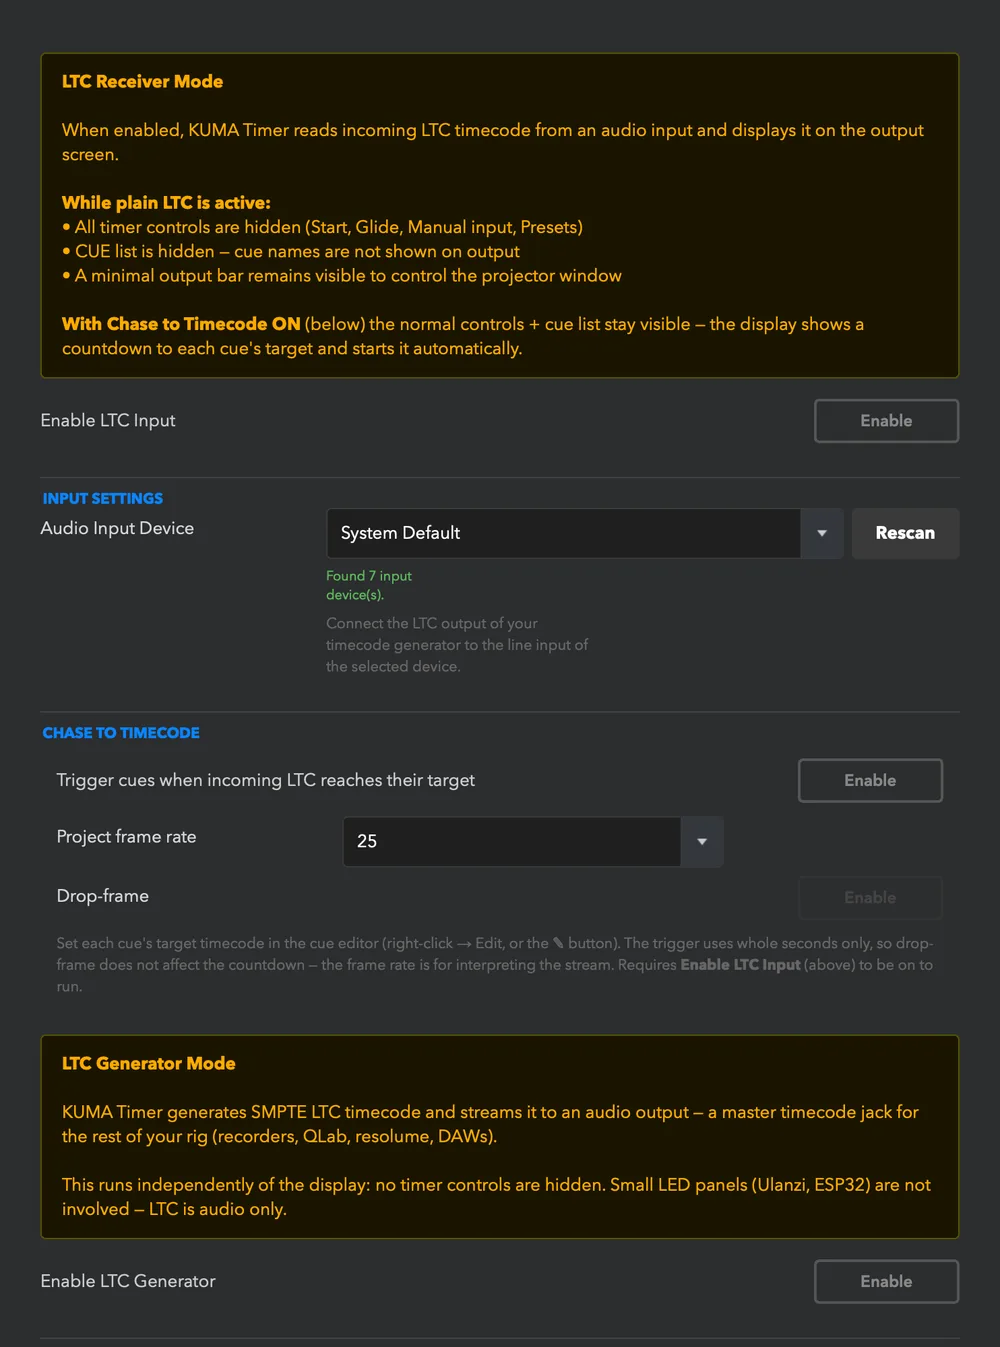
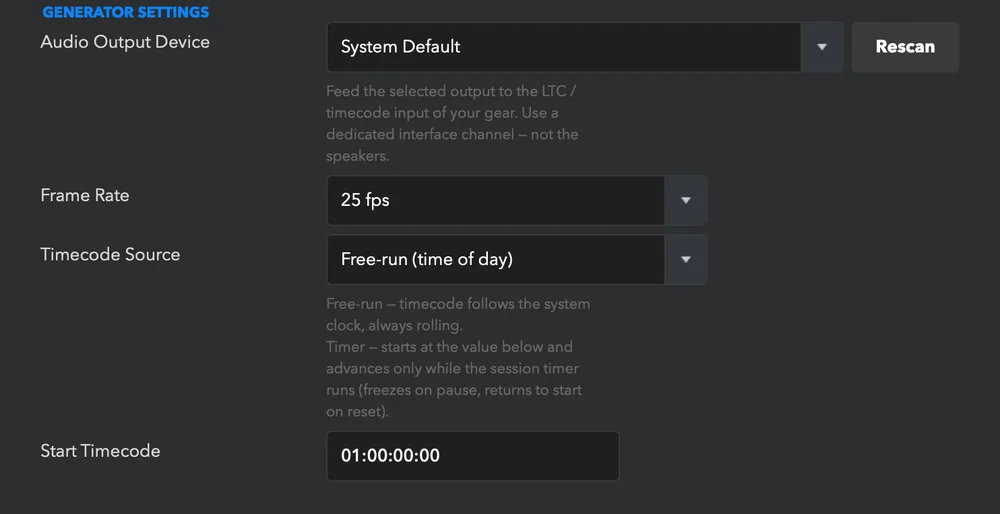
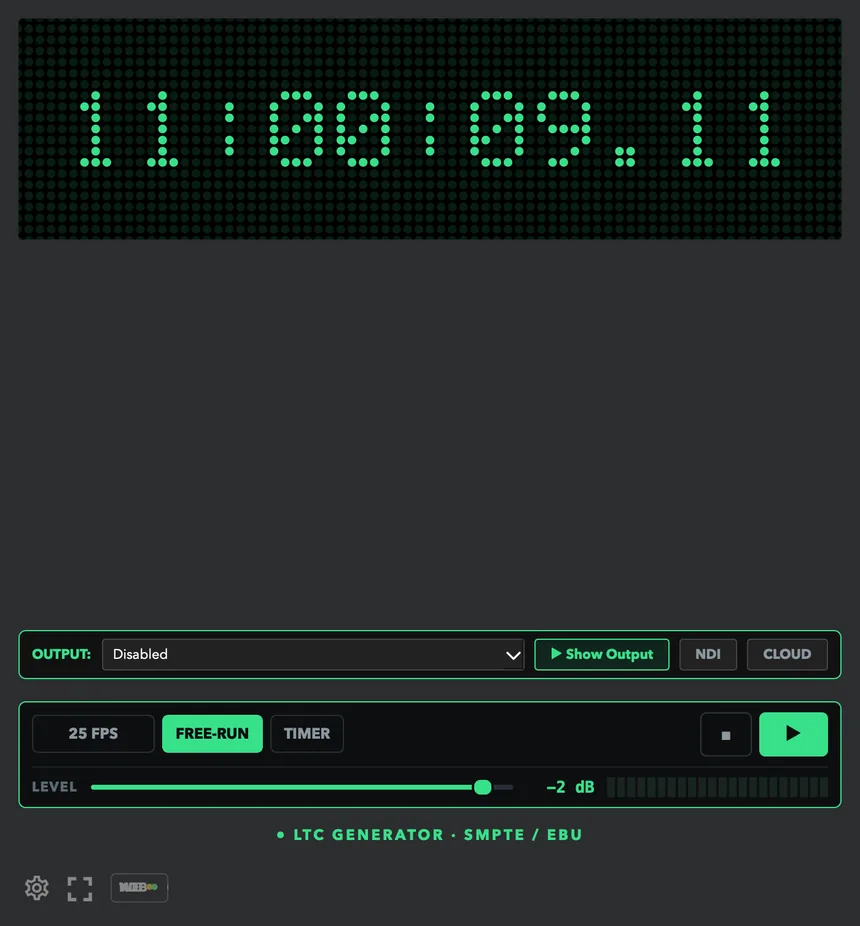
When the generator is on, the control window changes to its own front: a large timecode read-out, an output bar (screen, Show Output, and NDI / CLOUD toggles), and a transport panel.
With chase on, each cue gets a Chase to TC target and two optional OSC fields (OSC on start, OSC on end) so lights or sound follow the cue. On macOS allow microphone access. Details: LTC in the reference.
Wide-screen kiosk
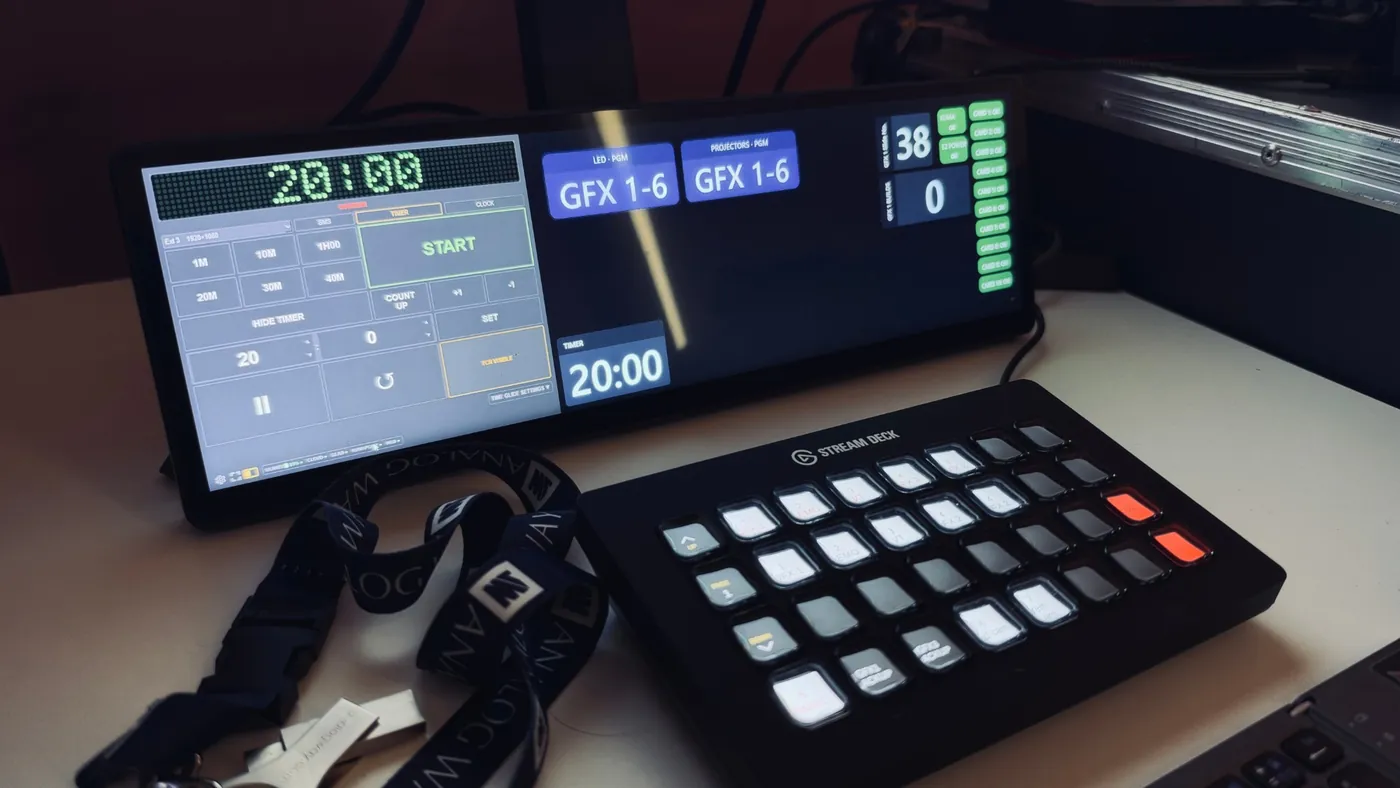
On an ultra-wide bar display (for example a 2560×720 Corsair Xeneon Edge) KUMA runs as a slim, frameless, full-height strip and leaves the rest of the screen for other apps, such as KUMA Dashboard. The button appears next to the kiosk button only when an ultra-wide screen (2.3:1 or wider) is connected.
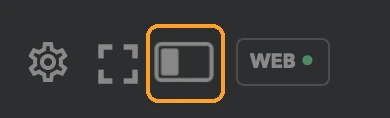
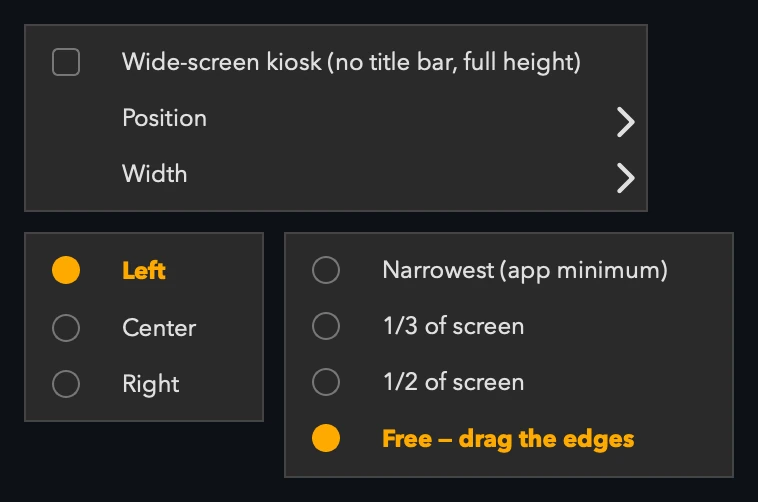
With Free width you drag the top edge to move sideways and the side edges to resize. Ctrl/Cmd + Shift + D toggles the mode. Auto-fit on short screens (Settings → Misc) squeezes the buttons so nothing is cut off on a 720-pixel-high screen or a small laptop, and restores them on a taller screen.
Settings, page by page
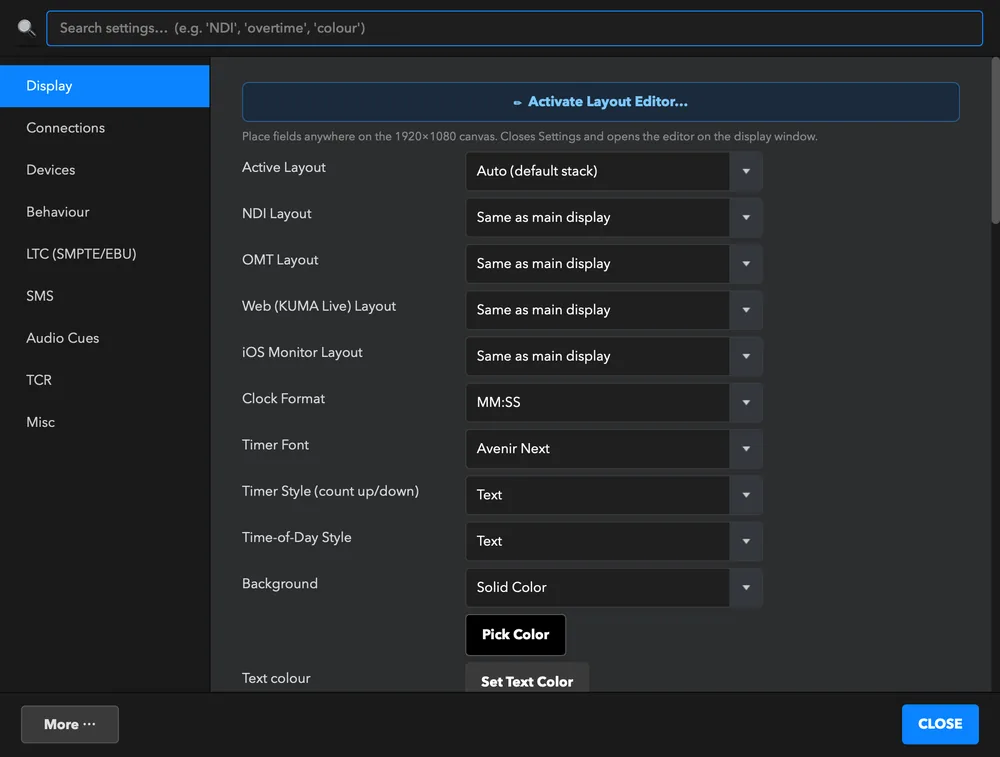
Open Settings with the gear at the bottom of the control window. The sidebar has nine sections; Ctrl/Cmd + 1 to 9 jump between them. Changes to the look apply live as you make them. The button at the bottom says CLOSE when nothing needs committing, and APPLY when you changed a subsystem (such as LTC, NDI, the web port or OSC) that needs to be applied.
| Section | What is in it | Covered in |
|---|---|---|
| 1. Display | Layout, format, font, styles, background, colours, ring, progress bar, wall clock, time of day, interface options, Presenter View, test pattern | Display window |
| 2. Connections | KUMA Live, remote control and passwords, Companion pairing, web port, OSC, TCP / UDP, NDI, OMT | Outputs and Remote control |
| 3. Devices | CDEther, ESP32-S3-BOX, Ulanzi, Limitimer, Blackmagic (and the quick-entry keypad on a Pi) | Outputs |
| 4. Behaviour | Overtime and scheduled cues | Overtime, Cuesheet |
| 5. LTC | Timecode in, chase, generator | LTC |
| 6. SMS | Message look, saved messages | Messages |
| 7. Audio Cues | Chimes, pips, beep | Audio cues |
| 8. TCR | QLab, Mitti, Millumin, PowerPoint follow | Following your show |
| 9. Misc | Privacy, confirm on exit, Time Glide panel, auto-fit, wide-screen kiosk | below |
Search and the “More” menu
At the top of the dialog is a search box. Type two or more letters of what you are looking for (“NDI”, “colour”, “tooltip”) and Settings jumps to the right section, scrolls to the setting and flashes it.
The More ⋯ button at the bottom left holds the tools that are not settings:
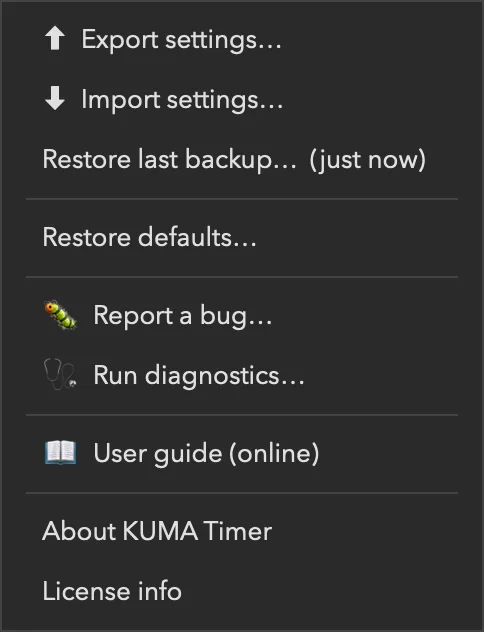
- Export settings… / Import settings… save and load all your settings as one file: a backup, or a way to copy a set-up to another computer.
- Restore last backup… KUMA makes an automatic daily backup of your settings; the menu shows how old the latest one is. Use it if a change went wrong.
- Restore defaults… returns everything to factory values (asks first).
- Report a bug… and Run diagnostics… (below).
- User guide (online) opens the reference manual; About and License info show the version and licence.
Run diagnostics
Checks what KUMA can really do on your network right now: it tests the network (gateway, hostname), sends a CDEther burst and looks for the reply, and reaches the cloud relay. It produces a plain-text report you can copy, save to a file or send to support, and you can add a description of what is wrong.
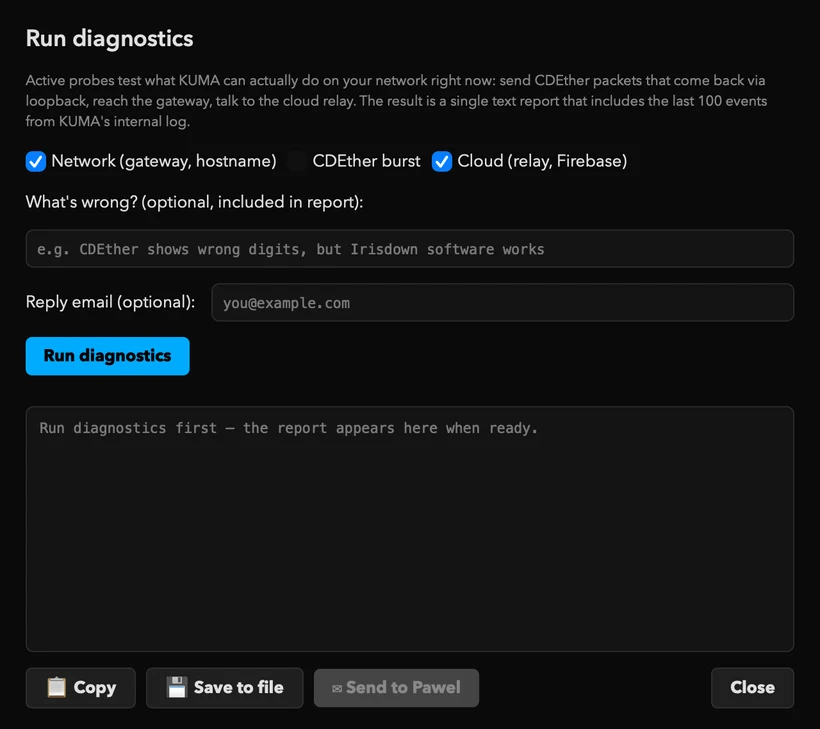
Report a bug
Describe what happened; system information is added automatically. Copy system info, Send by email or Open GitHub Issues.
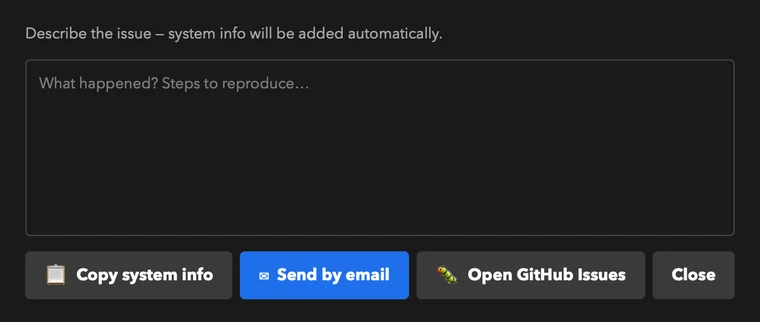
Behaviour
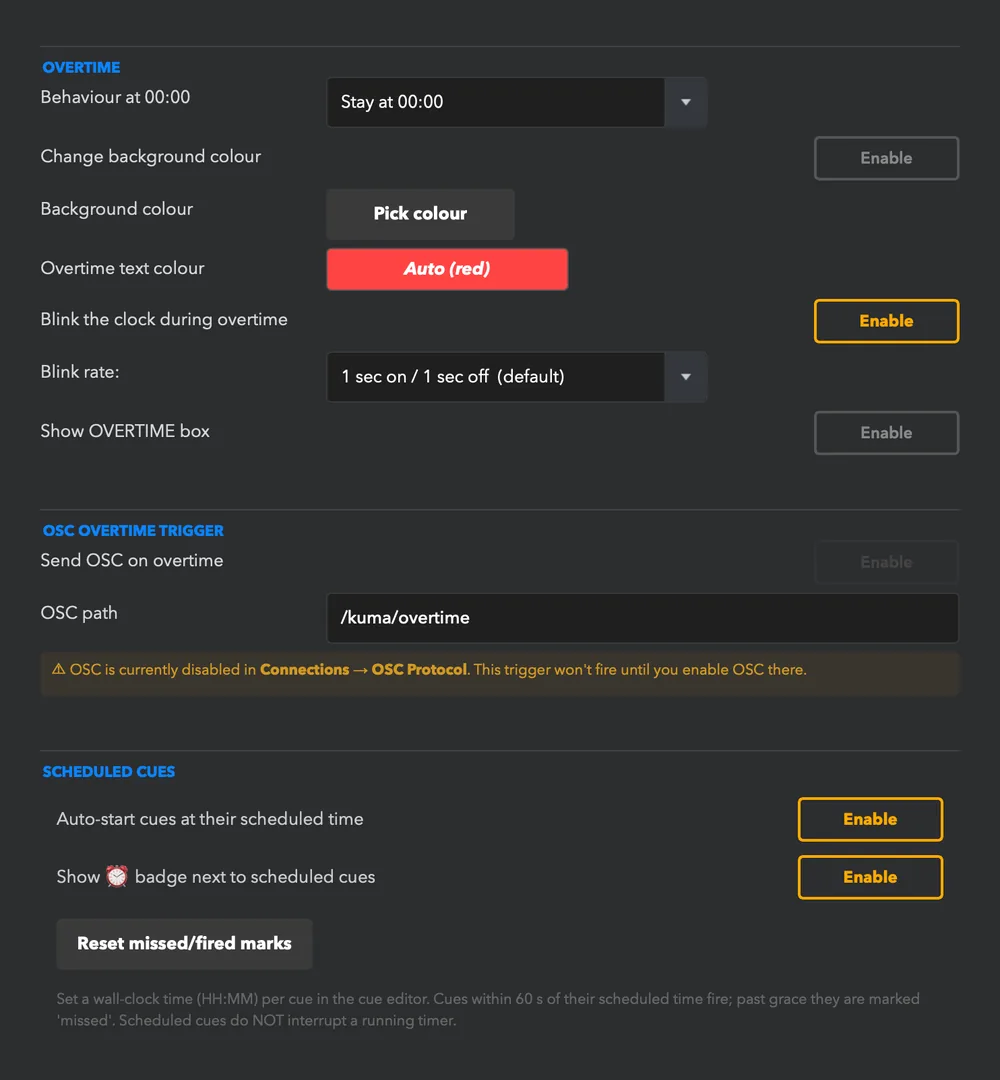
- Scheduled cues: Auto-start cues at their scheduled time (off = the cue only loads), Show badge next to scheduled cues, and Reset missed/fired marks.
- A warning appears when you ask for an OSC trigger but OSC is off under Connections.
Misc
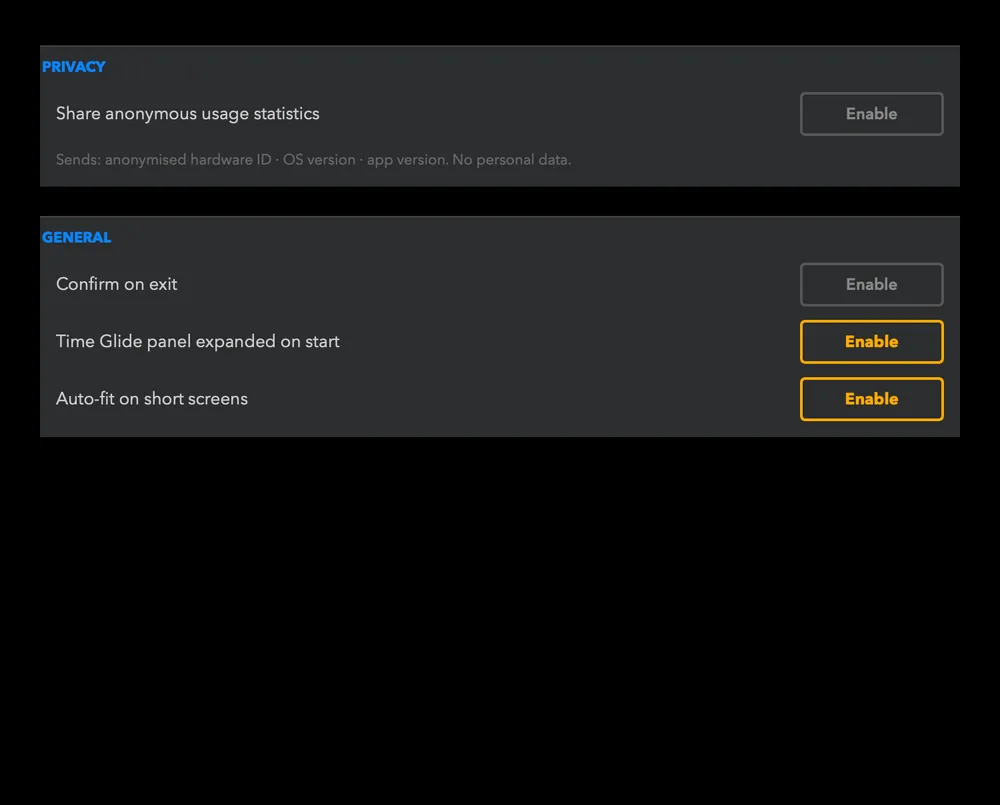
- Share anonymous usage statistics: off by default. Sends only an anonymous hardware ID, the OS and app version. No personal data.
- Confirm on exit asks before closing; Time Glide panel expanded on start opens the cut panel when KUMA launches.
- Auto-fit on short screens and the Wide-screen kiosk position and width (see above).
Licence, updates and backup
- License info (Settings → More ⋯ → License info) shows your activation state, with Deregister this machine when you want to move the licence to another computer.
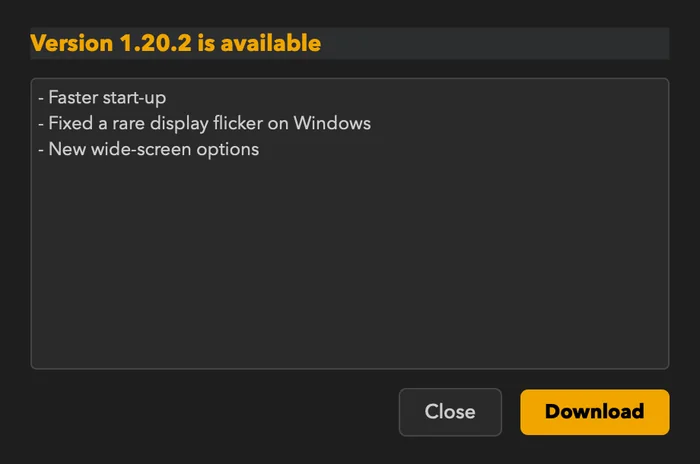
- Updates: KUMA checks for a new version and tells you with a dialog showing what changed. On macOS and Windows Download fetches and installs it and restarts KUMA; on Raspberry Pi use the web admin’s System → Update.
- Move your setup to another computer: web admin → System → Download this device's config, then Import & Restart on the other one. Presets, cues, colours and integrations come along; the password stays local. Restore Defaults (System → About / Factory reset) returns a machine to factory settings.
- Back up before an event: in the desktop app use Settings → More ⋯ → Export settings… and the cuesheet Export button (or download the device config from the web admin); keep the files with your show. KUMA also keeps an automatic daily backup (More ⋯ → Restore last backup).
Recipes
A conference with a stage timer and a confidence monitor
- Put the cues in the cuesheet (or import a CSV), give the keynote a scheduled start if it must begin at a fixed time.
- Send the display to the stage screen. Turn on Show Cue Name on Display and Progress Colours.
- Open the web mirror (
http://computer:5555/) on a TV in the green room. - Give the stage manager the Companion app (Controller view) and the speaker an iPad on the lectern (Monitor view).
A show with video and a video operator
- Settings → TCR: follow QLab, Mitti, Millumin or PowerPoint, in Line mode so the timer stays and the clip time shows underneath.
- Add NDI or SDI output so the timer can be keyed into the programme feed.
- Run the switcher and timer from one touch screen with KUMA Dashboard.
Running late
Open TIME GLIDE SETTINGS, choose STEALTH JUMP, enter the target time, press APPLY. The stage clock stays at one second per second and skips discreetly.
A permanent installation
Use a Raspberry Pi in kiosk mode: it boots straight to a full-screen timer, you control it from the web admin, and the Quick-Entry keypad gives a no-screen remote. See Installation.
Troubleshooting
| Problem | Try |
|---|---|
| The display window is on the wrong screen | Use the screen drop-down in the control window. It remembers the screen it last used. |
| The Companion app or a browser cannot connect | Check Enable network access is on, both devices share a network, and allow KUMA through the computer's firewall. If the app says licence required, the host is in Lite mode. |
| Two KUMA computers on one network interfere | Give each its own web port and OSC port. |
| NDI source does not show up | Tick the network interface your receiver is on (or leave all unticked for automatic) and check the NDI chip is green. |
| LTC does not read | On macOS allow microphone access. Select the right input device and press Rescan. |
| Messages do not appear on the Ulanzi / ESP32 | Tick Mirror SMS to wireless displays. |
| Time glide / jump is greyed out | It is a licensed feature and is not available in frame-accurate clock formats. |
| I forgot the access password | Set a new one in Settings → Connections. The admin sign-in uses the same password. |
| The window is cut off on a small screen | Make sure Auto-fit on short screens is on (Settings → Misc). |
Still stuck? Write to support@kumatimer.app; the reference manual has more on every topic, and the changelog lists what changed in each version.
Glossary
| Term | Meaning |
|---|---|
| Control window | Your operator view with buttons and cuesheet. |
| Display window | The picture on the speaker's screen. |
| Cue | One entry of the running order: a name and a time. |
| Preset | A one-click duration button. |
| Overtime | The time after zero. |
| Time cut (glide / jump) | Bringing a running countdown forward to finish earlier. |
| TCR | Time Code Remaining: the time left in the video that is playing. |
| LTC | Linear timecode: timecode carried as an audio signal. |
| NDI / OMT | Ways to send video over a network. |
| Look / layout | A saved arrangement of display elements made in the Layout Editor. |
| Companion | Either the KUMA Companion phone app, or Bitfocus Companion (the Stream Deck program); the context tells which. |
Related: Reference manual · KUMA Dashboard guide · Pricing · Changelog